Computer Systems Experiments 1 | Preparations
Computer Systems Experiments 1 | Preparations
- Hardware Preparation
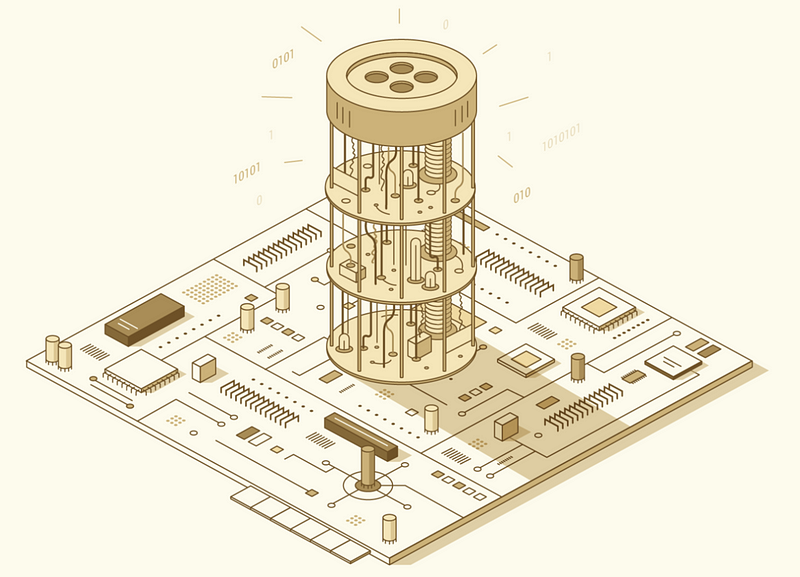
(1) Raspberry Pi and ARM
The Raspberry Pi model we are going to use is the Raspberry Pi 1 Model A+ and the CPU model of the Pi is BCM2835 (ARM11 series, ARMv6 architecture). Check the manual here BCM2835 Peripherals Specification (you don’t have to read it now) and please note that this manual has a lot of errors, so we must read it with BCM 2835 Datasheet Errata. Note that the address in the manual 0x7E... is the logic address and we will change it 0x20... in the code.
Because ARM is a RISC processor, it is easy to program at the assembly level. To know something more about the ARM assembly language, we can read the following book by Carl Burch and Hendrix College.
Pinout.xyz is an awesome website that shows the pins of the Raspberry Pi 1 Model A+ and the app VisUAL is a useful visual ARM emulator for us to write simulate our assembly language.
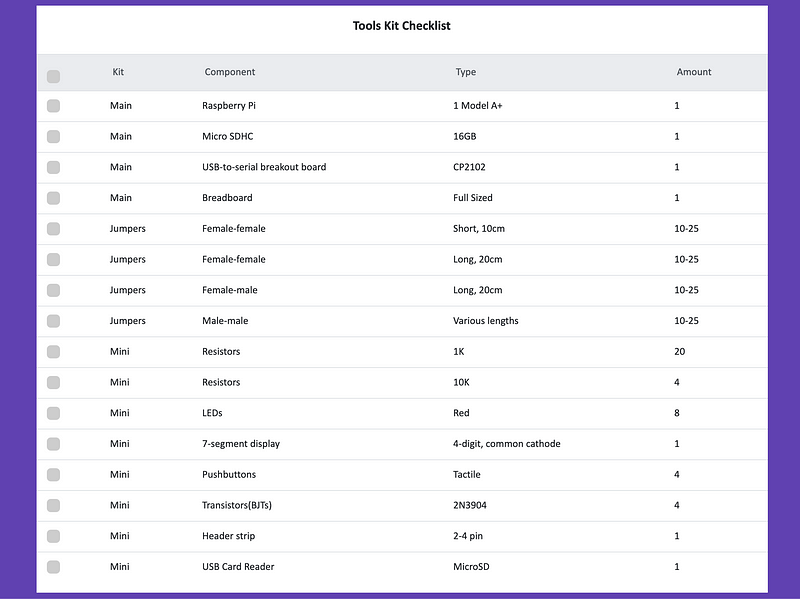
(2) Checklist for the Toolkit
We have three kits for our experiments. The first one is called the Main Kit. The second one is called the Jumpers Kit. The last one is the Mini-Kit. The components of the three kits follow the following list. To continue, we must have all the tools to be well prepared.
2. Software Installation
(1) Install arm-none-eabi
We need to install the arm toolchain for our Pi (compiler, assembler, linker, etc.) and the CP2012 driver. This tool is called arm-none-eabi. The meaning of this is that none means we are not targeting any operating system here, aka we are in "bare metal" and eabi means the ABI for the ARM architecture.
First, “Tap” into the CS107e Homebrew package,
$ brew tap cs107e/cs107e
Then, install the arm-none-eabi formula,
$ brew install arm-none-eabi
Finally, we can check the version of the arm-none-eabi,
$ arm-none-eabi-gcc --versionThe output should be,
arm-none-eabi-gcc (GCC) 4.8.3(2) Install CP2012 Driver
We also need to install the arm toolchain for the CP2012 driver. Download the CP2012 driver. The drivers are available on the Silicon Labs CP210x Downloads page. Scroll down to the section titled “Download for Mac OS” and download the VCP zip file. Open the zip to decompress into the dmg file SiLabsUSBDriverDisk.dmg. Open the dmg file to mount the volume named Silicon Labs VCP Driver Install Disk.
On the mounted volume, find the file named Install CP2010x VCP Driver. Open this file to launch the installer. Follow its instructions to install the driver.
Finally, confirm CP2102 driver is installed and loadable,
$ kextfind -B -s SiLabs -report -b -loadableThe output should be,
CFBundleIdentifier Loadable
com.silabs.driver.CP210xVCPDriver64 yes
com.silabs.driver.CP210xVCPDriver yes
(3) pyserial and xmodem Installation
We should also install pyserialand xmodem for Python3. To install this package, we should use,
$ pip install pyserial xmodem
To check the installation,
$ pip list | grep xmodem
The output should be,
xmodem 0.4.6
Note that the Python2 maybe the default version on your PC, so please manually assign the installation version of your python as follows if version errors happen,
$ python3 -m pip install pyserial xmodemTo check the installation, also,
$ python3 -m pip list