Computer Systems Experiments 23 | Implementation of A Button Controlled 4-Digit Clock
Computer Systems Experiments 23 | Implementation of A Button Controlled 4-Digit Clock
In this experiment, we are going to create a 4-digit clock with the time.c module and the gpio.c model. This clock should have the following features.
- Initially, the clock should display
----until the button is pressed. - When the button is pressed after
----, the clock should count the loop from0000to9999. - Each increment of the number displayed equally takes one second. That’s the reason why we call it a clock instead of a counter.
- When the button is pressed when the value is increasing, the number will be cleared to
0000and it should display----. - We have to add a pull-up resistor to control the input button that connects to the
GPIO 2.
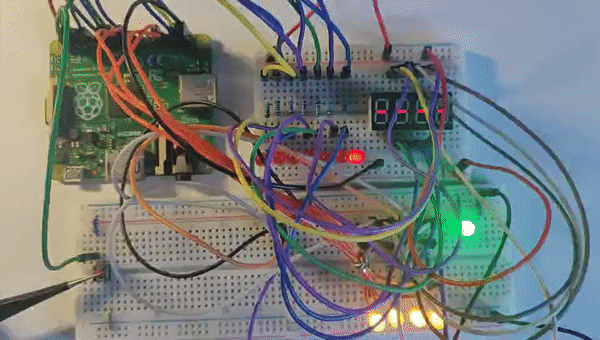
Let see a demo, if the button is pressed when displays ----,
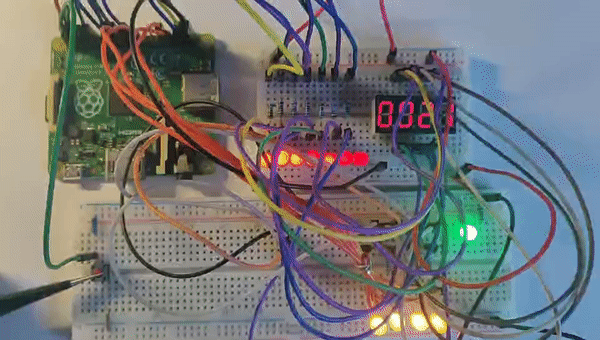
And if we press the button in the counting process,
Let’s start programming. Note that when the button is pressed, it’s a one-time check in the loop and there’s a probability that we have to press for several times to make it work. But if we press for a longer time, the loop may break and the clock stops counting (because the Pi thinks we have pressed for several times).
We can deal with this problem by using the code to wait for a longer period of time after each press, and this method is called debouncing.
if (gpio_read(GPIO_PIN2) == 0) {
   while (gpio_read(GPIO_PIN2) == 0) {
       displaytime(0);
   }
   /* Your Code*/
}
Also, create functions named displaytime and displaydashes can be useful. You can think about doing so in your clock.c file. Actually, we are not going to go through the code because this is an application of the previous experiments. You can also check your knowledge by doing it yourself. One solution to this experiment can be found in my repo.
Remember to use,
$ make install
for checking out the final result.