D3.js Guidelines 2 | D3 Intro, SVG Format, and Drawing Shapes with D3
D3.js Guidelines 2 | D3 Intro, SVG Format, and Drawing Shapes with D3

- What is D3.js
D3 represents the Data-Driven Document in the full name. It is going to change the boring data visualization into something really interesting with the front-line languages and make beautiful visualizations. We would take the raw data into the driven documents which are really beautiful.
Before we learning D3.js, we have to learn something about the HTML, CSS, and Js, which we are going to cover first in this material.
2. Get Started with D3
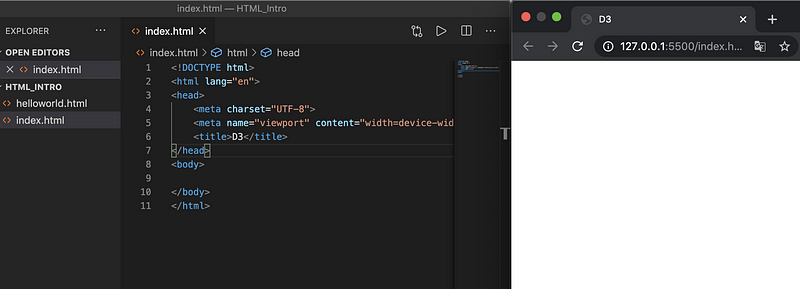
Now let us open a new one which is named index.html (we can rename the last one as helloworld.html). Type html:5 to create a structure of html5 and then we change the <title> tag in <head> to D3. Then we open the live server to make it automatically refresh. So, finally, we are here now.
Let’s create a new js file called “app.js”. So now we are going to put D3 into this file and then link it to the index.html file. While actually D3 is a remote library so that one way we can use d3 is to simply add a <script> tag under the head as,
<script src="https://d3js.org/d3.v5.min.js"></script>So for every time that we are going to use the code of d3, it will automatically online and refer to the contents in this link. However, we may have some trouble in some specific situation where mostly you may not be able to link to the website https://d3js.org/d3.v5.min.js , because of the firewall or a private network environment. What we can do here is to build the script inside the project so that our code can read the same javascript file locally.
First of all, we go to the link https://d3js.org/d3.v5.min.js and save it as javascript(which can be done by right-clicking on the webpage and then press “Save As …”). So after that, we can drag the file we have downloaded and put it into the HTML_Intro folder so we can refer to it locally.
That means instead of what we have done in the front, for the source of the script, we don’t have to go to the online https link, but to use the local file in the <script> tag as,
<script src="d3.v5.min.js"></script>After the </body> tag, we can refer to app.js, which is our D3 application javascript code, so we just type as follows,
<script src="app.js"></script>3. First D3 Application
Under the <body> tag, we add a <div> which could be treated as a general box with no specific name. Then we write <p> and <span> inside as follows,
<body>
    <div id="mydiv">
        <p> Hi there! </p>
        <span> Hi again! </span>
    </div>
</body>
If we are not using d3 and we would like to change the color of the font by js, what we have to do now is to use the built-in library and it is somehow complicated like,
document.getElementById("#mydiv").getAttributeBut with the D3 library, we don’t have to do it anymore. We could simply write in the app.js as,
d3.select("p")
.style("color","brown");
So after that, the first Hi there! changes to brown.

If we modify the index.html and rewrite the span as p, we could have the result as follows,
<body>
    <div id="mydiv">
        <p> Hi there! </p>
        <p> Hi again! </p>
    </div>
</body>
We press command+s to save but we don’t see anything changes. This is because the method .select(“p”) applies only to the first <p> tag. If we want it to work for all of the <p> tags, we can use the d3 method selectAll. For, example,
d3.selectAll("p")
.style("color","brown");
So now it works for all the results,

4. Scalable Vector Graphics
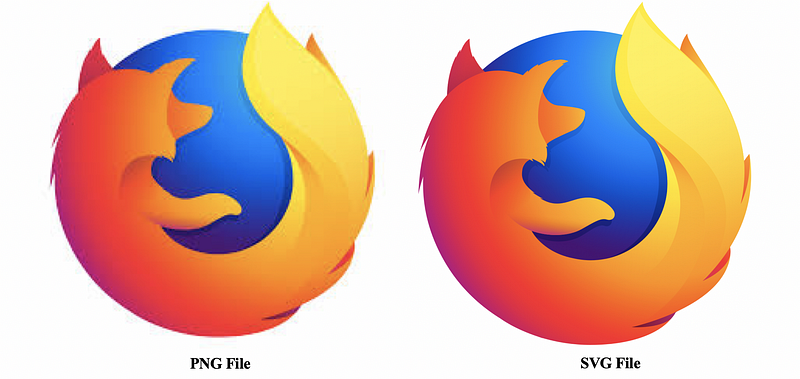
The reason why SVG or the Scalable Vector Graphics is important to understand to talk about is that D3 creates visualization using javascript and these visualizations are actually much connect to SVG because it has the following features:
- No image quality loss when zooming in or zooming out.
- Smaller file size, which means that they are easy loading in our system.
- SVG is the container for D3.
- SVG is a canvas that allows us to draw shapes.
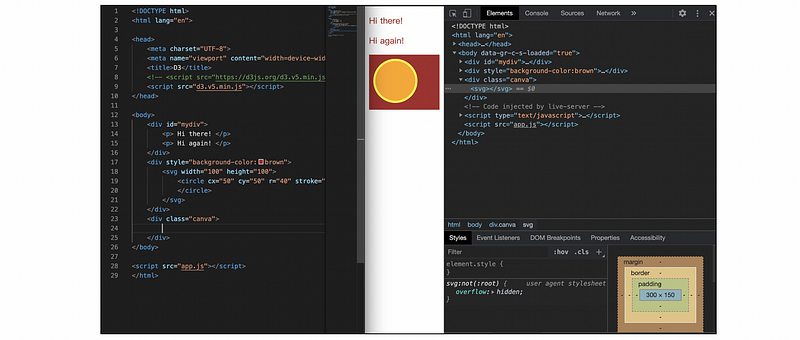
SVG is just like the other element that we have. For example, we can type the followings under the body tag:
<div style="background-color:brown">
    <svg width="100" height="100">
        <circle cx="50" cy="50" r="40">
        </circle>
    </svg>
</div>

In computer science, the origin of a coordinate is the left-up side. Or we could simply refer to the following graphic which is going to give us a clearer description. For example, the following is an ellipse(3,3,4,6).

We can even change the stock of the graph by stroke and stroke-width.For example,
<div style="background-color:brown">
    <svg width="100" height="100">
        <circle cx="50" cy="50" r="40" stroke="yellow" stroke-width="4">
        </circle>
    </svg>
</div>
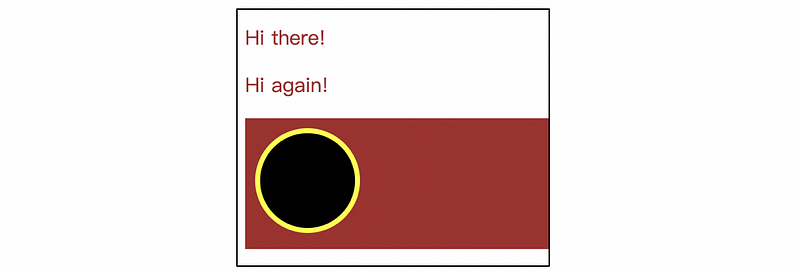
We can also change the fill-in color by the label fill. For example,
<div style="background-color:brown">
    <svg width="100" height="100">
        <circle cx="50" cy="50" r="40" stroke="yellow" stroke-width="4" fill="orange">
        </circle>
    </svg>
</div>

5. Know More About SVG
If we want to learn more about the SVG, what we have to do is to search in the browser for https://developer.mozilla.org/en-US/ and then search svg in its search box. So we can get the link to the documentation of the SVG (on https://developer.mozilla.org/en-US/docs/Web/SVG). Many of our daily apps such as google maps are created with svg format, so if you are ready to learn more, MDN is always a great reference.
6. Creating D3 Canvas
First of all, we could create a div with its class named canva, we can type in div.canva and then press Tab, it will automatically give us <div class=”canva”></div>. Now we are going to go to our app.js and remember it is connected to our html which we previously added to with our d3.v5.min.js library. So if we want to select elements, what we should do is to write in app.js with:
const a = document.querySelector(".canva")But in D3, we don’t have to do all of this, and we could simply say,
const b = d3.select(".canva");Then we write the console.log sentence to show the log of constant a and b,
console.log(a, b);
7. The Difference Between the Document Object and the D3 Object
So in the browser, we could then press F12 to go to the inspect mode, from which we select console and read the information in that as the following picture.
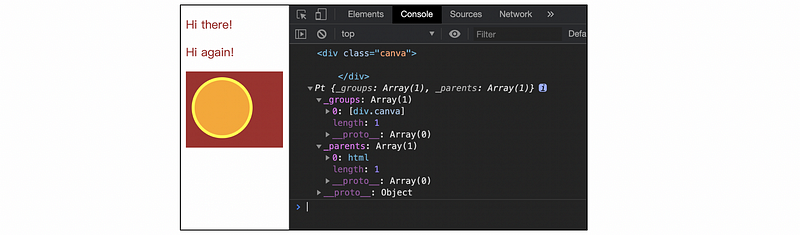
In this picture, we could figure out that the const a returns an ordinary <div> with class canva while const b returns a D3 object. We can find out that every D3 object has a _groups where we can get this div.canva, which is exactly what we have got in the html. We can also see that in D3 object, everything is organized in an array with the first element canva with all the properties related to class canva.
8. Create Elements by D3
We then re-edit the code in the app.js as,
d3.selectAll("p")
.style("color","brown");
// const a = document.querySelector(".canva");
const canvas = d3.select(".canva");
// console.log(a, b);Now we are going to add an svg element in the canvas. So we can type in,
// add an svg element
const svg = canvas.append("svg");
After we press command + s, it seems that nothing happens after we have modified the code. However, when we go into the inspect mode (F12) and start to check the html code, we can find out that there is an <svg> element being added into the <div class=”canva”> tag. Therefore, we can conclude that the svg was created by the D3 library.
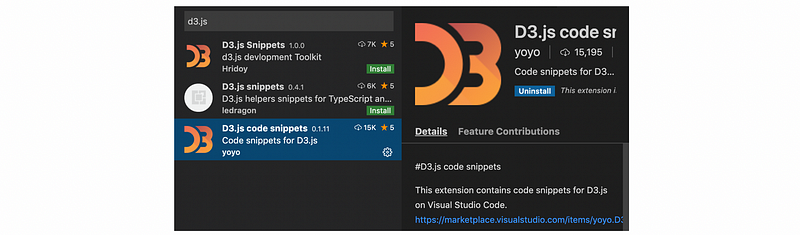
9. Install D3 Snippets
D3.js Code snippets are templates that make it easier to enter repeating code patterns, such as loops or conditional-statements. It could be installed by extensions. As we coding, the snippets give us the hints that we need so that we can actually write code faster.
10. Configure D3 Element Attributes
We can change the width and similarly the height of the D3 element. For example, we can type in app.js as follows,
svg.attr('width', "500").attr('height', "250");
One thing that we could make the codes easier to read is to put them all in a single sentence. It is always a good idea if we write like that and it will work just fine.
const svg = canvas.append("svg")
.attr('width', "500")
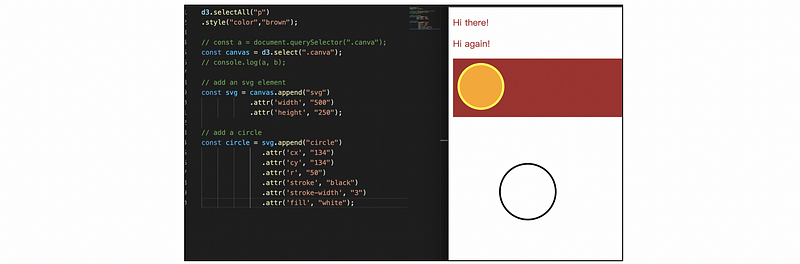
.attr('height', "250");11. Create a Circle with D3
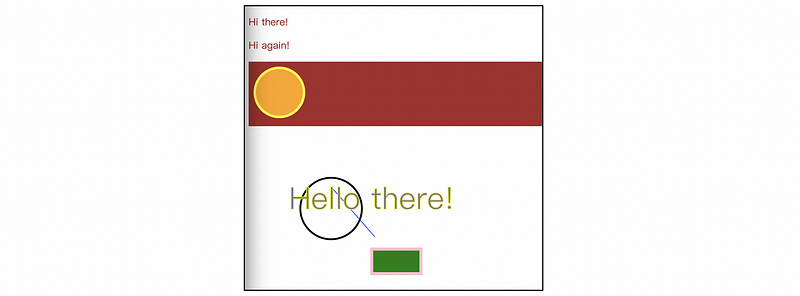
Since we have already know the basic features of creating a new tag and how to change its attributes by D3, now it is time for us to create a new circle under the <svg> tag that we have already created. For example,
// add a circle
const circle = svg.append("circle")
               .attr('cx', "134")
               .attr('cy', "134")
               .attr('r', "50")
               .attr('stroke', "black")
               .attr('stroke-width', "3")
               .attr('fill', "white");
This code is going to give us a new circle.
We have used single quotes for the attribute name and then double quotes for its value. However, it is simply not a good idea to have two different notations so what I would like to recommend here is to use single quotes all the time because the snippet gives us the single quotes in the first place and we just want things to be simpler.
12. Create a Rectangle with D3
Now things have been much much simpler. We can then do as many things as we want. For example, we can create a rectangle with the code:
const rectangle = svg.append('rect')
                  .attr('x', '200')
                  .attr('y', "200")
                  .attr('width', '80')
                  .attr('height', '40')
                  .attr('stroke', 'pink')
                  .attr('stroke-width', '5')
                  .attr('fill', 'green');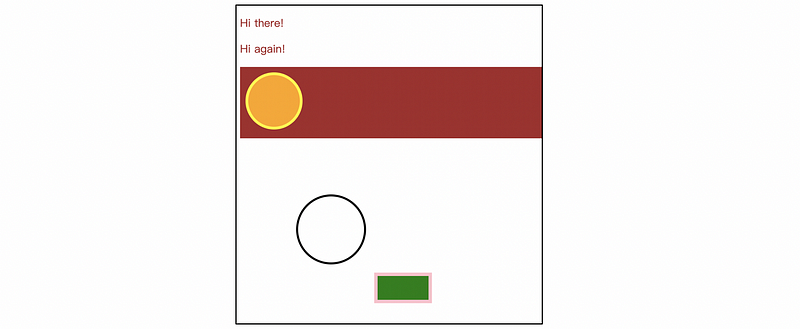
13. Create a Line with D3
Similarly, we can run the following code to create a line,
const line = svg.append('line')
             .attr('x1', '135')
             .attr('y1', '100')
             .attr('x2', '205')
             .attr('y2', '180')
             .attr('stroke', 'blue');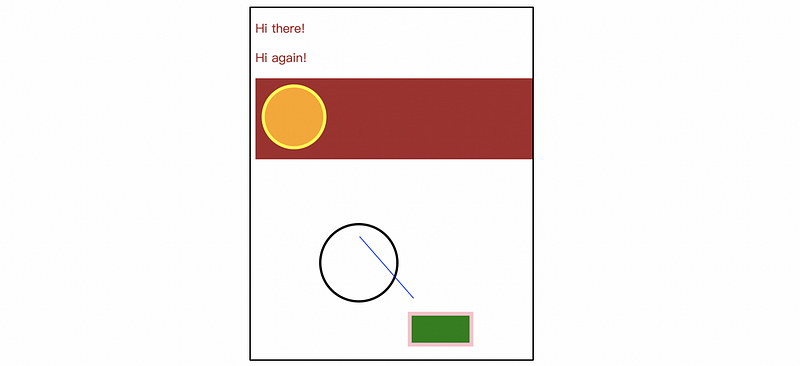
For other shapes, as we have told previously, we could go to the webpage https://developer.mozilla.org/en-US/ and search for more information.
14. Create Text with D3
The codes are as follows,
const text = svg.append('text')
             .text('Hello there!')
             .attr('x', '200')
             .attr('y', '135')
             .attr('fill', 'grey')
             .attr('font-size', '50');
We can actually position our text by text-anchor attribute. This attribute shows what do we mean by the given x and y, and by default, the value of this attribute is set to be “start” but what we can do is to change it to “middle” or “end”. For example,
const text = svg.append('text')
             .text('Hello there!')
             .attr('text-anchor', 'middle')
             .attr('x', '200')
             .attr('y', '135')
             .attr('fill', 'grey')
             .attr('font-size', '50');
We can also add a stroke to a given text with the stroke attribute. For example,
const text = svg.append('text')
             .text('Hello there!')
             .attr('text-anchor', 'middle')
             .attr('x', '200')
             .attr('y', '135')
             .attr('fill', 'grey')
             .attr('stroke', 'yellow')
             .attr('font-size', '50');