Data Pipeline 1 | Apache Airflow Overview
Data Pipeline 1 | Apache Airflow Overview
- Apache Airflow
(1) What is Apache Airflow?
Apache Airflow is an open-source workflow management platform. It started at Airbnb in October 2014 as a solution to manage the company’s increasingly complex workflows.
(2) The Definition of Workflow
The workflow is defined as a sequence of tasks that start on scheduled data or are triggered by an event. They are currently broadly used to handle the big data processing pipelines.
(4) Traditional ETL Workflow
Now, let’s think about a traditional ETL workflow. In a naive approach, the APP generates data to the database and then the engineers write a script for pulling data from the database and then send it to HDFS. Then Hadoop or Spark are used for distributed computing on the data retrieved from the database. The workflows are scheduled by crontab in Unix-like systems.
However, this approach has the following defects,
- Difficult to manage retries after failures
- Hard to monitor the time and status of the process
- Difficult to manage task dependencies or data dependencies
- etc.
(5) Benefits of Using Apache Airflow
- DAGs (Directed Acyclic Graph) is written in Python language and it is easy to learn. The DAGs are a kind of workflow process that we can define, and we will take about it later.
- Apache Airflow is supported by a huge open-source community
- Apache Airflow is capable of creating complex workflows
- Apache Airflow has a richer API with a better UI
- Apache Airflow uses Jinja as a Python template engine for rendering
2. Airflow Installation
(1) Airflow Installation
We should use pip to install the Apache Airflow,
$ pip install apache-airflow
To make it support AWS S3 and PostgreSQL, we should also install some extra functions by,
$ pip install apache-airflow[postgres,s3]
Then if we would like to see the version of the current airflow we have, we can run,
$ airflow version
We can simply start all the components by standalone option,
$ airflow standalone
This all-in-one standalone command actually runs the individual parts of Airflow manually. The Apache Airflow requires a database running before we run the tasks, and here we will just use the default SQLite database if we run db init by default.
$ airflow db init
$ airflow users create \
      --username admin \
      --firstname FIRST_NAME \
      --lastname LAST_NAME \
      --role Admin \
      --email admin@example.org
$ airflow webserver --port 8080
$ airflow scheduler
(2) Setting Up a DAG Directory
After we run,
$ airflow standalone
We are expected to get the following information,
...
standalone | Airflow is ready
standalone | Login with username: admin  password: ...
standalone | Airflow Standalone is for development purposes only. Do not use this in production!
...
Then we can go to the 8080 port of localhost,
GOTO: localhost:8080
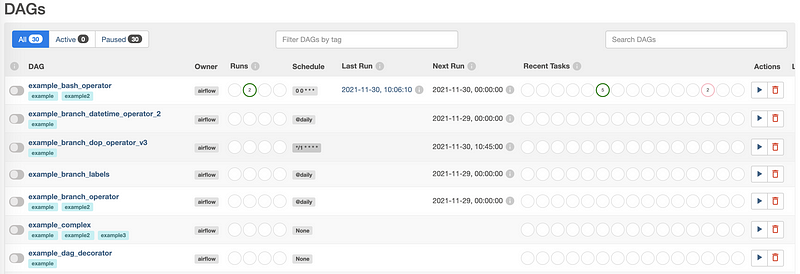
And we should be able to log in with the username and password generated above. We will by default have some example DAGs.
We can get this list from the command line by,
$ airflow dags list
Now, suppose we want to create our new DAGs and put them in another directory DAGs. Suppose we would like to add a new folder in the home directory for the current user.
$ cd ~
$ mkdir DAGs
And then, we will make it a path that will be used by the Airflow. The correct path to your DAG folder is set in airflow.cfg file is located at,
$ cd ~/airflow/
And we can choose to open it then by,
$ vi airflow.cfg
The variables dags_folder actually holds the place that we should use for our new directory. According to the document, the folder where your airflow pipelines live, most likely a subfolder in a code repository. Therefore, we should change the value of it by,
dags_folder = ~/DAGsThen we should be able to create our own DAGs in this directory ~/DAGs .
Also, we can stop the service at any time by pressing ^c.
(3) Create a Hello World DAG
Now, let’s use a completed baby Hello World DAG for our testing. You can download the following script and then put it in the directory we have assigned to dags_folder . Currently, we don’t dive deeply into this script but we can give it a general introduction.
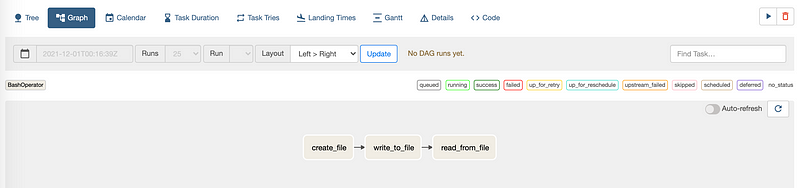
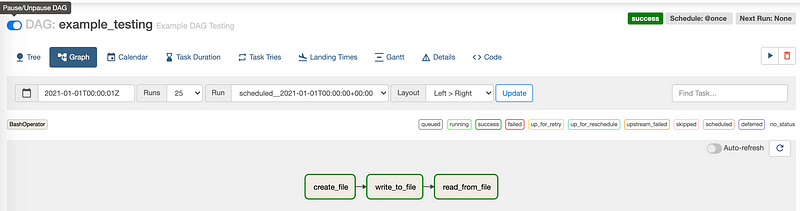
In this script, we have three tasks t1, t2, and t3 and they are all bash commands,
t1: create a new file in/tmpnamedtest.txtt2: writeTesting.to this filetest.txtt3: read from filetest.txtand print it to standard output
They are organized in the running order of,
t1 >> t2 >> t3
Then we should start the Airflow by.
$ airflow standalone
Then go to the 8080 port and we should be able to find the DAG with the name example_testing , and it is going to be the DAG we are going to run.
We can click on the name of the DAG and then select Graph tag in the next view. From here, we can check out the current directed acyclic graph. Also, we can check out the code by selecting the Code tag.
To start a DAG, we have to turn on the switch of Pause/Unpause DAG behind the name of the DAG. Then after a second, we can find out that all the tasks are successfully executed.
We can check out the logs for each task. For example, we can check out the log for task t3 and see if it prints Testing. to stdout. To do so, we should first select the task read_from_file (i.e. t3), and then in the following view, select Log .
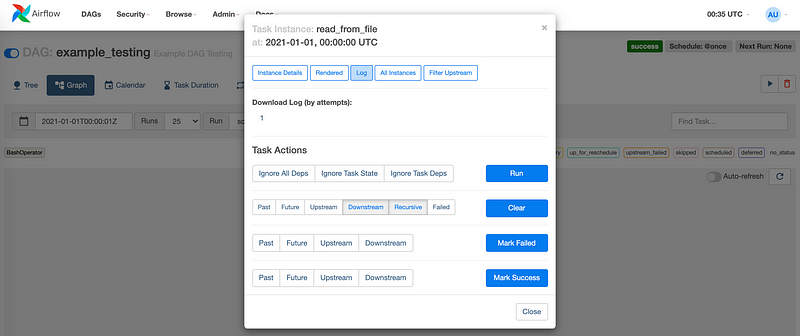
From the logs, we are able to find this output information at the bottom,
...
[2021-11-30, 16:25:10 UTC] {subprocess.py:74} INFO - Running command: ['bash', '-c', 'cat /tmp/test.txt']
[2021-11-30, 16:25:10 UTC] {subprocess.py:85} INFO - Output:
[2021-11-30, 16:25:10 UTC] {subprocess.py:89} INFO - Testing.
[2021-11-30, 16:25:10 UTC] {subprocess.py:93} INFO - Command exited with return code 0
...
And this indicates that we successfully output the content of the message.
We can also check out if we have this test.txt file created by,
$ cat /tmp/test.txt
Testing.