Distributed Computing 4 | AWS IAM Configurations, Amazon EMR and Spark Clusters
Distributed Computing 4 | AWS IAM Configurations, Amazon EMR, and Spark Clusters

Note: If you meet any problems when following the instructions, my recommendation is to delete the things you have done and do all the things again.
- AWS IAM Configurations
(1) The Overview of AWS Pipeline
- Upload the data to AWS S3
- Manage collaboration by AWS IAM
- Transfer to AWS EMR
- Transfer to third party software like Plotly
(2) The Definition of IAM
The identity and access management (IAM) system of AWS enables to manage access to AWS services by allowing to manage the AWS user groups.
(3) Creating IAM
The procedure of creating IAMs should be as follows,
- Go to AWS.com
- Sign in to the console
- Select Root User
- Enter the email address
- Enter the password
- Search for IAM and redirect to the IAM dashboard
- Select
Access management > Usersin the left navigation bar (this should be the default page) - Select
Add users - Enter the
User nameyou want to add to your project (e.g.Adam) - Check both the
Access key(means the IAM user can use AWS CLI) andPassword(means the IAM user can access AWS console/website) - We can choose to autogenerate a password for this user or enter a custom password. Here we would like to make everything simple and we just choose the default settings of autogenerating the password and requiring the IAM user to reset it after the first time they log in.
- Select
Next: Permissionsto continue. - Select
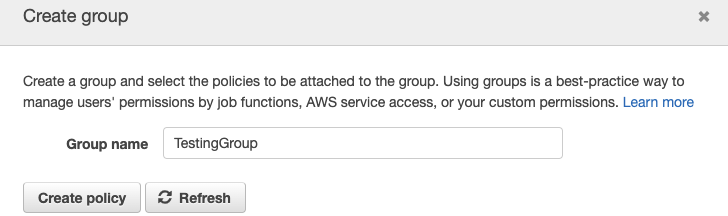
Create groupto create a new IAM user group. From this group management, we can manage the accessibility to the resources of this IAM user. - Next, we should enter a
Group name(e.g.TestingGroup) that will be used to authorize a series of resource accessibility.
- First, let’s authorize the accessibility to S3. Let’s first search
S3among the policies. If we would like to be open to all the operations, we can checkAmazonS3FullAccess(means the IAM users can r/w). We are going to check this for simplicity. - Second, we also want to authorize the accessibility to EMR. Let’s then search for
elasticmap, and from the result, we can checkAmazonElasticMapReduceFullAccessfor again, simplicity. - Click on
Create groupto continue. - Select the group (e.g.
TestingGroup) we have created. - Click on
Next: Tagsto continue. - The tag section is optional but it does provide some IAM user-specific management. We can add no more than 50 tags to a specific user and then use these tags to organize, track, or control access for this IAM user. We are going to skip this part for simplicity.
- Click on
Next: Reviewto continue. - From the review page, we can check again if all the settings for this user are correct because we may have serious problems if we assigned the wrong permissions. So make sure all the settings are correct before you click on
Create user. - Now, we have already created the user and we can download user security credentials by a CSV file. Also, we can also send an email as we wish. If we don’t necessarily need to download the CSV file because we can retrieve all the IAM user information back. Let’s see how it works.
- Go back to the IAM dashboard, select
Access management > Users. - Click on the name of the new user (e.g.
Adam) we have created just now. - Select
Security Credentials.

- From this section, we can get the Console sign-in link, which can be used to sign in as an IAM user. Also, we can reset the password we generated because we may not save the previous CSV file. Click on
Manageafter theConsole password. Then checkSet password > Autogenerated password. Check the box ofRequire password reset. Then click onApply. - Then click on
ShowafterConsole password. Note that this should be stored somewhere and after you close this window, if the password is lost, you must create a new one. For example, my autogenerated password is,
)%|vYR-vji5cN!s
- Then we go to the
Console sign-in linkshown in your Sign-in credentials,
Goto: https://<Numbers>.signin.aws.amazon.com/console
Your current account will be logged out if you enter this sign-in page in your browser.
- Keep the
Account ID, then enter the IAM user login information,
IAM user name: Adam
Password: )%|vYR-vji5cN!s
- Click on Sign in to log into this IAM account.
- Then, because we, as the root user, checked the box for
Require password resetwhen conducting the configurations. We have to reset the password. So, enter a new password and confirm it. - Now, check if we can access EMR and S3.
- Now, check if we can create a new RDS database. You must not be able to do that because this IAM user is not authorized to perform RDS operations.
(4) Add IAM User to AWS CLI
If you haven’t installed AWS CLI before, it’s time to install it. You may use the following command to install the AWS command line to,
$ curl "https://awscli.amazonaws.com/AWSCLIV2.pkg" -o "AWSCLIV2.pkg"
$ sudo installer -pkg AWSCLIV2.pkg -target /
Then check if we installed it successfully,
$ aws --version
Then, let’s add the IAM user to our account.
- First, go back to the root user’s IAM dashboard
- Find the IAM user we have created (e.g.
Adam), selectSecurity credentials - From the Access keys section, click on
Create access key. Click onShowto reveal theSecret access key, record these two keys (i.e.Access key IDandSecret access key) somewhere - Second, type in the following command,
$ aws configure
- Then enter the
Access key IDandSecret access key
AWS Access Key ID [****************K3MZ]: ...
AWS Secret Access Key [****************o8yJ]: ...
Default region name [us-east-1]:
Default output format [None]:
(5) Log in as Root User by SSH
Now that we have discussed the AWS CLI, let’s discuss the SSH accessibility. For SSH login, we have to generate a PEM file. This approach of SSH login is extremely useful when we have to get the console of an EC2 service. Now, let’s see how it works.
- Log in as the root user
- Let’s first search for EC2.
- Select
Network & Security > Key Pairsin the left navigation bar. - Click on
Create key pair - Enter a name (e.g.
Adam) and keep the other settings. - Click on
Create key pairto download a PEM file - Finally, let’s store it somewhere so that we can use it for logging into the EC2 service in the future.
(6) Authorizing an S3 Bucket to an IAM User
- Go to the IAM dashboard, select
Users - Click on the username (e.g.
Adam) we have created - Copy the
Summary > User ARNinformation - Then, redirect to the S3 dashboard
- Click on the non-public bucket name we would like to add this IAM user
- Select
Permissions - Find
Bucket policyand then click onEdit - Click on
Policy generator - Select
S3 Bucket Policy - Add the IAM user’s
User ARNas thePrinciple - Select
GetObjectin the actions to allow read-only behavior - The
Amazon Resource Name (ARN)should have the following pattern,
arn:aws:s3:::${BucketName}/${KeyName}where the ${BucketName} should be the bucket name we want to authorize, and ${KeyName} should be the files we want to allow access. If we want to allow accessing all the files, we can put a * sign here.
- Click on
Add Statementto add this record - Then click
Generate Policyto generate this policy - Copy the JSON document generated
- Paste in the
Bucket polity - Click on
Save changesto save this permission
2. Amazon EMR and Spark Clusters
(1) Spark Cluster
Now we are basically running the program in the local mode and we have to run it in a cluster mode if we want to achieve higher performance for a larger scale of data. As we have mentioned before, the Spark cluster is a set of interconnected processes running in a distributed manner on different machines. Basically, there are three types of Spark cluster managers,
- Spark standalone
- Hadoop YARN
- Apache Mesos
(2) Components of the Spark Runtime System
In the Spark architecture, we have three major components,
- Client: client is the physical or virtual machine we start the driver program by spark-submit, pyspark, spark-shell scripts, etc.
- Driver: driver is the physical or virtual machine that orchestrates and monitors all the executors of a Spark application. The driver is in charge of checking the resources, distributing the jobs/tasks to executors, receiving the computed outputs from the executors, and sending them back to the client. Note we have only one diver per Spark application.
- Executor: executors are the execution units that execute Spark tasks with a configuration with a configurable number of cores. Each executor stores and caches the data partitions only in its memory.
(3) The Definition of Elastic MapReduce (EMR)
EMR (aka. Elastic MapReduce) is a connected structure of the EC2 instances so that we can leverage a dynamically scalable EC2 network through this service. Because we are going to use AWS EMR as our Spark clusters, we are going to use Hadoop’s YARN (aka. Yet Another Resource Negotiator). It can handle the HDFS mode while Spark standalone can not.
(4) Creating an EMR Cluster
- First, let’s log in as the IAM user
- From the left navigation bar, select
Clusters - Click on
Create cluster - Select
Go to advanced options - Select
Releaseversion asemr-6.3.0 - Check
Hadoop 3.2.1andSpark 3.1.1for supporting the clusters - Check
JupyterEnterpriseGateway 2.1.0to enable the jupyter notebook service - Check
Livy 0.7.0, which is the API we need for the Spark cluster - We can also change the last step completes to
Cluster auto-terminatesto save our resources, but we will just leave it there for simplicity - Click on
Nextto continue - On this page, we can check the clustered nodes we are going to have. Currently, we have three types of nodes: Master (the driver instance for orchestrating the jobs, and note that we can only have 1 master instance), Core (a kind of executor instance for data processing and storing), and Task (another kind of executor instance for only the data processing). Depending on the data, we can also change the machine type and the instance count. For simplicity, we just leave the default settings here.
- Click on
Nextto continue - On this page, we can rename the cluster by entering a new
Cluster name. We can also change some other general settings but we will just leave them there. - Click on
Nextto continue - On this page, we have to select the EC2 key pair we have set (e.g.
Adam) - Click on
Create clusterto create the instance - Then, from the
Clusterstag, we can find the cluster namedMy clusterwe have created
(5) Connecting to the EMR Cluster Using a notebook
- Select
Notebooksin the left navigation bar - Click on
Create notebook - Enter the
Notebook name(e.g.MyNotebook) - Select
Choose an existing clusterwe have started forCluster(e.g.My cluster) - Select
Use the default S3 location - Click on
Create notebookto generate a notebook - When the notebook is no longer
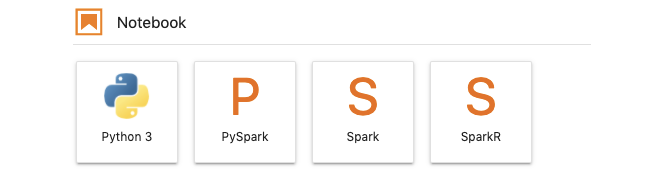
Pending(i.e.Ready), click onOpen in JupyterLab - Select
PySparkNotebook
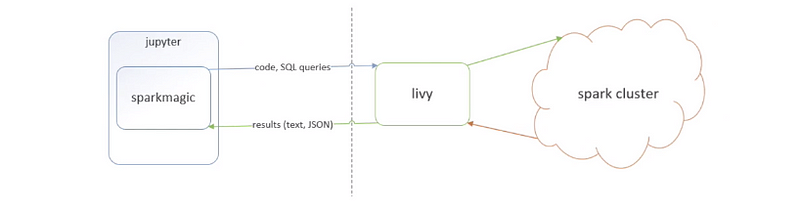
(6) The Definition of Sparkmagic
Sparkmagic is a set of tools for interactively working with remote Spark clusters through Livy, a Spark REST server, in Jupyter notebooks. The Sparkmagic project includes a set of magics for interactively running Spark code in multiple languages, as well as some kernels that you can use to turn Jupyter into an integrated Spark environment.
(7) Basic Sparkmagic Operations
Now we have opened a Jupyter Notebook with the sparkmagic and we are going to interact with it.
- Open the user manual
%%help
- Outputs session information for the current Livy endpoint.
%%info
- Outputs the current session’s Livy logs.
%%logs
- Change the memory size to 1000M
%%configure -f
{"executorMemory": "1000M"}
- Change the number of cores used for an executor
%%configure -f
{"executorCores": 4}
- Locally executed the code in subsequent lines
%%local
a = 1
print(a)
- The result of the SQL query will be available in the
%%localPython context as a Pandas dataframe namedVAR_NAME
%%sql -o VAR_NAME
(8) Start with Sparkmagic
Now, let’s really configure and work with the cluster through sparkmagic .
- Start a Spark application with the following configurations
%%configure -f
{
"conf":{
        "spark.pyspark.python": "python3",
        "spark.pyspark.virtualenv.enabled": "true",
        "spark.pyspark.virtualenv.type":"native",
        "spark.pyspark.virtualenv.bin.path":"/usr/bin/virtualenv",

        "spark.executor.heartbeatInterval":"10800s",
        "spark.network.timeout":"24h",

        "spark.driver.memory": "1G",
        "spark.executor.memory": "1G",
        "spark.executor.cores":"2",
"spark.app.name":"testing"
      }
}
- Creates SparkContext
sc
- Print out the section infomation
%%info
- Install extra packages (e.g. Plotly) to the
sc.install_pypi_package("plotly")- Check all the packages installed
sc.list_packages()
- Create an RDD through our S3 bucket
rdd = sc.textFile("s3://${Bucket Name}/${File Name}")- Try to print the first line of this RDD
rdd.take(1)
- Let’s download the
supervisor_sf.tsvfile from this link - Upload this file to our S3 bucket
- Then, create an RDD with the content of this file
rdd = sc.textFile("s3://${Bucket Name}/supervisor_sf.tsv")- Operate the data by RDD transformations,
zip_id = rdd.map(lambda x : x.split("\t")).map(lambda x : (int(x[0]), int(x[1])))
zip_id_count = zip_id.groupByKey().map(lambda x : (x[0], len(x[1]))).sortByKey()- Register the DataFrame as a SQL temporary view named
zip_id_count_view
zip_id_count_df = zip_id_count.toDF()
zip_id_count_df.createOrReplaceTempView("zip_id_count_view")
- View the data from that SQL temporary view
zip_id_count_view, store this as a pandas DataFrame namedzip_id_count_tabin%%localPython context
%%sql -o zip_id_count_tab
SELECT * FROM zip_id_count_view
- Use
plotlyandzip_id_count_tabfor visualization, execute the code in the%%localcontext
%%local
import plotly
import plotly.graph_objects as go
x = zip_id_count_tab['_1']
y = zip_id_count_tab['_2']
# Use the hovertext kw argument for hover text
fig = go.Figure(data=[go.Bar(x=x, y=y,
                             marker_color='lightsalmon',
                             hovertext=x)])
fig.update_layout(xaxis=dict(tickformat="digit"))
fig.show()

- Stop the SparkContext
sc.stop()