Relational Database 9 | AWS IAM, S3, and RDS Services
Relational Database 9 | AWS IAM, S3, and RDS Services

- AWS Identity and Access Management (IAM)
In practice, we have to collaborate with others. For the reason that several people should have the access to an instance, we have to manage the identity and the accessibility for that specific instance that we are going to use. This is called the IAM for AWS.
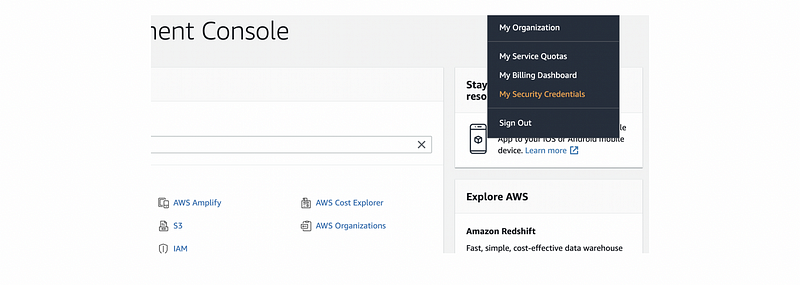
To change the accessibility of an instance or to create a new identity, from the AWS Management Console, we click on our user name and then choose “My Security Credentials”.
- Create a new IAM user
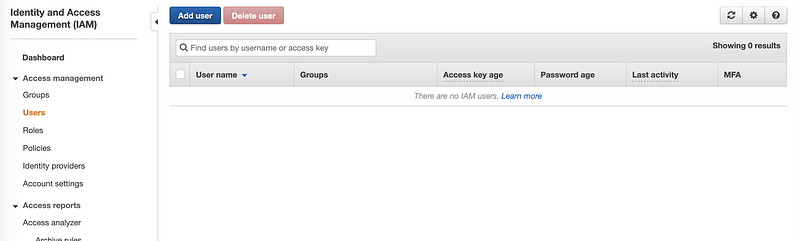
An IAM user is different from the root user, and the IAM user only has the accessibility of a few instances selected by the root user. As a root user, we have the permission to create IAM users for a specific instance, however, the IAM user doesn’t have the permission to add or delete users.
To create a new IAM user, click on the Users tab from the left bar and then click on the “Add user” button,
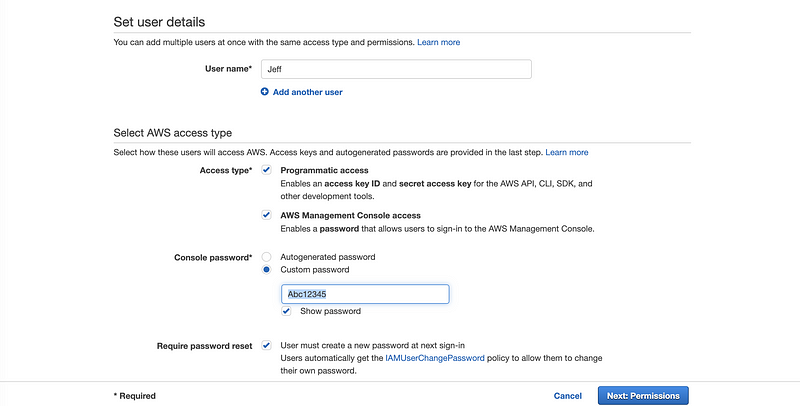
For example, Jeff is our friend and we would like to give him permission for my instances. Then check the boxes of “Programmatic access” and “AWS Management Console access”. For the password, we just simply write “Abc12345” (or you can write what you want) for an original one because the AWS will ask the IAM user to change the password after they log in for the very first time because of the security issues. Then we click on the “Next: Permissions” button to continue.
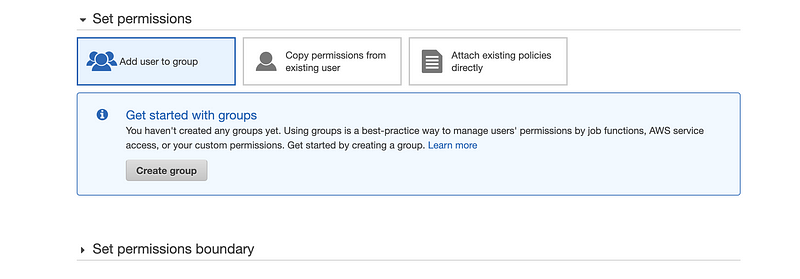
On the Permission page, we are supposed to restrict the IAM user because we don’t want the other sensitive information being accessed. So we have to create some policies for the IAM user. Because the IAM users can be more than one for a specific project and in most of the cases, we have to set the same policies for all of them, that’s why we create groups to give policies to all of the IAM users with the same permission. Because it is said that we haven’t got a group now, then we have to create a group first.
Click on the “Create Group” button,
Then in the popped-up window, we can write the Group name randomly (i.e. I use projectname for this). We can either create some new policies or we can search for some common permission policies.
For example, suppose we are going to give access to the EC2 servers, so then we can check the box of the EC2 policies (note that the description will describe specifically what’s the meaning for this policy).
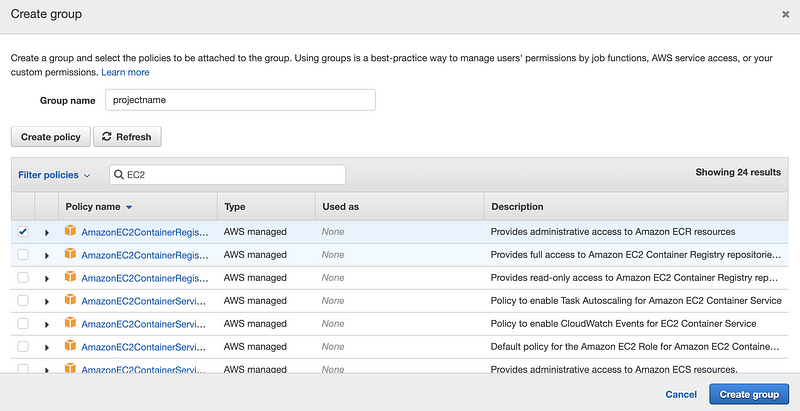
However, we are going to create a policy because the common policies are not enough for us to use. So we click on the “Create policy” button and then we will be redirected to a new page for creating policy.
a. Allow the permission to S3
Step 1. Add S3 to the service

Step 2. Choose all S3 actions except for the permissions management, because the IAM user should not have the ability to change the permissions
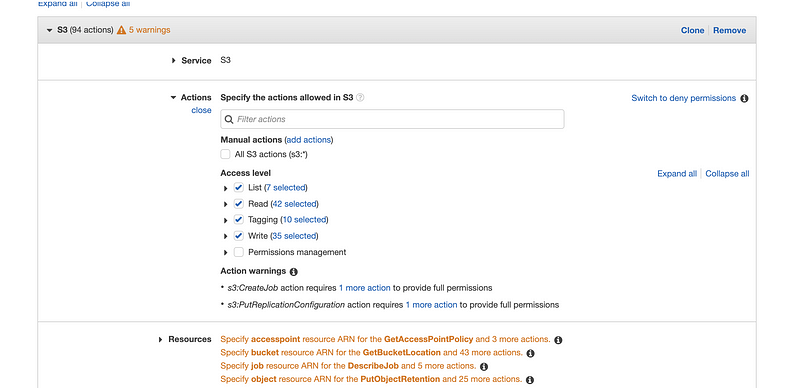
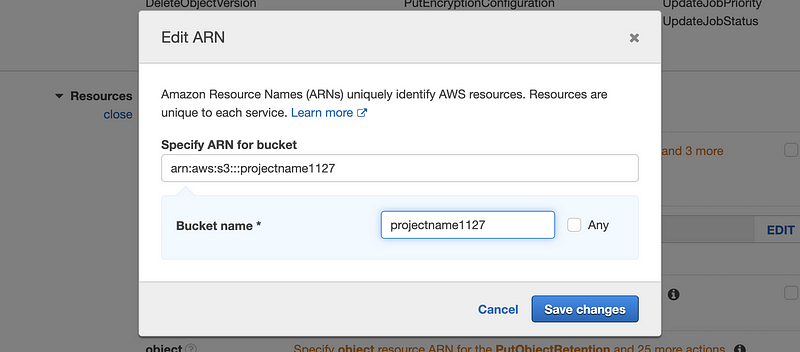
Step 3. From the source part, choose the permission for the buckets (i.e. in our case, we only allow the bucket named “project1127” for our resource). It doesn’t matter whether we have created this bucket or not. And what is the bucket? We will talk about it later.
b. Allow the permission to RDS
Now, let’s do the same stuff to add permission to the RDS. To make things easier, we just give all the action permissions and all the resource permissions at this time.
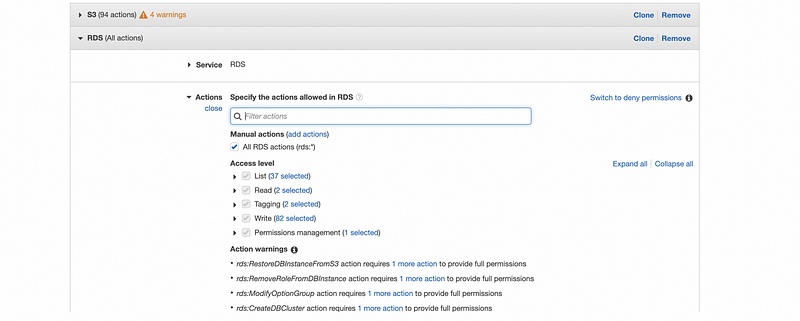
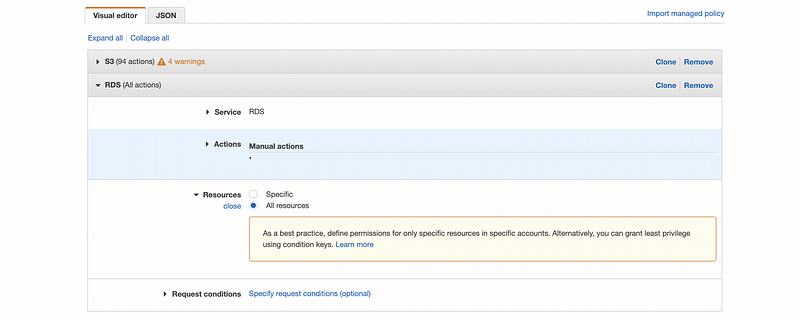
Then we click on the “Review policy” button to continue. For this policy, we just simply name it as “newpolicy”. After that and make sure all the permissions are set correctly, we then click on the “Create policy” to create this policy.
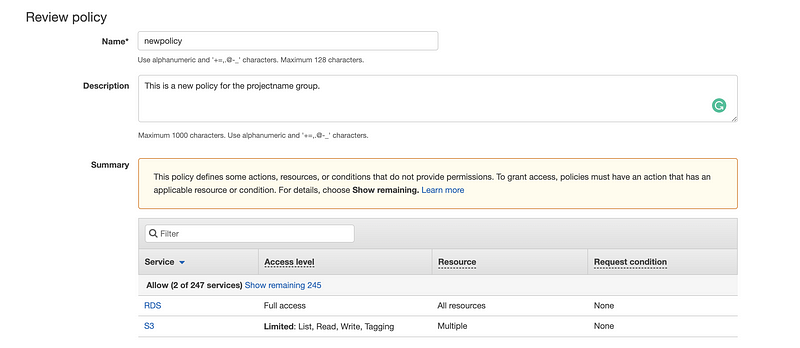
It will be fine if we can see this sign,

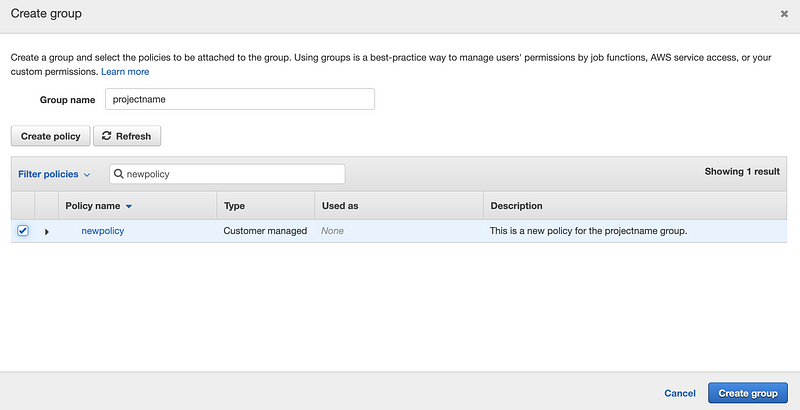
Then we go back to the “Create Group” page and click on the “Refresh” button to refresh the policy list. In the policy search box, we write “newpolicy” and then we can find the policy that we have created. Check the box of it and then click on the “Create group” button to create this group.
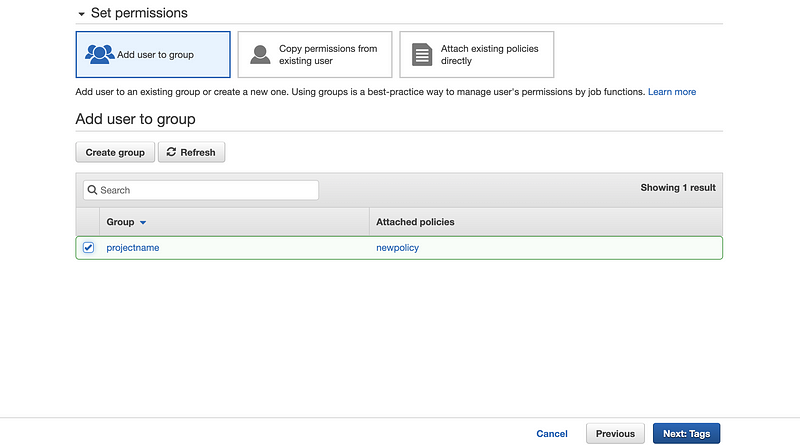
Select “Add user to group” and check the box of this group to make the permissions that we have set working on the current IAM user. Then we click on the “Next: Tags” button to continue.
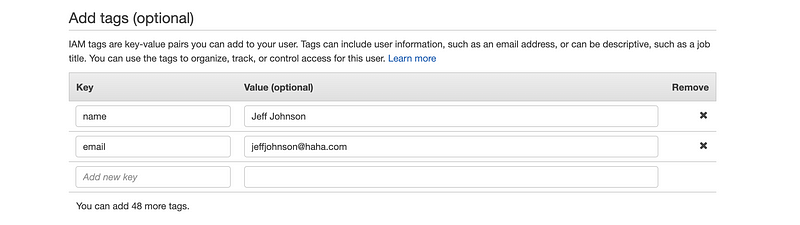
On the “Add tags” page, we can add some information about this IAM user. For example, name, email, phone number, etc. Or we can just leave it there because this is an optional page for us. Then we click on the “Next: Review” button to continue.
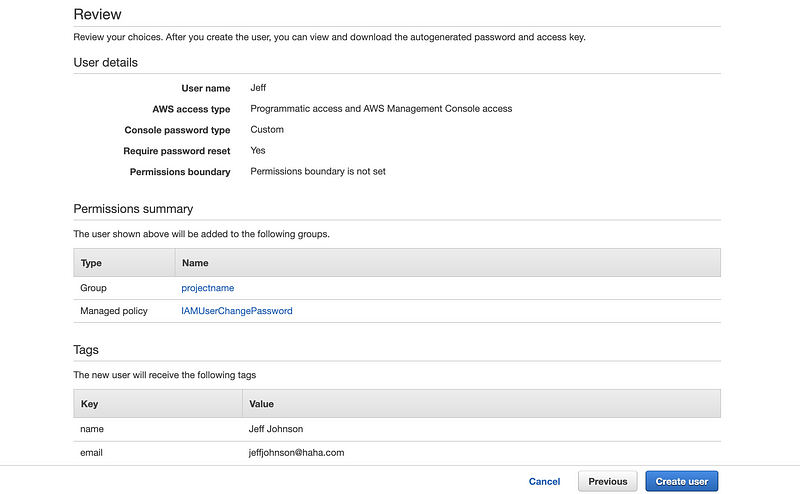
The review page will show us the settings that we have made to that IAM user and if there’s nothing wrong, click on the “Create user” button to continue.
The next page will show us the access key ID and the secret access key for that IAM user and we should download a CSV file with all these pieces of information because they are not going to show for a second time. Click on the “Download .csv” button to download the information.
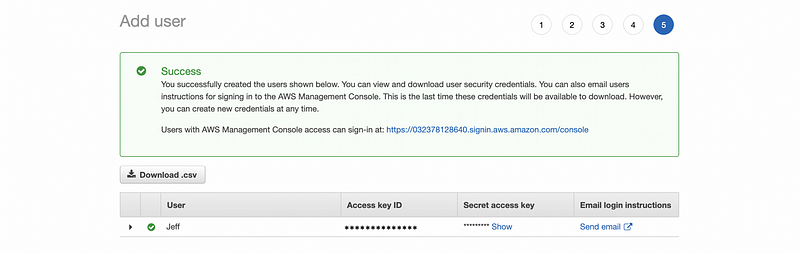
Then from the downloaded CSV file, we can find a console login link. With this link, we can log into the IAM account.

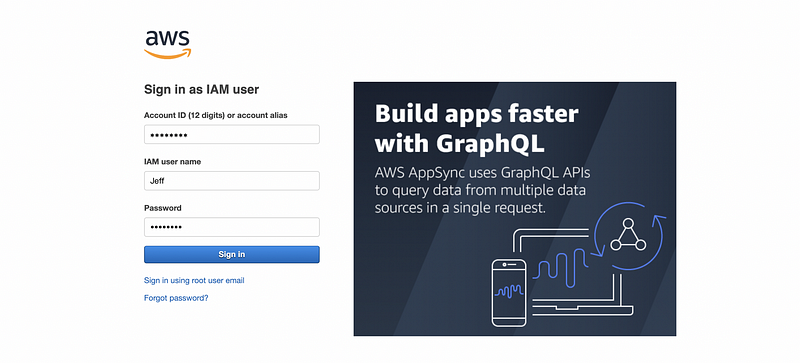
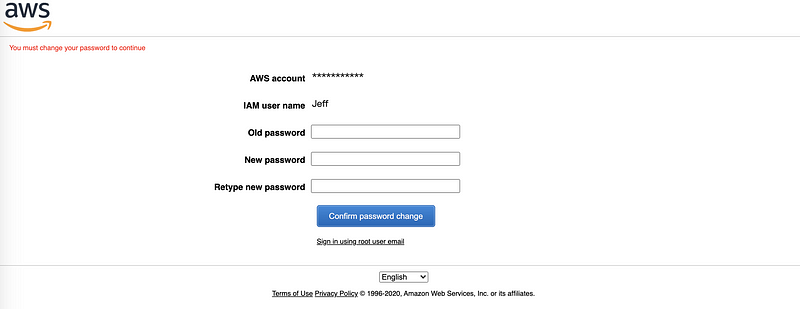
Click on the link to open it (or copy and paste it in the browser). In case you forget, the username and the password are,
Username: Jeff
Password: Abc12345
Then we are asked to change the password because we have checked (by default) the box of “Require password reset” in the previous settings.
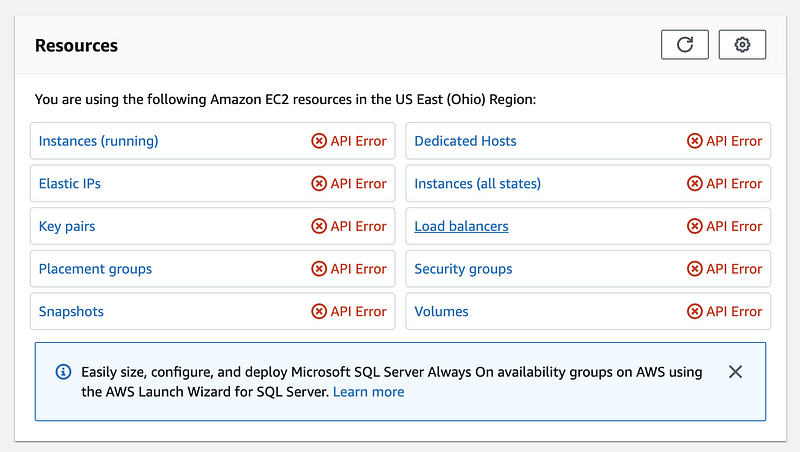
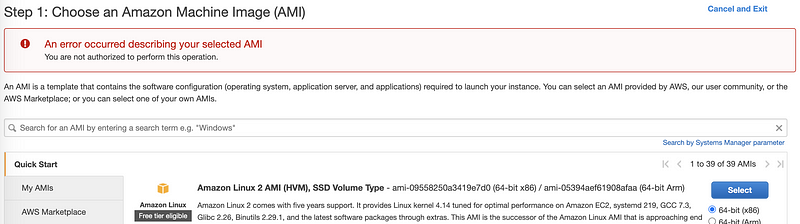
After resetting the password, we can then check the accessibility of our IAM account. Because we didn’t choose to give the accessibility of the EC2 service, let’s see what will it be if I go to the EC2 dashboard. We can discover that we haven’t got any accessibility to the current instance of the root account, and also, we don’t have the permission to create a new EC2 instance. This is basically what we want to set for this IAM account.
- IAM Log in with the command line
Remember we have got the access key ID and the secret access key of the IAM account and this is used for log in the AWS through the command line. For macOS, firstly, we have to download the latest version of the AWS Command Line Interface and install it,
$ curl "https://awscli.amazonaws.com/AWSCLIV2.pkg" -o "AWSCLIV2.pkg"
$ sudo installer -pkg AWSCLIV2.pkg -target /
Then we type in,
$ aws configure
to open the aws service. In this window, we enter the AWS Access Key and the AWS Secret Access Key that is stored in the CSV file we have downloaded,
AWS Access Key ID [None]: .........
AWS Secret Access Key [None]: ...........
Default region name [None]:
Default output format [None]:
2. AWS S3 Bucket
Amazon Simple Storage Service (Amazon S3) is an object storage service that offers data storage services. The basic storage units of Amazon S3 service are objects which are organized into buckets. To make things easier, we can abstract that an S3 bucket is a remote disk that can be used to store data.
- Create a new bucket
In the dashboard of the S3 service, let’s click on the orange button with “Create bucket”.

Step 1. Assign a unique bucket name. This bucket can not be the same as any buckets that is existing and created by any users of S3. I will use “project1127” as the bucket name and of course, you can not use this unless I delete this bucket (it may happen).
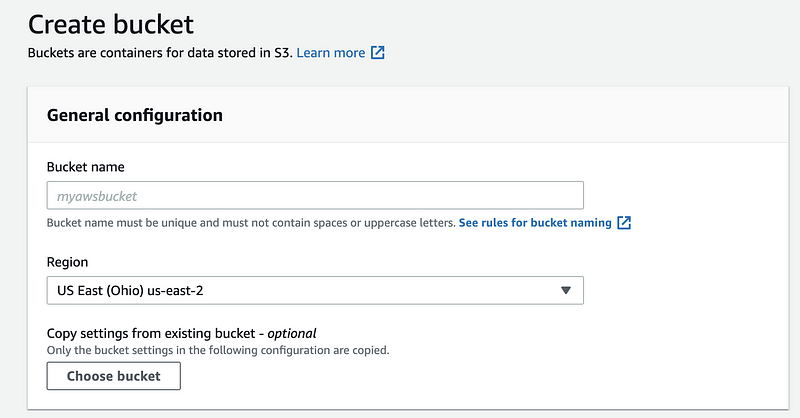
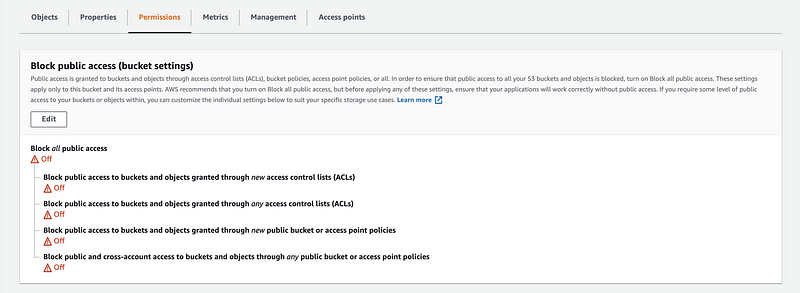
Step 2. Make it a public bucket
In my case, I want this bucket to be publically available, so I uncheck the box of block all public access and check the box of acknowledging the risks.
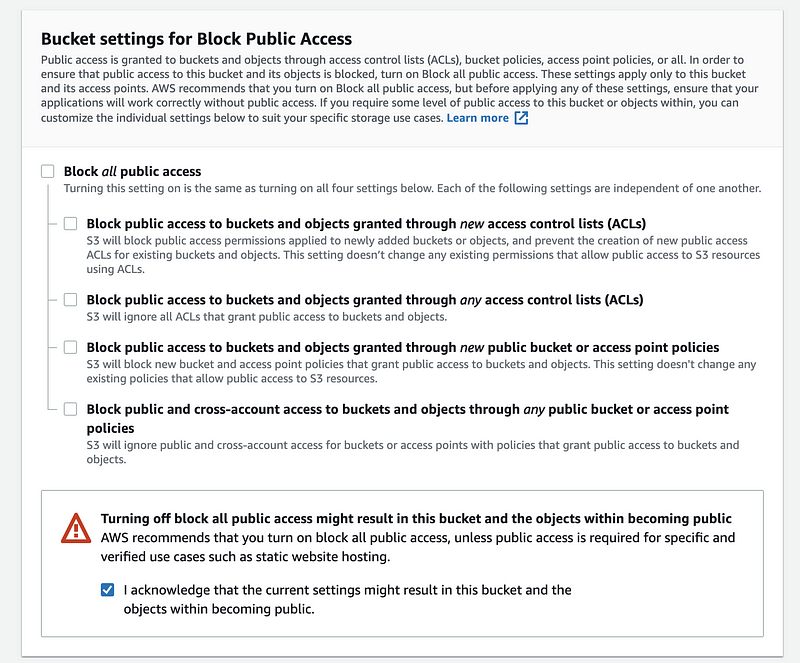
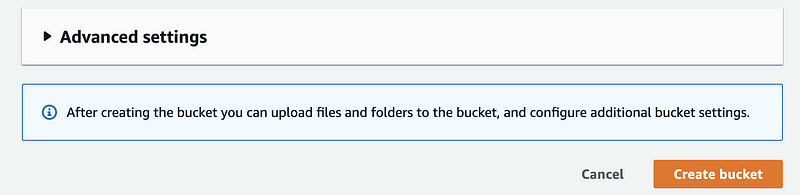
Step 3. Click on “Creat bucket” to create this bucket
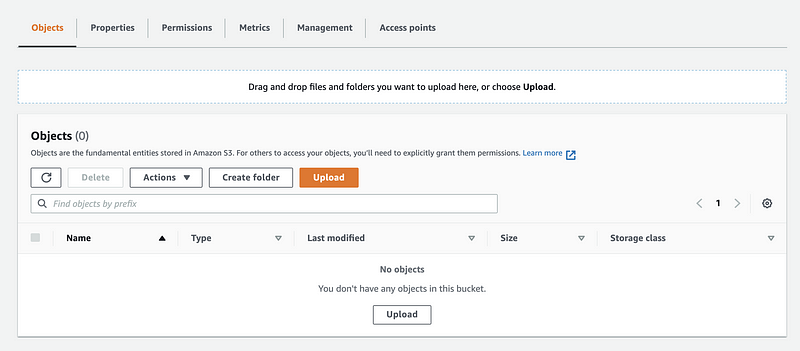
- Upload files to the bucket
Step 1. Click on the bucket that we have created and from the object page of this bucket, we can choose to upload files. We click on the “Upload” button to upload the files.
Step 2. Click on “Add files” to select the files we want to upload. For example, I choose two PDF files for this,
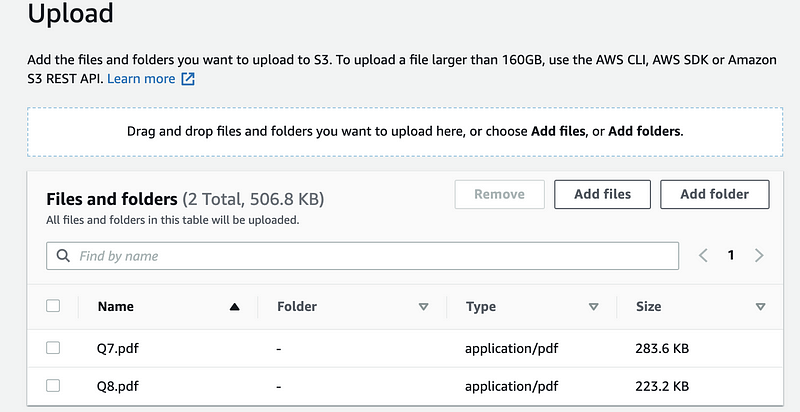
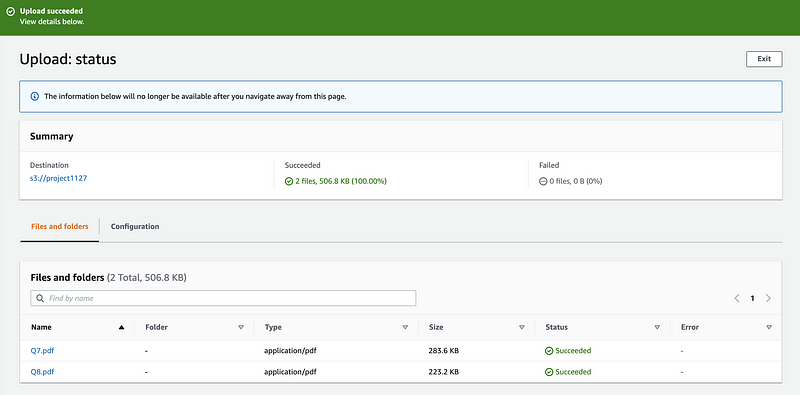
Step 3. Click on the “Upload” button to upload these two files to the server.

After a second, we can see that those files are uploaded successfully.
- Change the permission of a bucket
To modify the permission of a bucket, we will go to its Permissions page and then click on “Edit”,
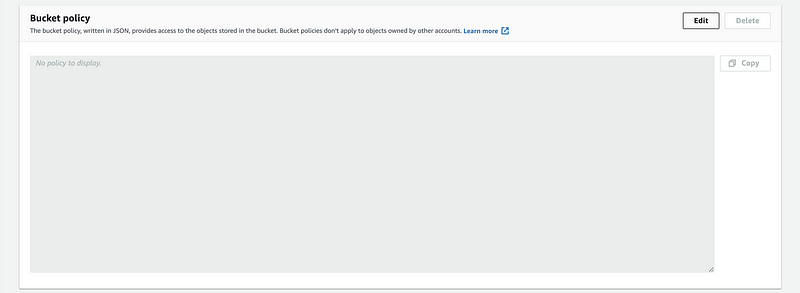
We can also change the bucket policy by clicking on the “Edit” button of the Bucket policy part,
We don’t have to write the JSON policy because we can use the policy generator. We click on the “Policy generator”,
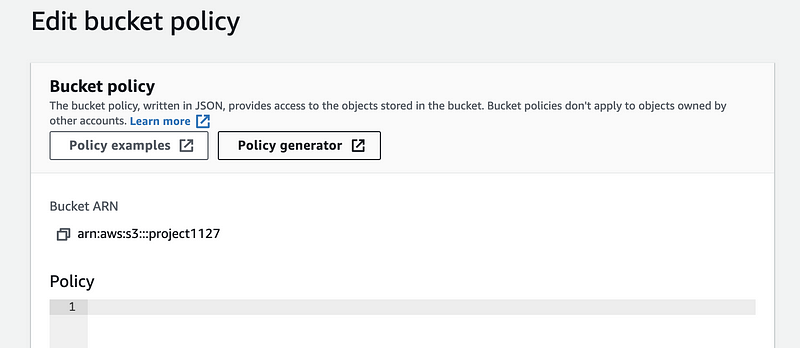
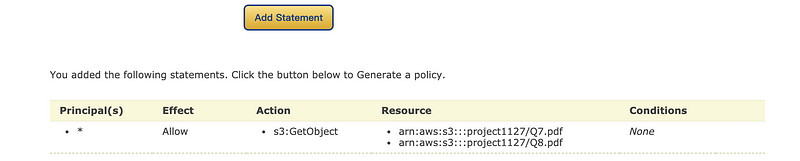
Then for the AWS Policy Generator we choose the type as S3 Bucket Policy. The * for the principle means this can be used for all the users. GetObject is selected as our action and ARN shoule be the bucket ARN of this bucket plus the name of the files separated by comma (for example, my ARN for this is arn:aws:s3:::project1127/Q7.pdf,arn:aws:s3:::project1127/Q8.pdf).

Then we click on thee “Add Statement” to add this statement. Finally, we should click on the “Generate Policy” button to create a JSON file.
Then we copy and paste the generated policy to the bucket policy and then click on the “Save changes” button to make it works for this bucket.
{
  "Id": "Policy1606547208127",
  "Version": "2012-10-17",
  "Statement": [
    {
      "Sid": "Stmt1606547131805",
      "Action": [
        "s3:GetObject"
      ],
      "Effect": "Allow",
      "Resource": [
        "arn:aws:s3:::project1127/Q7.pdf",
        "arn:aws:s3:::project1127/Q8.pdf"
      ],
      "Principal": "*"
    }
  ]
}
3. AWS RDS Cloud-Based Database
AWS relation database service makes it easier to deloy a relational database in the cloud.
- Create a cloud database
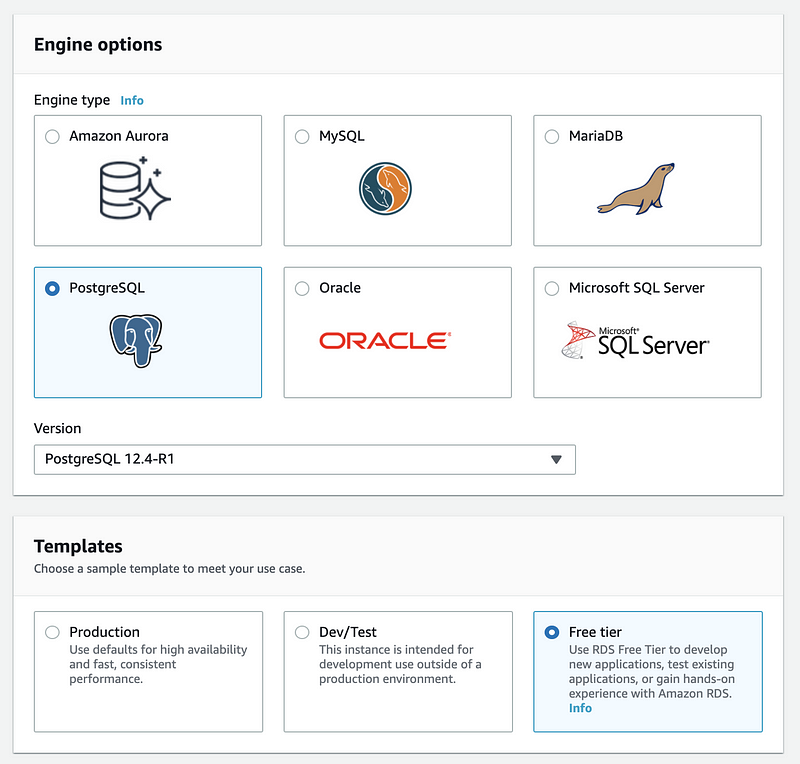
To create a cloud-based database, first of all, we have to click on the “Create Database” button and then we choose “Standard create”. Then we should choose PostgreSQL (or other relational databases) and the “Free tier” template (because this service can be really expensive for us).

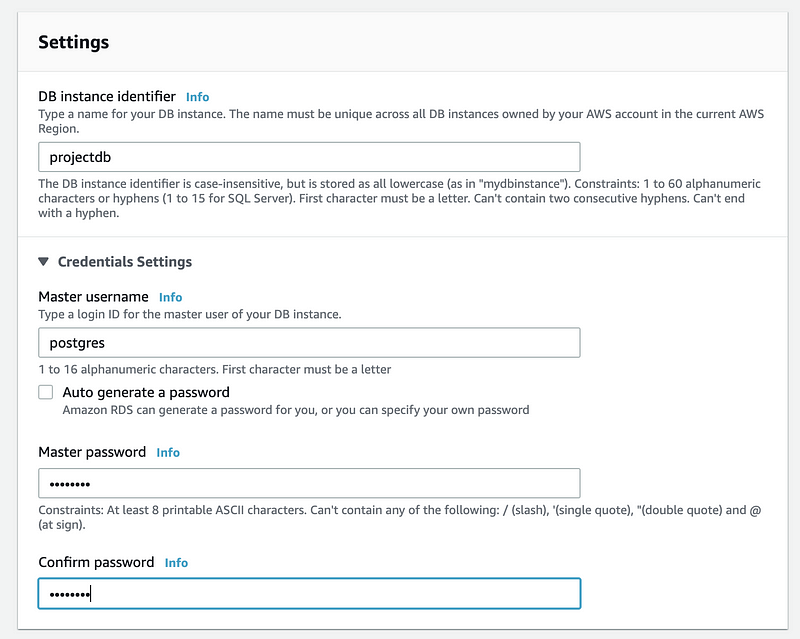
For the Settings part, the should create a name for our database instance (i.e. projectdb) and then we create the username (by default, postgres) and the password for our database.
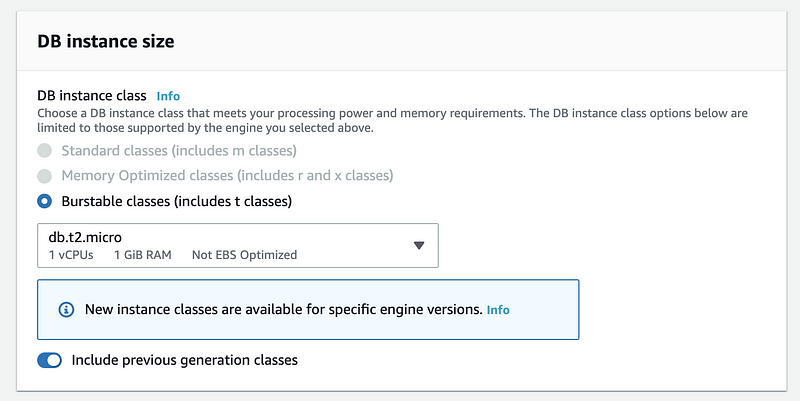
If you are not using the free tier, you should then choose a proper DB instance size. Of course, a higher performance machine means a more expensive cost and we should be careful about this. For me, because I choose the free tier, so it won’t be a problem.
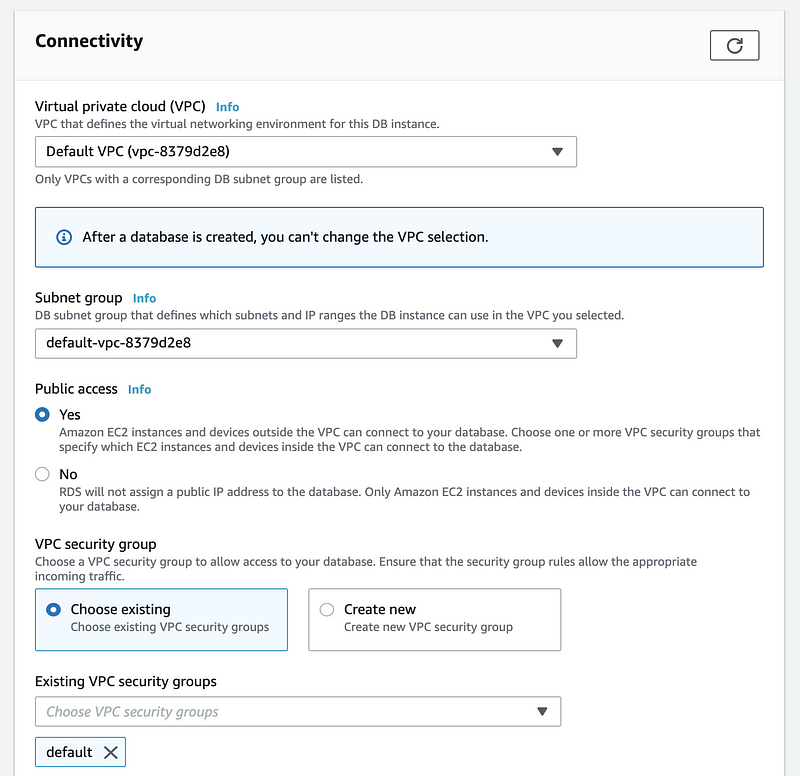
Then in the connectivity part, select yes for the Public access because we want the others connect to the database freely form their local machines.
Remember to check the bill before we continue. For me, it is a free service and I am not worrying.
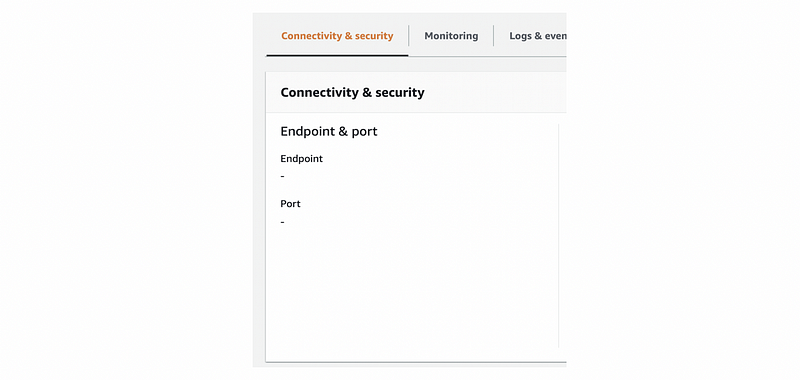
Finally, click on the “Create database” button to create this database. It can take quite a while before we can use this database. If you see there’s no endpoint and port, keep patient and wait for some time until they appear.
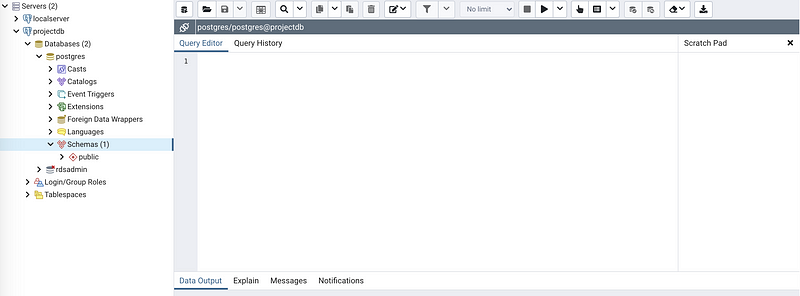
- Add the cloud-based server to the PgAdimn
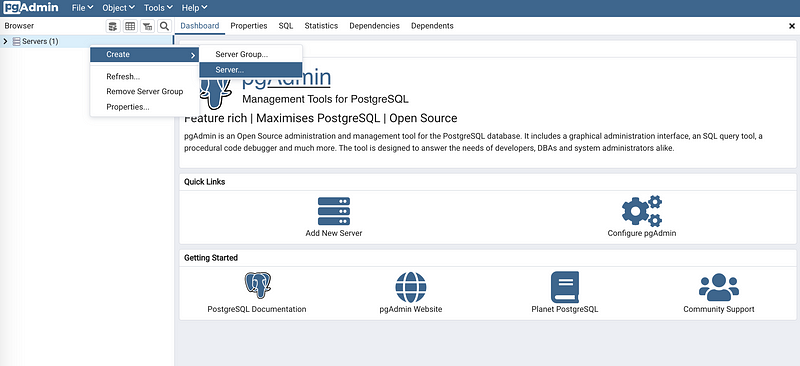
To connect the PgAdmin to that cloud server that we have created, we should right click on the Server and choose “Create > Server”.
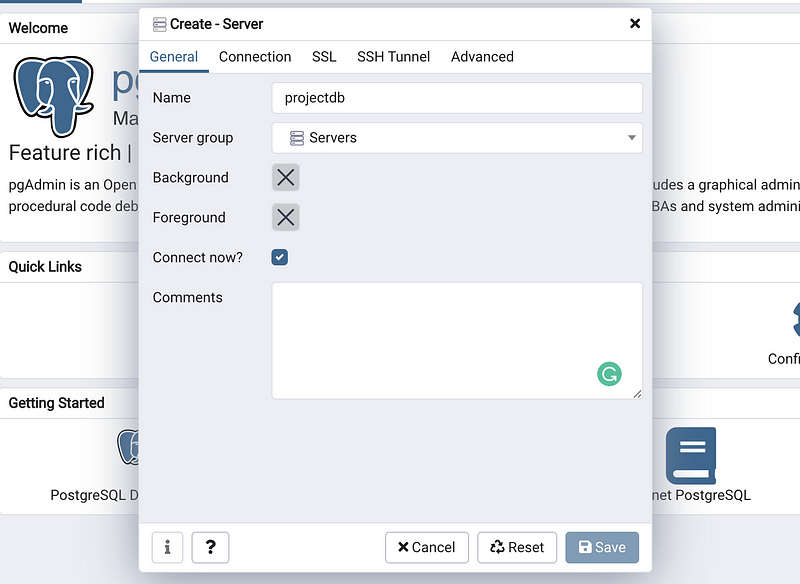
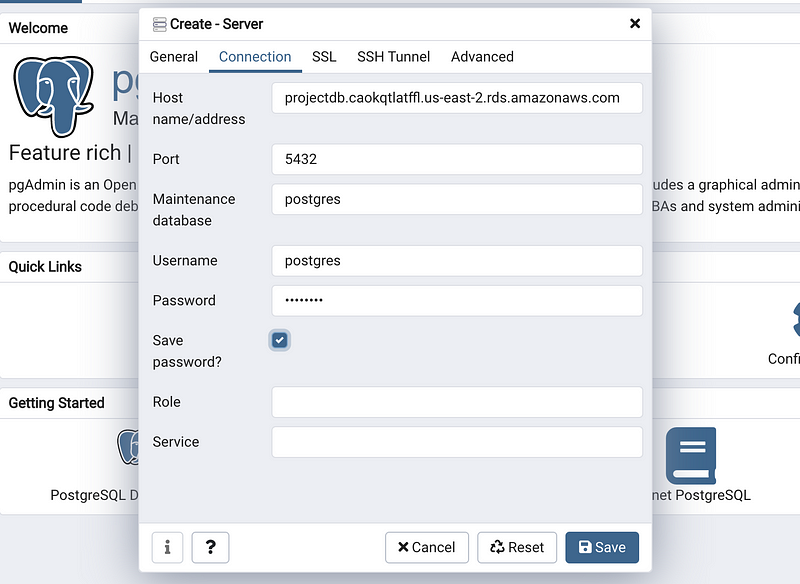
Then we give its name as the “projectdb” and we select the connection tag to configure more about this server.
Under the connection tag, first of all, we copy and paste the endpoint information from the AWS and then we should type in the password of this database. Keep the other blanks as default if you followed our steps of creating a RDS instance. Then click on Save to save our server.
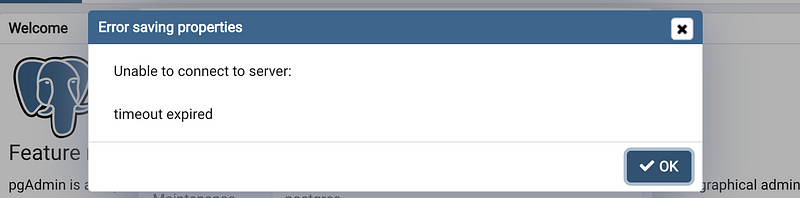
Now, after a second, we will have a problem: connection time out! Again, this is a problem because of our firewall settings.
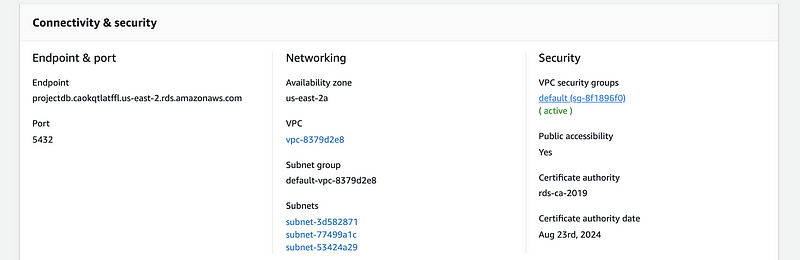
Let’s go back to our RDS dashboard and from the Security, we can find a VPC security groups. Click on it to change its inbound rules. Then click on the “Security group ID” to change the rules.
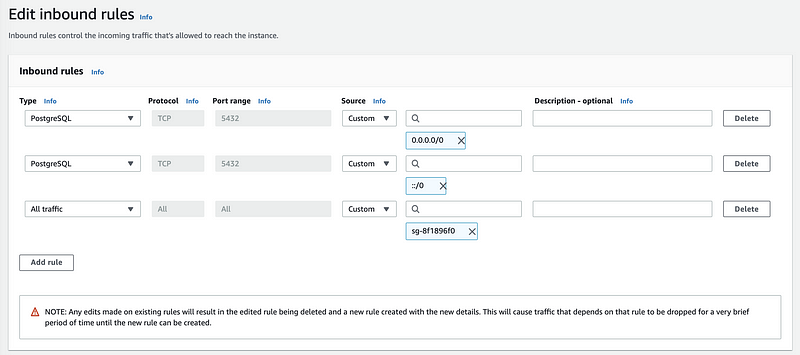
Then we select the type as PostgreSQL and choose anywhere for the Source. Click on “Save rules” to make this work.
Now let’s go back to the PgAdmin, and reconnect. Now we can successfully connect to the database service.

- Load data from S3 to RDS
First of all, we upload the “nyt_bestsellers.json” file to the S3 bucket. Remember to change the permissions after this.
{
    "Version": "2012-10-17",
    "Id": "Policy1606547208127",
    "Statement": [
        {
            "Sid": "Stmt1606547131805",
            "Effect": "Allow",
            "Principal": "*",
            "Action": "s3:GetObject",
            "Resource": [
                "arn:aws:s3:::project1127/nyt_bestsellers.json"
            ]
        }
    ]
}
Secondly, we go back to the RDS dashboard and open the query tool of this database,
Where we can write,
CREATE EXTENSION aws_s3 CASCADE;
this query will install the aws_s3 extension for us,
| NOTICE:  installing required extension "aws_commons"
| CREATE EXTENSION
Then we create a new table as we have done for the other database,
CREATE TABLE nyt_bestsellers (
    bestsellers JSON
);
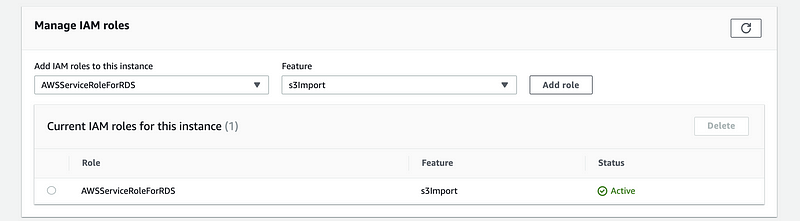
To load the data from the S3 to RDS, we should add an IAM role to this database. From the Manage IAM roles section, we choose the role of “AWSServiceRoleForRDS” with the feature “s3Import”.
Then we go back to the PgAdmin and run the following query,
SELECT aws_s3.table_import_from_s3(
    'nyt_bestsellers', 'bestsellers', '',
    aws_commons.create_s3_uri('project1127', 'nyt_bestsellers.json', 'us-east-2')
);
where the we have to add a “create_s3_uri function” which follows the rules of aws_commons.create_s3_uri(<bucketname>,<filepathname>,<region>).
Then we can successfully load the data from S3 to RDS by this method. To check our result, we can write,
SELECT *
FROM nyt_bestsellers;