Video Game Design 2 | Case Study: Rolling a Ball
Video Game Design 2 | Case Study: Rolling a Ball
1. Case Study: Rolling a Ball
Note that this project can be found on this page.
(1) Creating a New Project
- Open Unity Hub and log in with your account
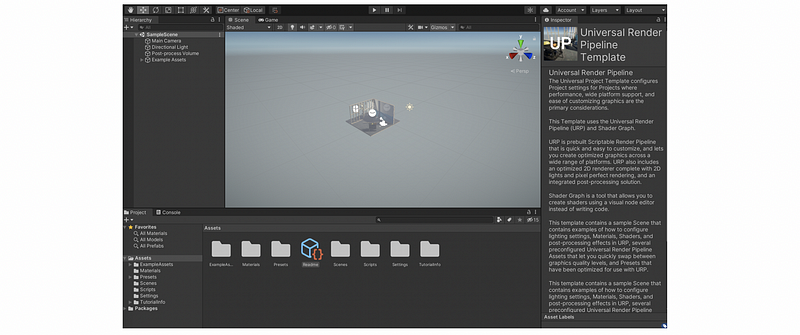
- Select Projects > New to open a new project window
- Select 3D Sample Scene (URP), and this means to create a universal render pipeline across all the platforms
- In the Project Name field, call this project
Rollaball - Select Create to make the project
Now we have our workspace.
(2) Setting Up the Workspace
- Choose a Layout: Commonly, we will choose to use the default one
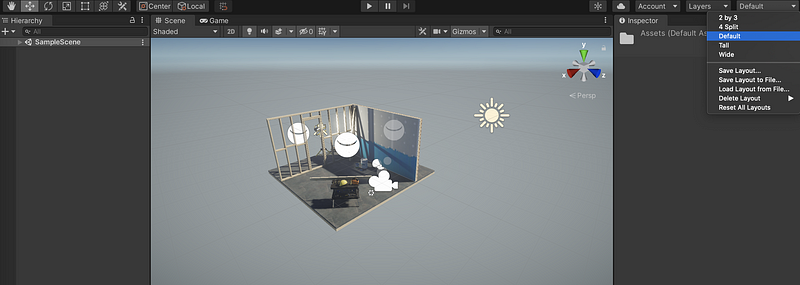
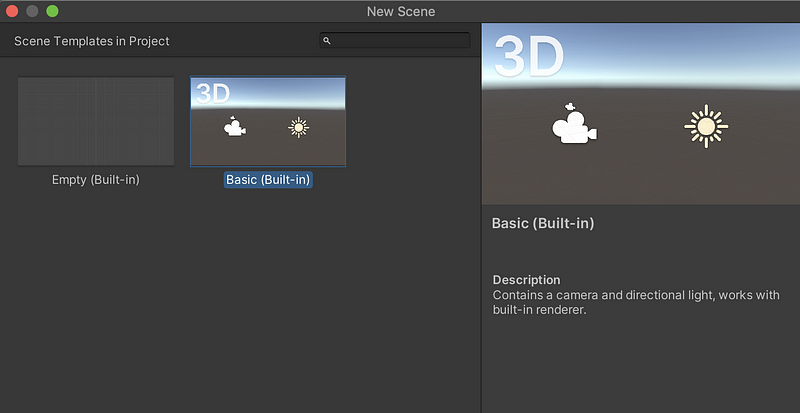
- Create a New Scene: Select File > New Scene > Basic (Built-in)
- Create a new folder in the Assets and then move all the present assets inside this folder
- Select File > Save As, then add a new folder called
Scenes, inside this folder, let’s call the present senseMiniGame
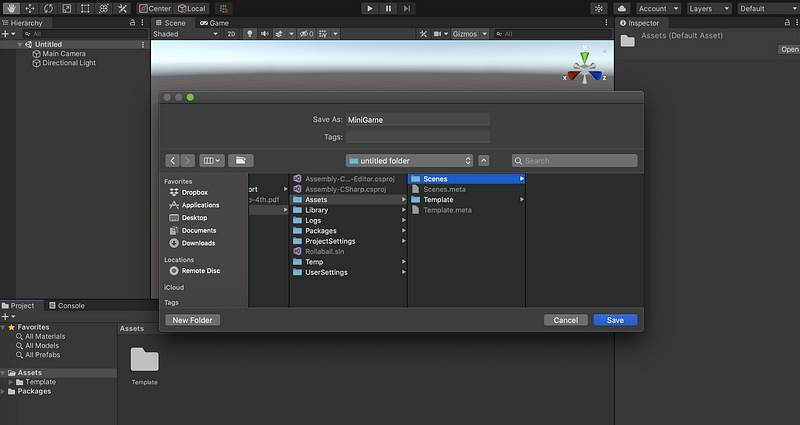
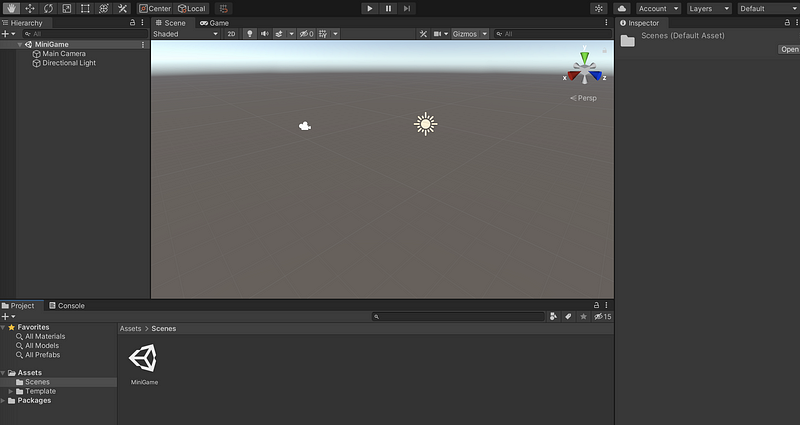
If we can find a Scenes folder in the Assets , and there’s a scene called MiniGame inside, we are okay to move on to set the play area of the game
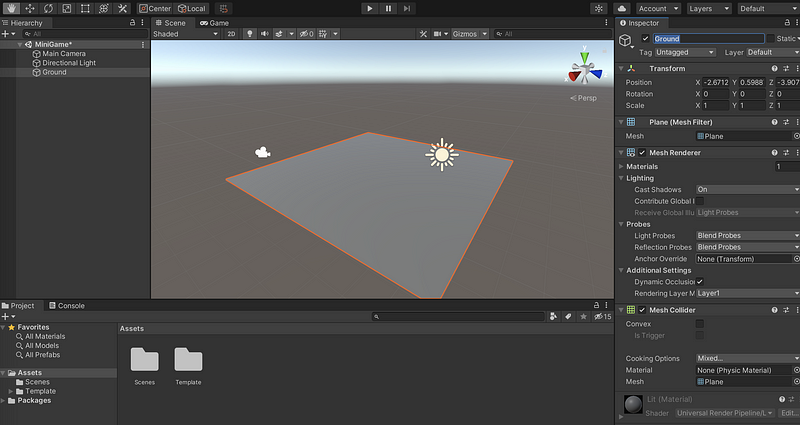
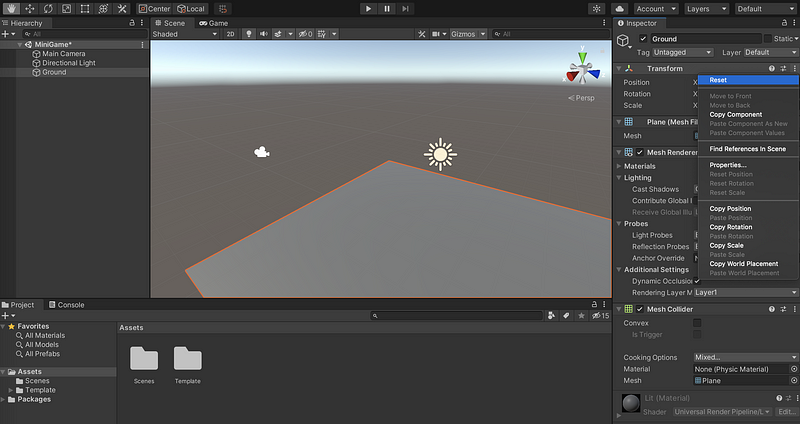
(3) Create a Primitive Plane
- Create a plane by: GameObject > 3D Object >Plane

- Modify the plane name to
Ground, then press enter to save it
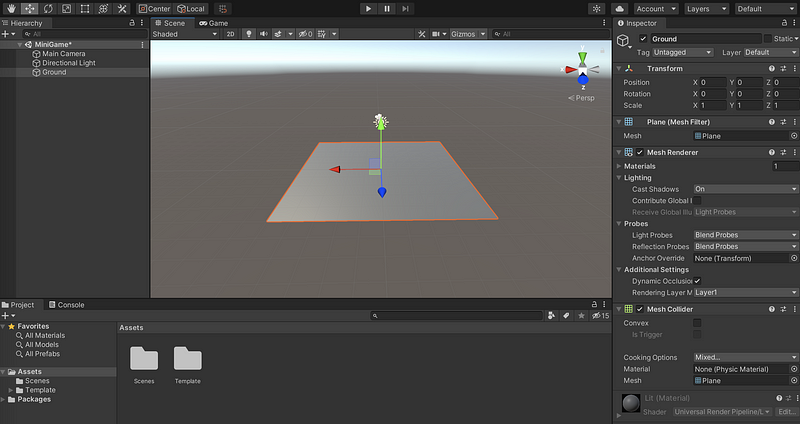
- Select Transform > Reset, to reset the transformation
- Press key f to see the scene view, make sure you select the component
Ground
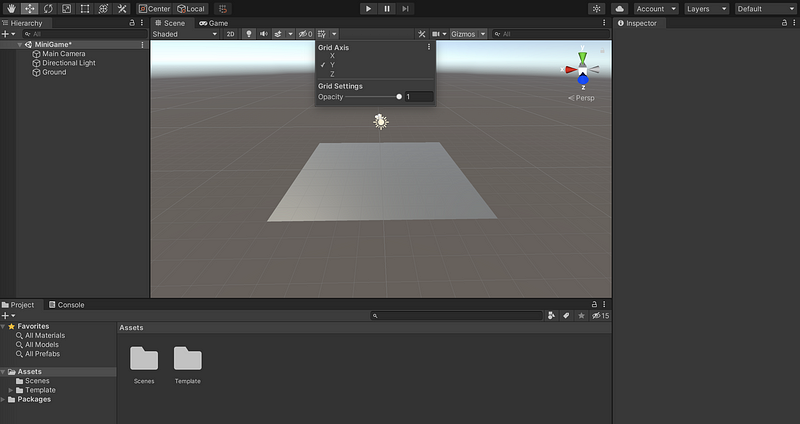
- Grids can be added by X-, Y-, or Z-axis, and we can set the opacity of the grids
(4) Scale the Ground
Typically, we have three ways to scale the ground,
- Select the scale tool on the left-up side (or press the hotkey R), then click and drag to scale the plane
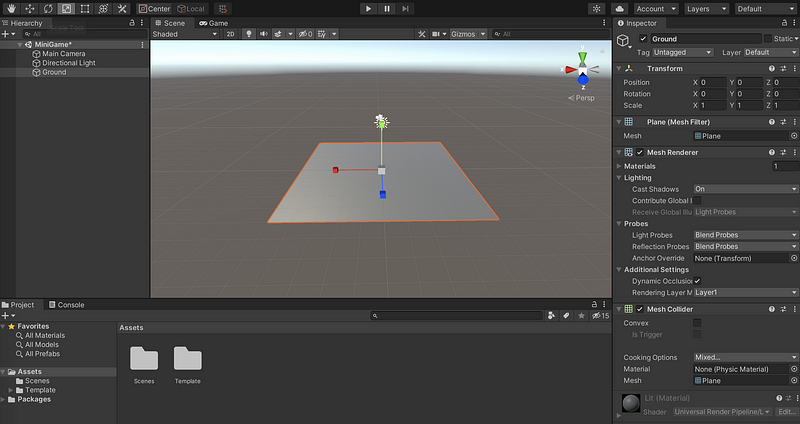
- Find Transform > Scale, then click and move the mouse on X, Y, or Z. You can also type in a value directly, and then enter to confirm it

- Set Scale X = 2, Y = 1, Z = 2. Press f to adjust the frame. A plane is a one-surface object and the Y scale doesn’t means anything for us. If the scale of Y is smaller than 0, then the plane will have the surface in the opposite position

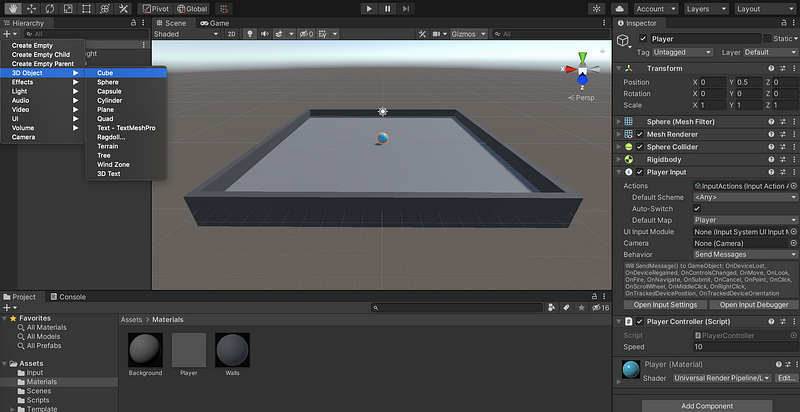
(5) Create a Player Object
- Select + in the Hierarchy tag, then choose 3D Object > Sphere
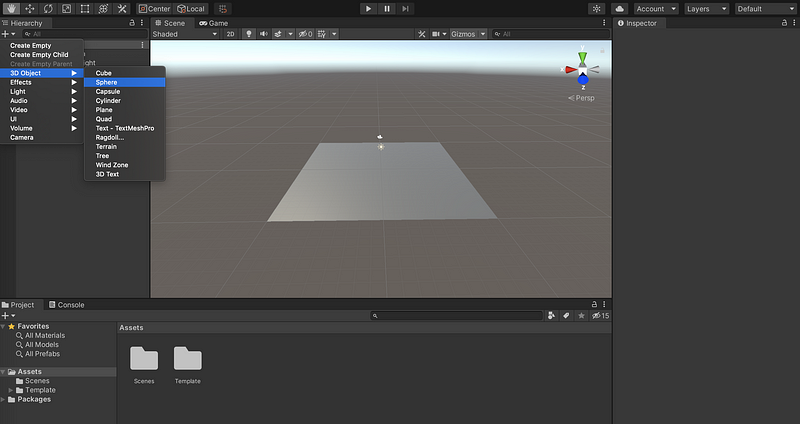
- Reset its transform and then rename this object to
Player
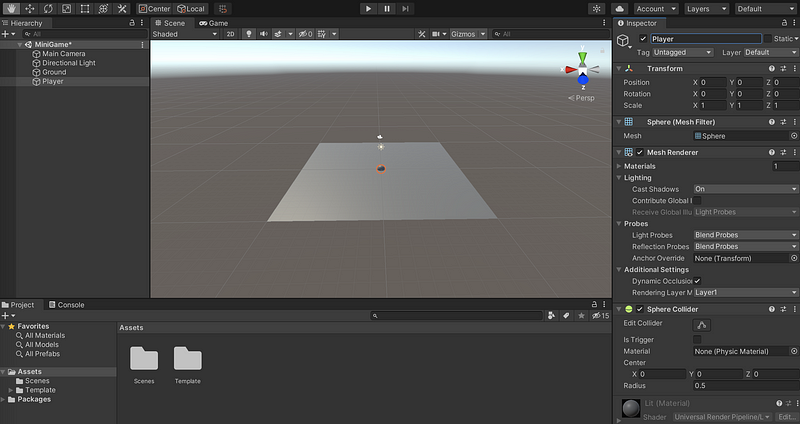
- Press the hotkey F to focus on this new sphere object, we can discover that half of the sphere is buried under the ground
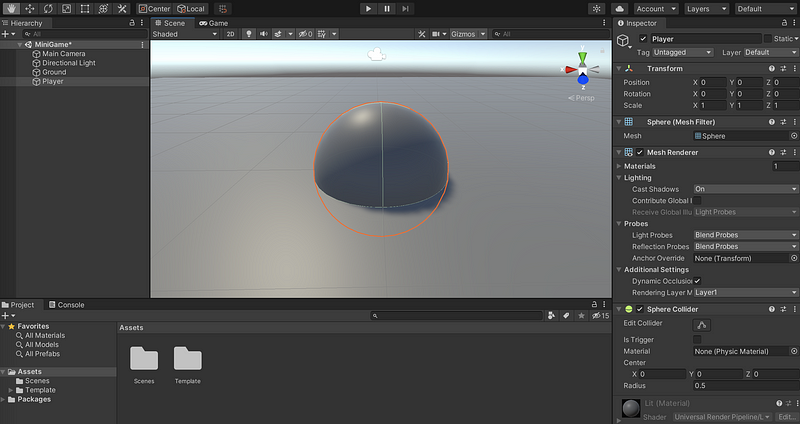
- Set Y position of the sphere to 0.5 in order to make it place on the ground in a proper way
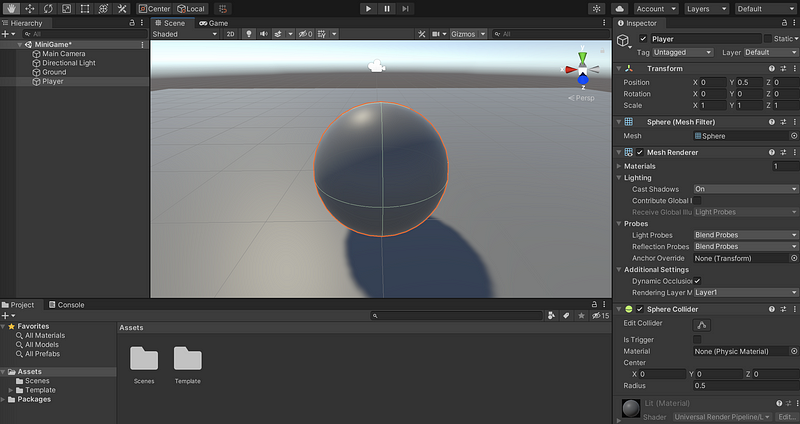
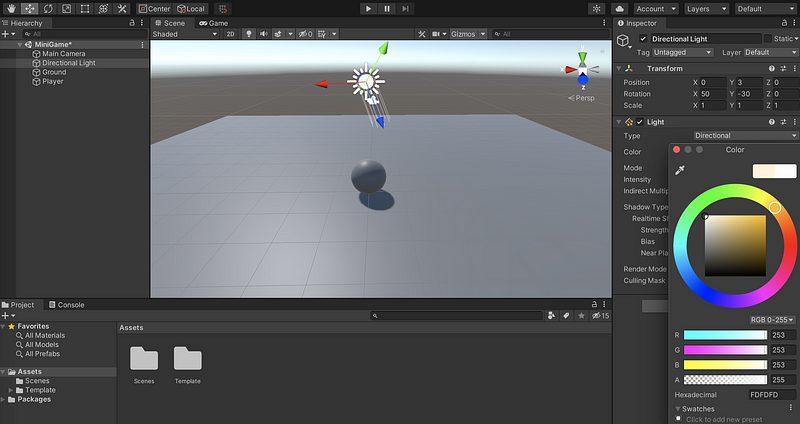
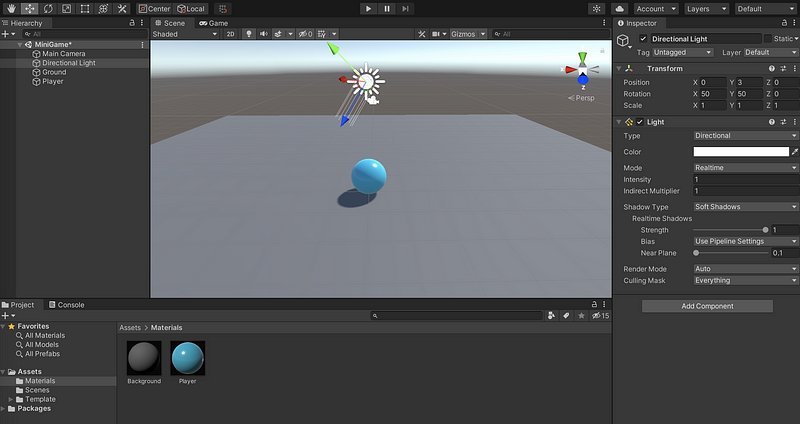
(6) Adjust the Default Lighting
We can observe a shadow of the sphere and this is because of the default lighting. Now, let’s see how to adjust it.
- Click on the Directional Light object, find Light > Color, then switch the color of the light from yellow to pure white. We can also use the color picker to specify a particular color (pure white =
(255, 255, 255)).
(7) Add Colors with Materials
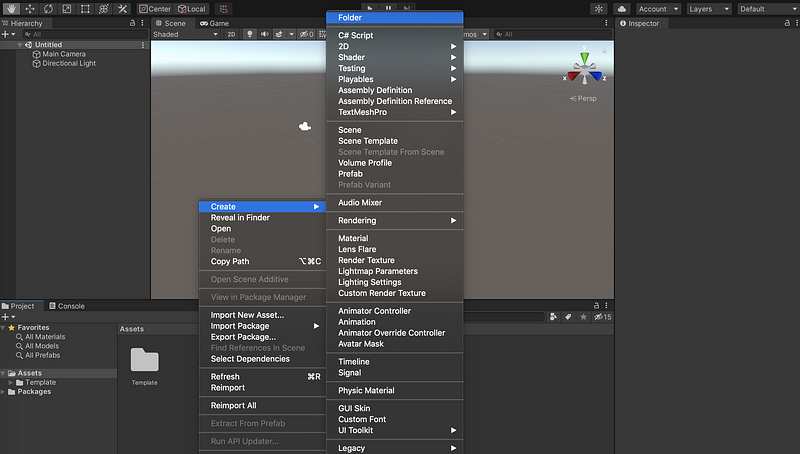
- Right-click on the Assets and select Create > Folder. Rename the newly created folder to
Materials
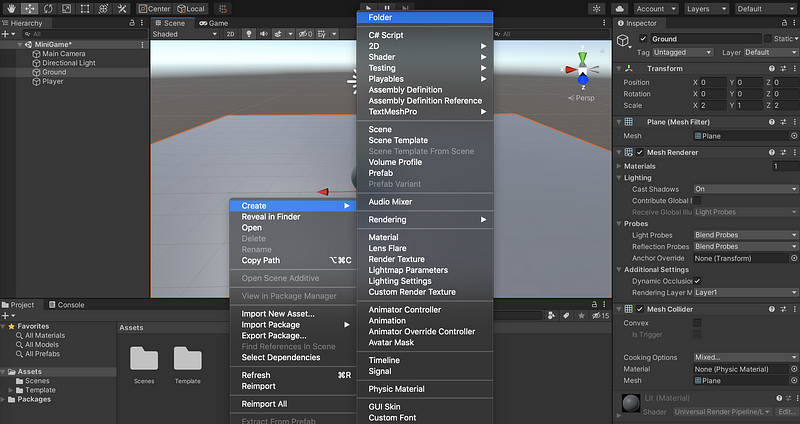
- Right-click on this folder, select Create > Materials to create a new material
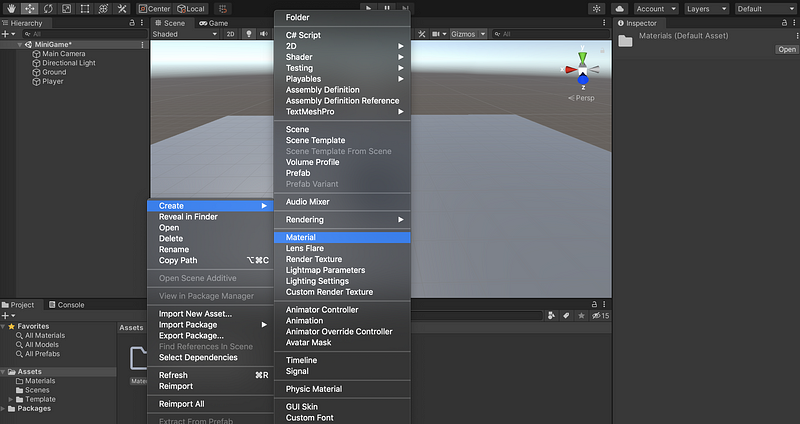
- Rename this new material as
Background
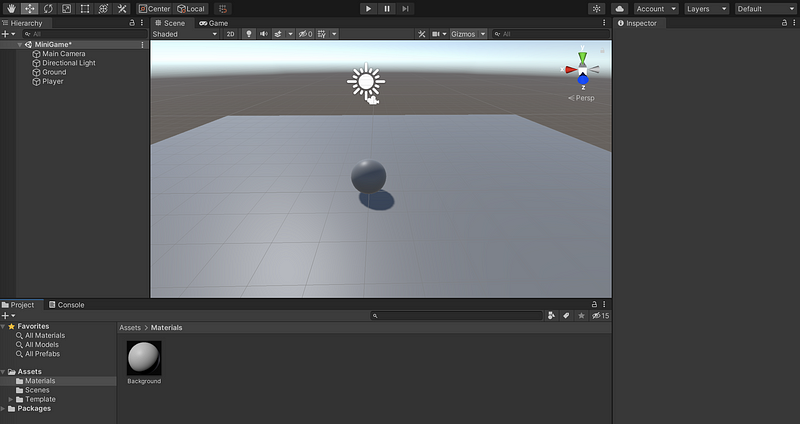
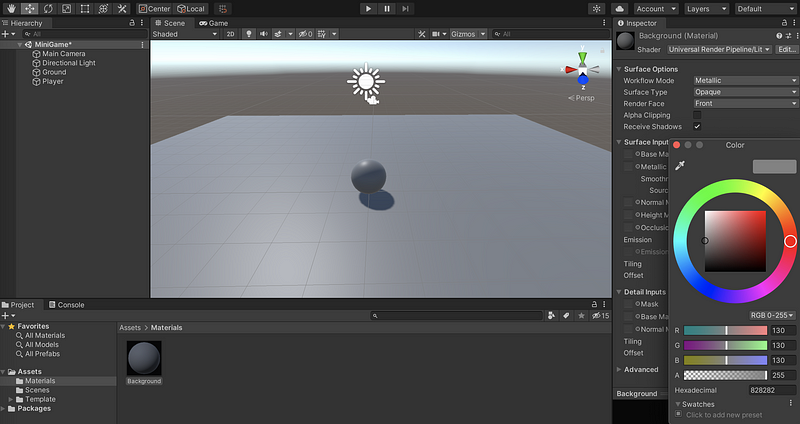
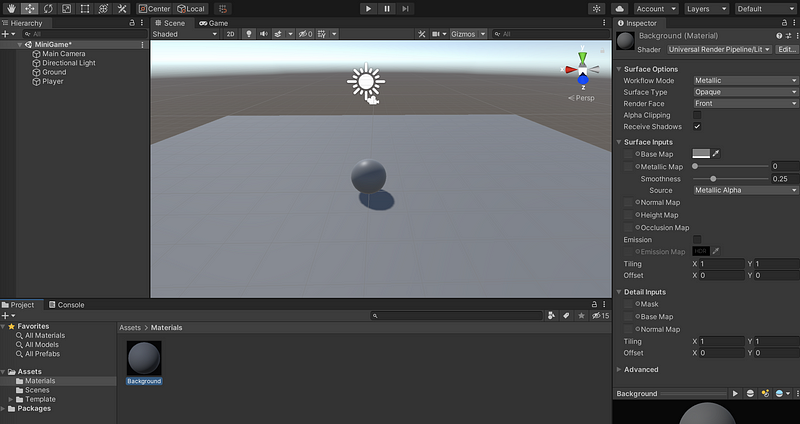
- Click on this material and click on the color plate in the Inspector. Set the color to
RGB = (130, 130, 130). Then keep the metallic to0and set smoothness to0.25. Press enter to save the settings.
- Then we can simply click and drag this material on the ground and release the mouse. Feel free to use
ctrl+zif you regret it.
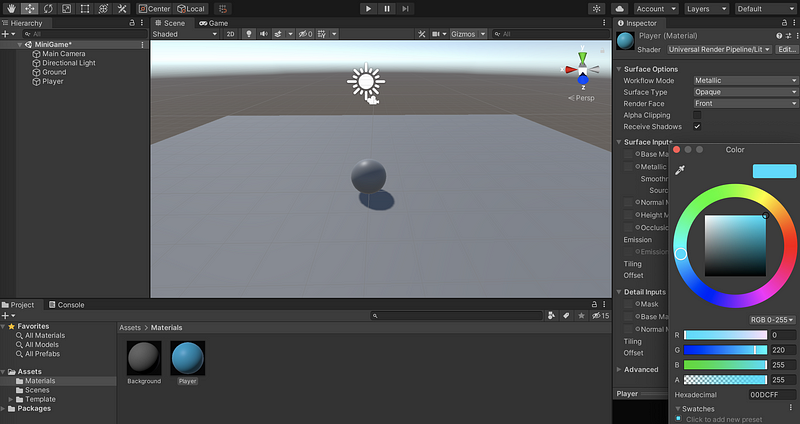
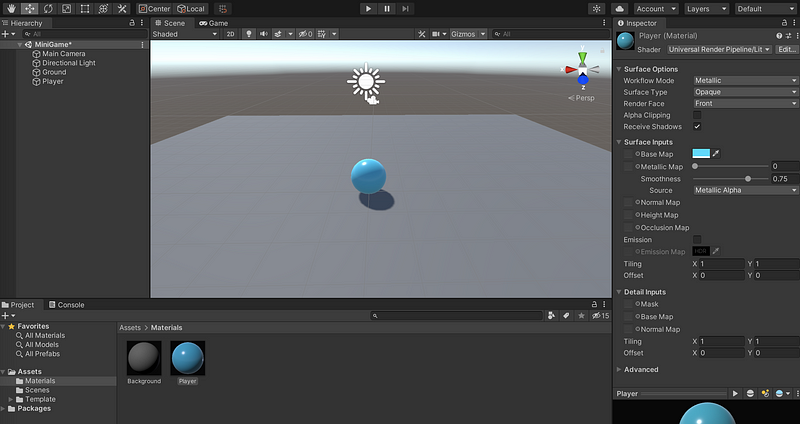
- Create another material called
Playerand set itsRGB = (0, 220, 255), which is a light blue. Keep the metallic to0and set smoothness to0.75.
- Again, click, drag, and release this material onto the player sphere.
- Finally, let’s change the direction of the light to
(50, 50, 0)
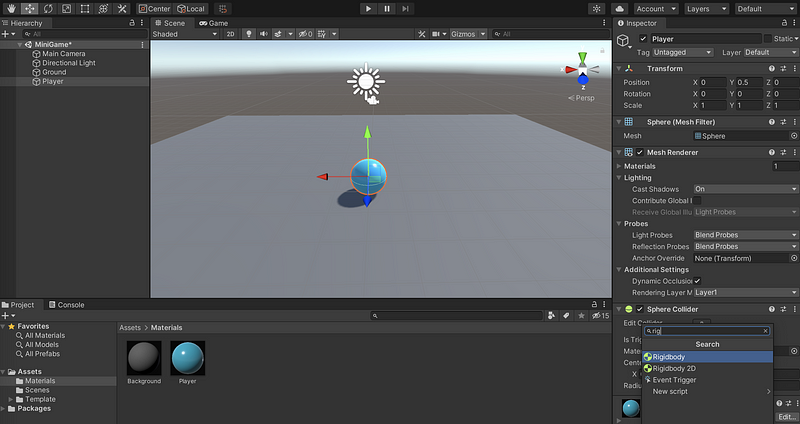
(8) Add a Rigidbody to the Player
- Select the Player object, click on Add Component. We have to search for
Rigidbodyand then click to add it. Now the Player object fits the physical rules and we can apply some force to it.
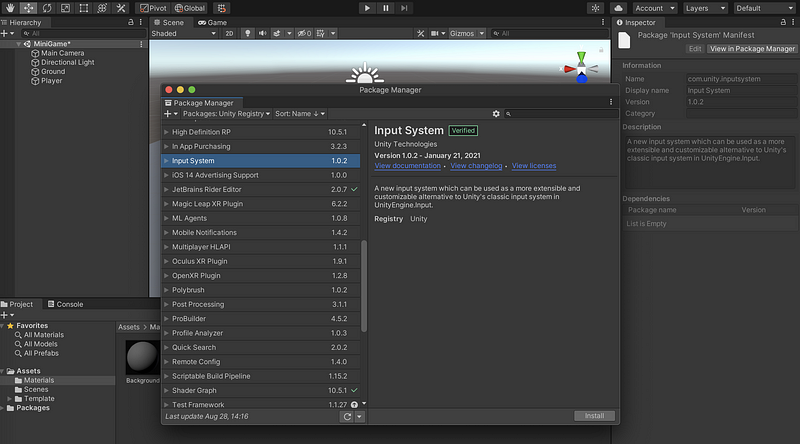
(9) Install the Input System Package
Now, it’s time to move the player. However, it may not be possible if we can not read from the user’s inputs. Therefore, the first thing now we have to do is to install the input system package.
- Select Window > Package Manager
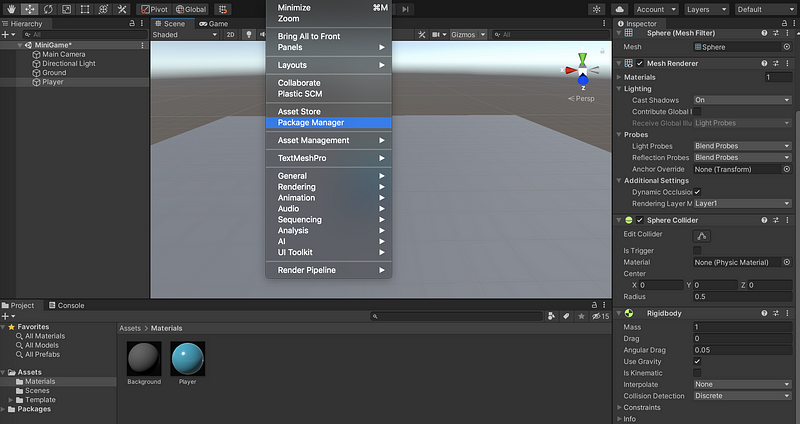
- Select Unity Registry to review all the currently available Unity packages
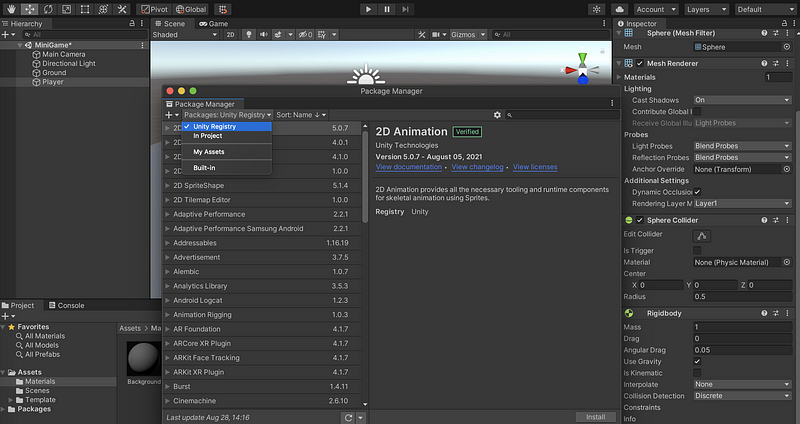
- Find Input System and then click on Install to install the package. If you meet a dialogue window, just click Yes. Click on save to save the settings to the current scene.
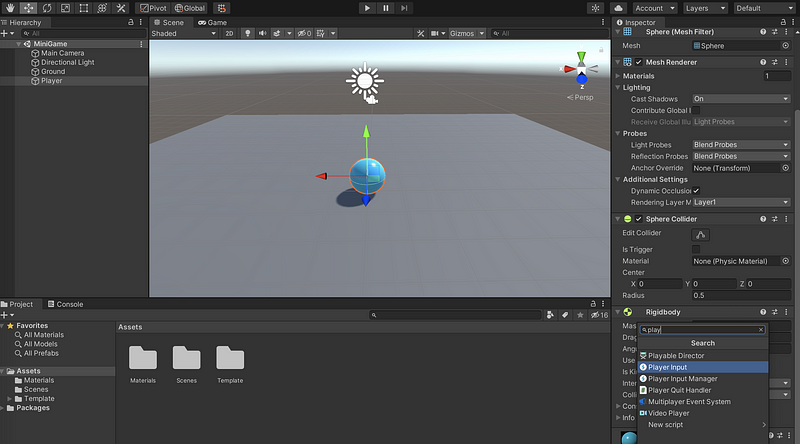
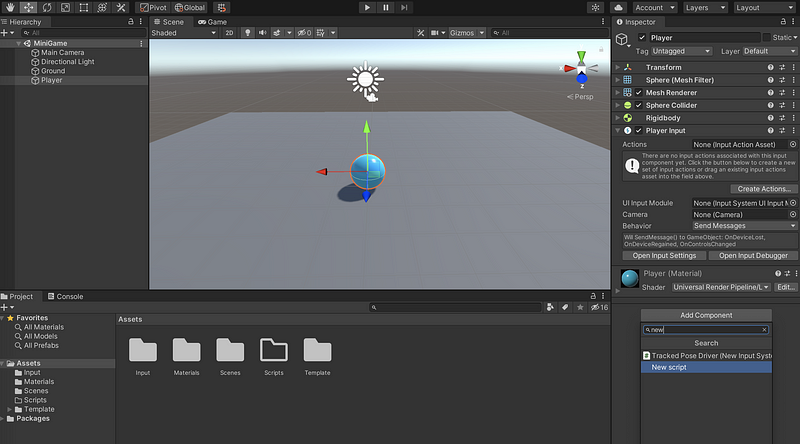
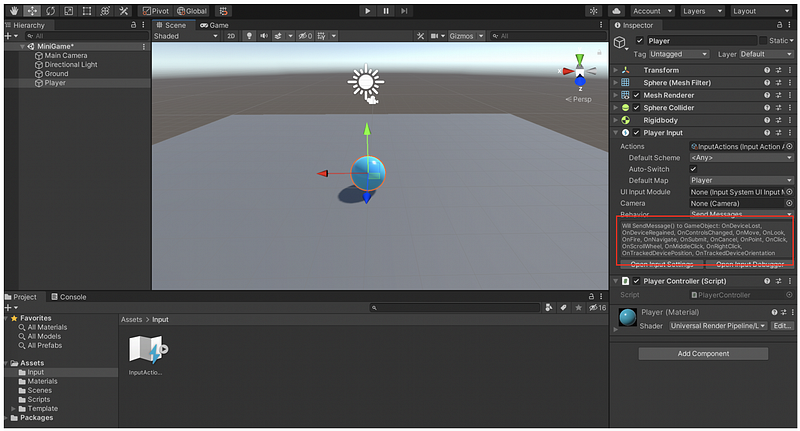
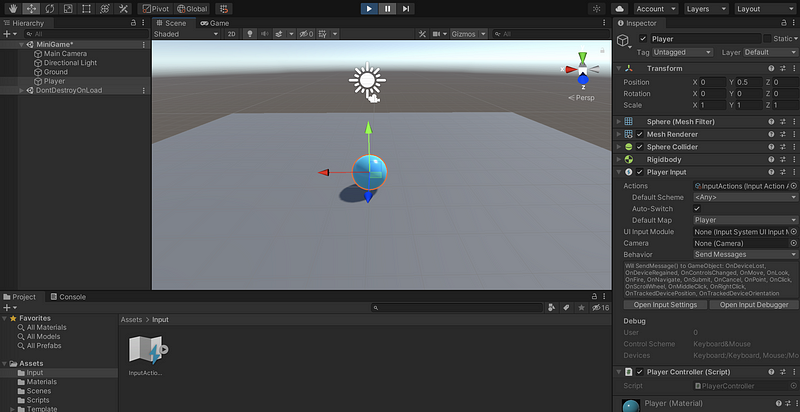
(10) Add a Player Input Component
- Select the Player object, then choose Add Component. Search for Player Input, then click to add it.
- Select Inspector > Player Input > Create Actions > New Folder. Then create a new folder in
AssetscalledInput
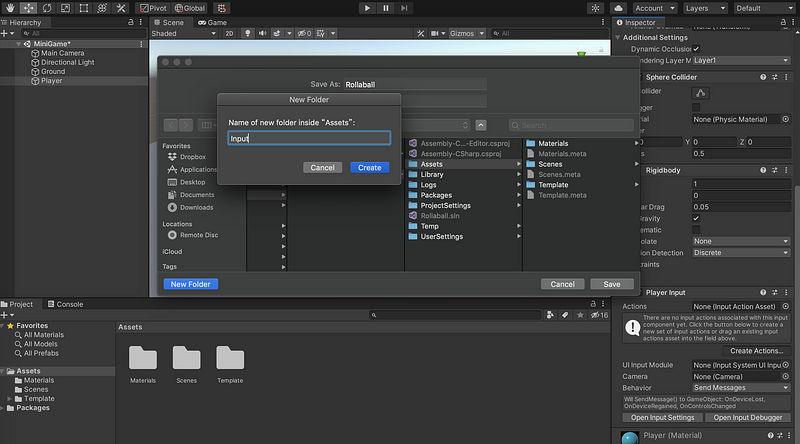
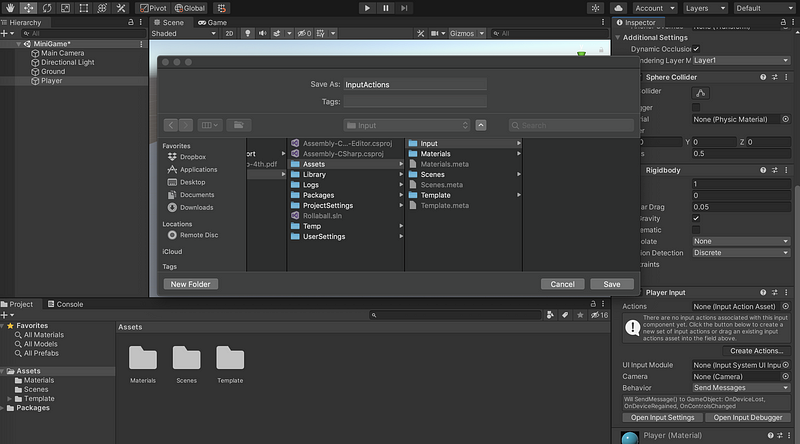
- Name the file as
InputActionsand then click on Save. Note that if you meetNullReferenceException: SerializedObject of SerializedProperty has been Disposed., you have to save the current project and restart it again.
(11) Create a New Script
- Create a new folder called
Scriptsin Assets.
- Select the Player object, then click on Add Component. You can search for New Script and name it
PlayerController. To make things organized, we will then drag this file created in the Assets folder to the Scripts folder.
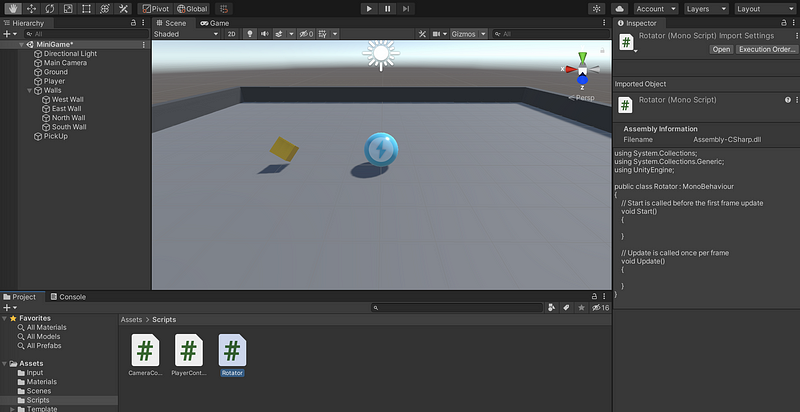
- Select the C# script we have created for a preview of this project. We can double-click the script or click on the Open button to open this script.
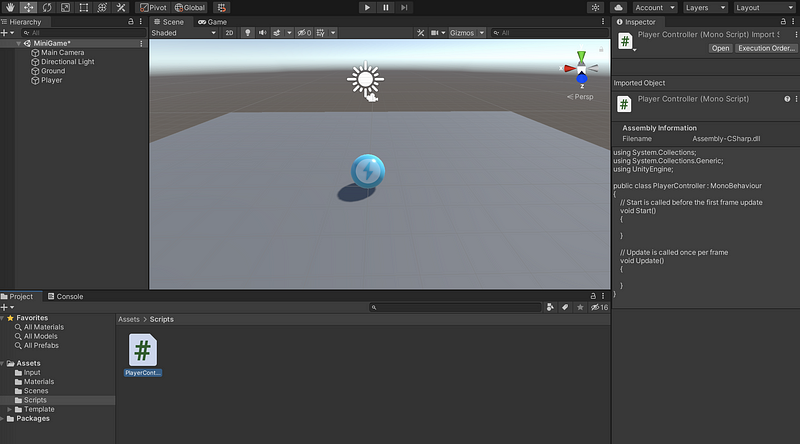
(12) Write the OnMove Function
- After we pressed the Open button, we will be redirected to the Virtual Studio. There are two templates in this template
Start()andUpdate(). The code inStart()is the code executed when the game starts, and the code inUpdate()is the code called once per frame in the game. Because we don’t need to update the game once per frame, we can simply delete the functionUpdate().

- The PlayerInput component will notify the PlayerController script of action happening by calling functions with predefined names in our scripts. The predefined functions for the changes in movement control when pressing WASD or moving a joystick on a controller is called
OnMove. In that function, the computer will read the value from the input, for example, up, down, left, or right. And then we will use that information to move the ball using code in the update function.
The function declaration for the OnMove function is,
void OnMove(InputValue movementValues) {}- The
InputValuedatatype is used for storing the input information. We can access the value of it by,
movementValues.Get<Vector2>();
Vector2 is a 2D vector data type, and Get<Vector2>() method returns a 2D vector with the input information. Therefore, we can store this value in a Vector2 variable movementVector .
Vector2 movementVector = movementValues.Get<Vector2>();
(13) Write the Start() Function
- To move the ball, we have to make this
movementVectorvariable interact with the physics engine. We have to use this variable to add or apply forces to the Rigidbody. To achieve this, the current script should be able to access the Rigidbody component, and then add force to the Player object. The data type of a Rigidbody isRigidbodyand we would like to declare a private one in the script,
private Rigidbody rb;
- After that, we should also set the value of the variable
rbby getting a reference to the Rigidbody component attached to the player sphere object. The function we are going to call isGetComponentand we should write the following assignment in thestart()function because this has to happen at the beginning.
rb = GetComponent<Rigidbody>();(14) Write the FixedUpdate() Function
- We also need to update the frames to make the ball movement in fixed time. Commonly, the
FixedUpdate()function will be called when there’s a need to update. In each update, we will apply the information to themovementVectorby the Rigidbodyrb. This can be achieved by calling therb.AddForcemethod. However, one problem with this method is that it must take a 3D vector as its parameter, whilemovementVectoris merely aVector2. In order to make things easy, we will create two private float attributesmovementXandmovementYthat store the information inmovementVectoron the axis X and axis Y. And then we will combine them together as aVector3data type and then pass it to theAddForcemethod. The whole program is,
using System.Collections;
using System.Collections.Generic;
using UnityEngine;
using UnityEngine.InputSystem;
public class PlayerController : MonoBehaviour
{
    private Rigidbody rb;
    private float movementX;
    private float movementY;
    // Start is called before the first frame update
    void Start()
    {
        rb = GetComponent<Rigidbody>();
    }
    void OnMove(InputValue movementValues)
    {
        Vector2 movementVector = movementValues.Get<Vector2>();
        movementX = movementVector.x;
        movementY = movementVector.y;
    }
    private void FixedUpdate()
    {
        Vector3 movement = new Vector3(movementX, 0.0f, movementY);
        rb.AddForce(movement);
    }
}
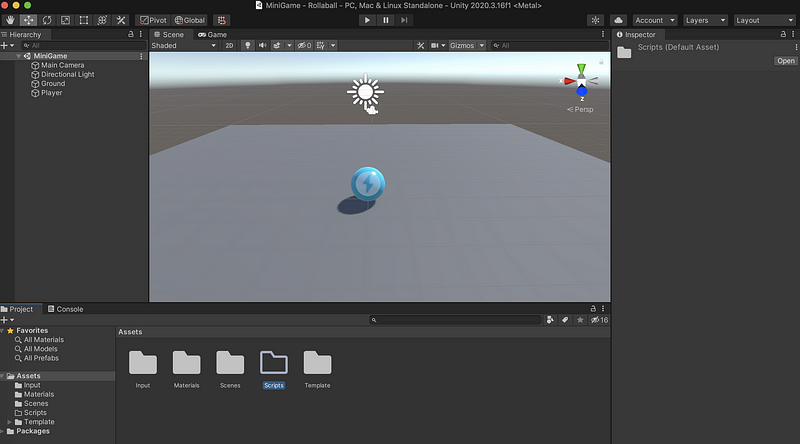
(15) Test It In the Game
- Finally, let’s click the play button ▷ to run the game.
- Then we can use WASD to control and move the ball. But you may notice the speed of the ball is quite slow, and it would be better if we can make it faster.

Note that if we want to reset the game, we should click the play button ▷ again.
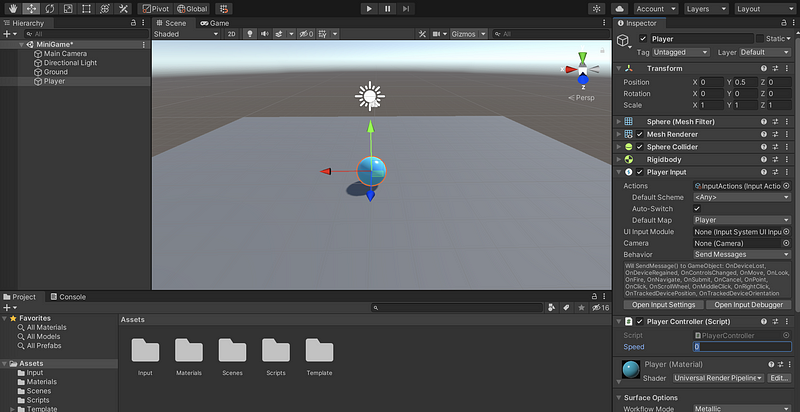
(16) Fix the Speed
- Open the script again. Now we would like to add a new public attribute called
speed. This attribute is initially set to 0, but we can change the value of it in the Inspector because it is a public attribute.
public int speed = 0;
- Also, we have to apply the speed to the movement by modifying the statement in
FixedUpdate. After that, we have to save the script.
rb.AddForce(movement * speed);
- Select the Player object, and now we can find a new variable called speed under the Player Controller (Script) tag. We can change this value to 10 and press enter to save it.
- Run the game again. Now, the speed of this ball is better.
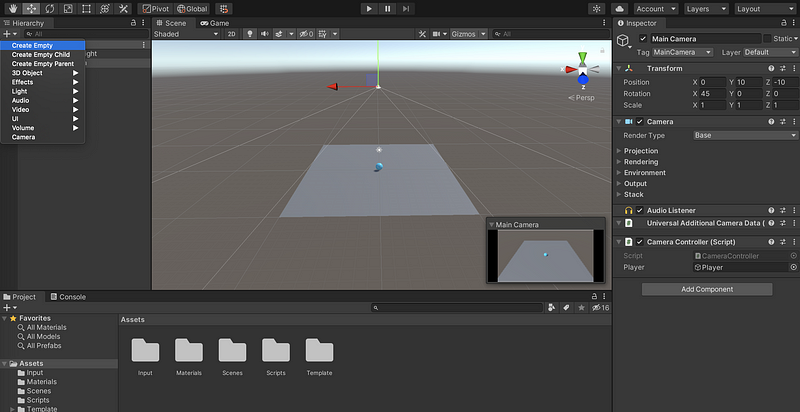
(17) Attach Camera to the Ball
- Select Main Camera object. Typically, for a 3rd person view, we have to set the transform
Position Y = 10andX Rotation = 45.
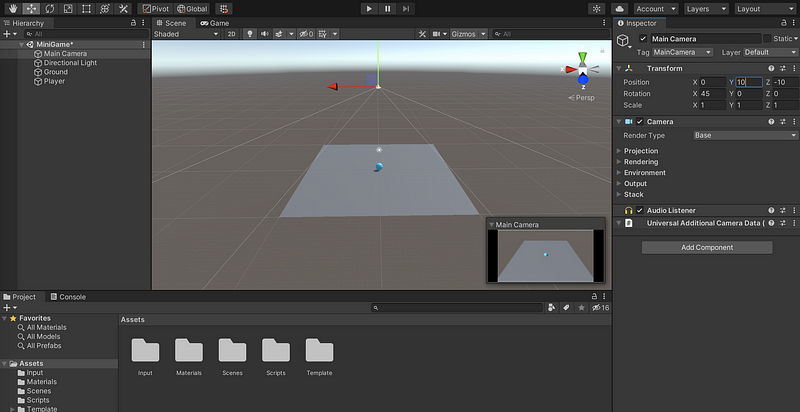
- The simplest way to attach the camera to that ball is to make the Main Camera object as a child of the Player object. We can drag the name of the Main Camera, and release it on the Player.

- Let’s try it in play mode. Ouch! This wild thing is definitely not what we are expecting. The reason for this is that when the Player sphere rotates, the main camera also rotates because it is a child object of the Player. In order to deal with this problem, we should not make the main camera a child of the Player. Instead, we will assign a constant distance between them, and this requires another script.
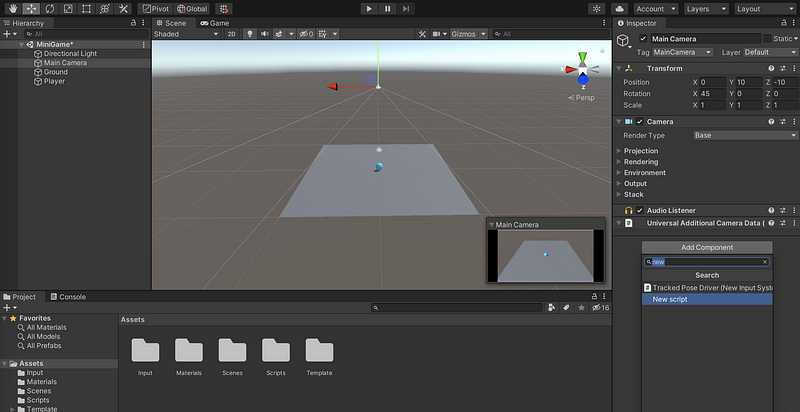
(18) Write A CameraController Script
- Select the Main Camera. Click on Add Component, and then search for New script. Name the new script as
Cameracontrollerand then create it. Move this script to theScriptsfolder.
- Select the script
Cameracontroller, and then click Open. The logic is that, in the beginning, we will calculate the distanceoffsetbetween the Player object and the Main Camera. Then in each frame, the position of the Camera should be the position of the Player plusoffset. The program should be,
using System.Collections;
using System.Collections.Generic;
using UnityEngine;
public class CameraController : MonoBehaviour
{
    public GameObject player;
    private Vector3 offset;
// Start is called before the first frame update
    void Start()
    {
        offset = transform.position - player.transform.position;
    }
// Update is called once per frame
    void Update()
    {
        transform.position = player.transform.position + offset;
    }
}
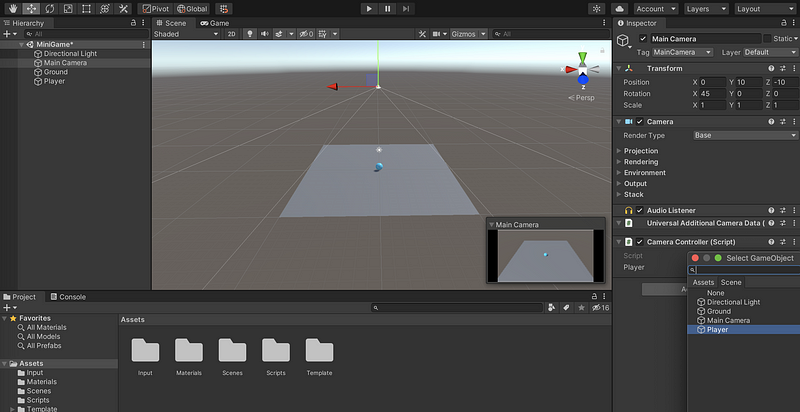
- The last thing we are going to do before testing is to add a reference to the Player object. Select the Main Camera, and we can find a Player tag under Camera Controller. Click on that and choose the Player object.
- Run the game and we will find the camera working for us.
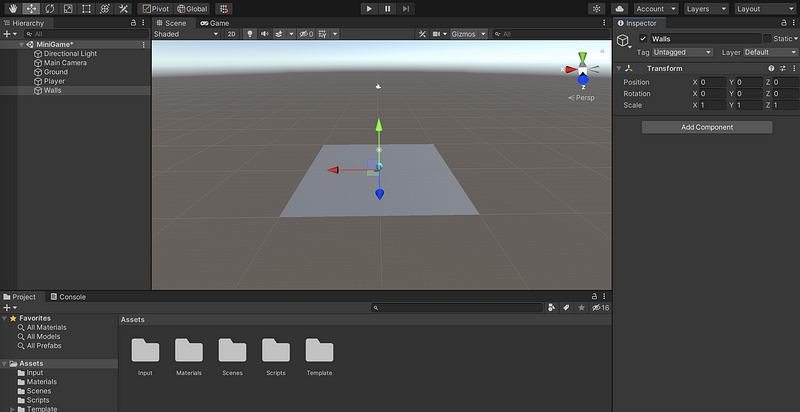
(19) Create a Wall for the Play Field
- Create a new empty game object: select hierarchy > + > Create Empty.
- Rename it as
wallsand also reset its transform. This will be the parent game object for all of the wall game objects.
- Select hierarchy > + > 3D object > Cube. Press the hotkey F to focus on it.
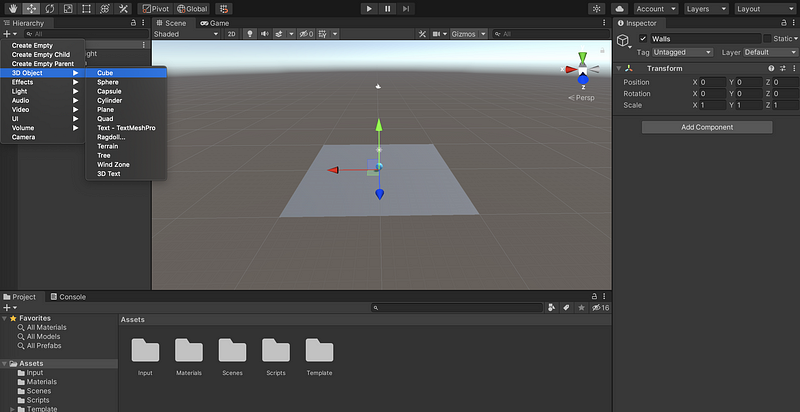
- Right-click on transform and select Reset. This resets the component to its default values.

- Drag and release West Wall onto Walls, in order to make it a child of the Walls game object.
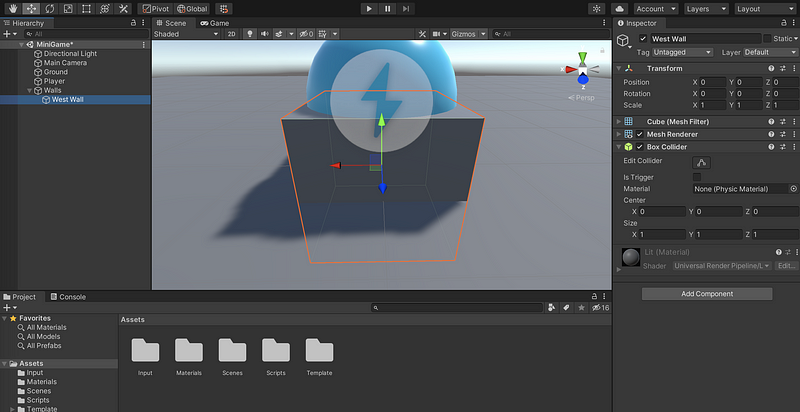
- Transform the cube to make it a wall. We should have
Position X = -10,Scale X = 0.5,Scale Y = 2,Scale Z = 20.5
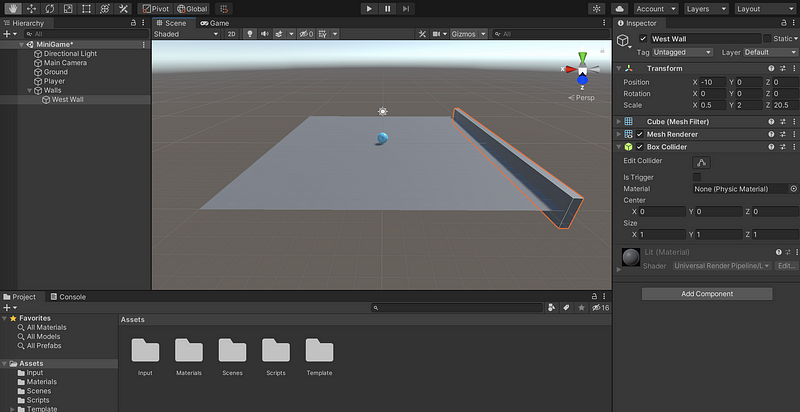
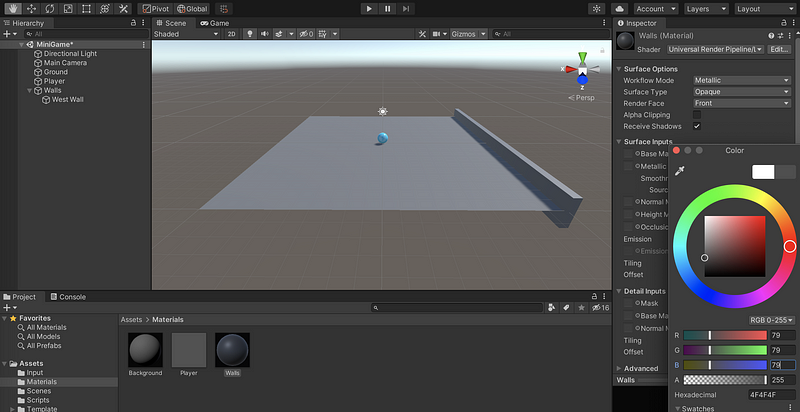
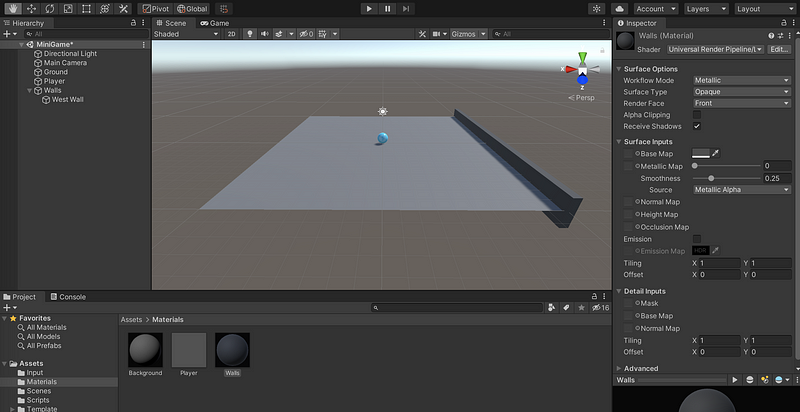
- Then we have to create a material
Wallsfor the walls. The color of the walls should beRGB = (79, 79, 79). Metallic should be kept to 0 and the smoothness should be 0.25.
- Grab the material
Wallsand use it for the West Wall. Great, now we have one wall built perfectly.
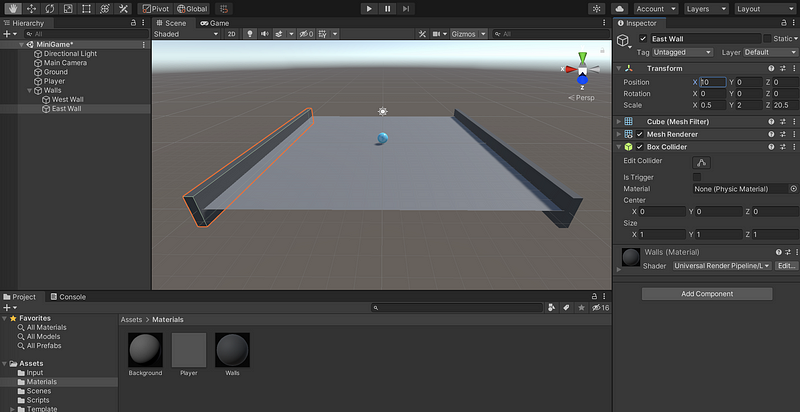
(20) Finish the playfield walls
- To create more walls, right-click on West Wall and then select Duplicate.
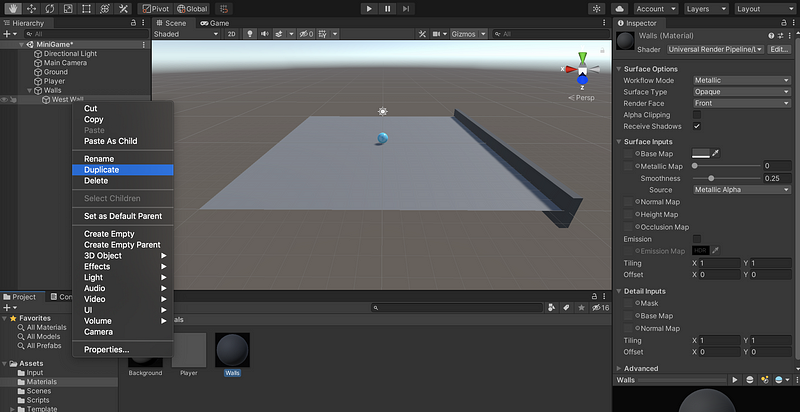
- Rename the wall as
East Walland then modify the Position X from -10 to 10.
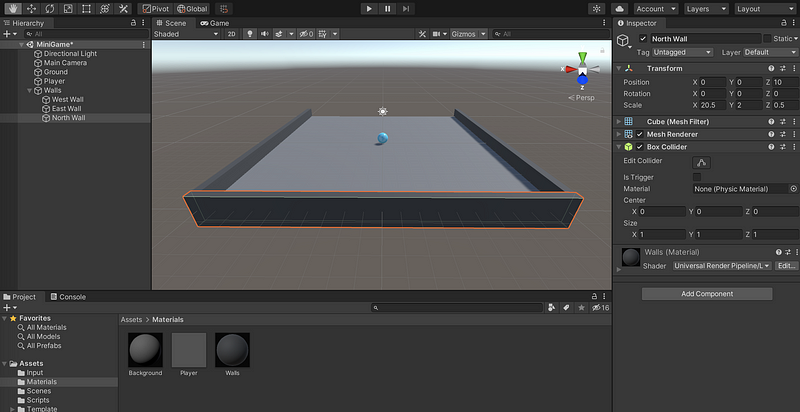
- Duplicate East Wall and rename it as North Wall. We should change the transform to
Position X = 0,Position Z = 10,Scale X = 20.5,Scale Z = 0.5
- Duplicate North Wall and rename it as South Wall. We should change the transform to
Position Z = 10

- Finally, let’s run the game. We can see that because the Player object is a Rigidbody, the Walls work as the boundary of the playfield.
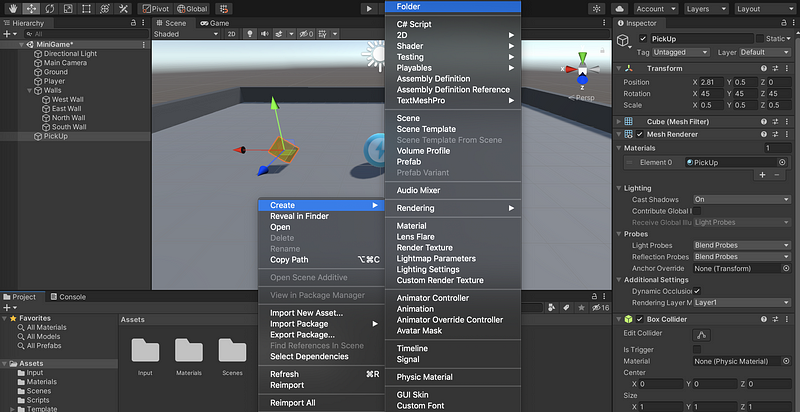
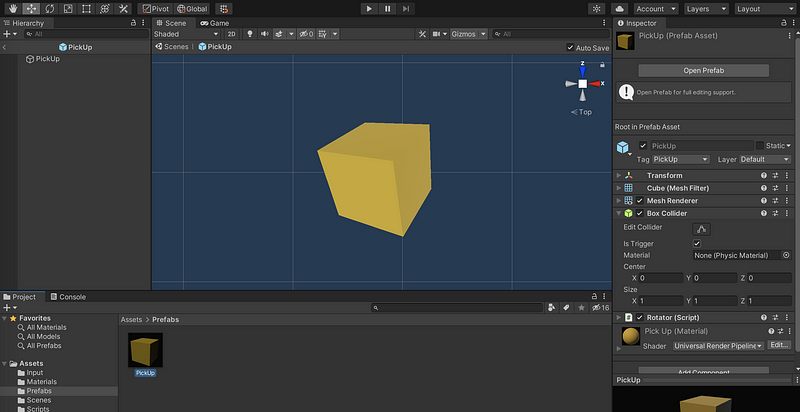
(21) Create a Collectible GameObject
- Let’s create a new cube object and rename it as
PickUp. We should also reset the transforms. Then press F to focus on it.
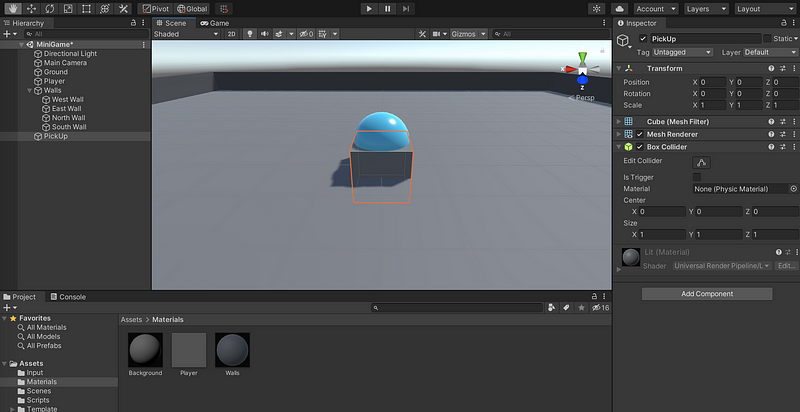
- Set the transform of the PickUp to
Position X = 2.81,Position Y = 0.5,Rotation X/Y/Z = 45,Scale X/Y/Z = 0.5
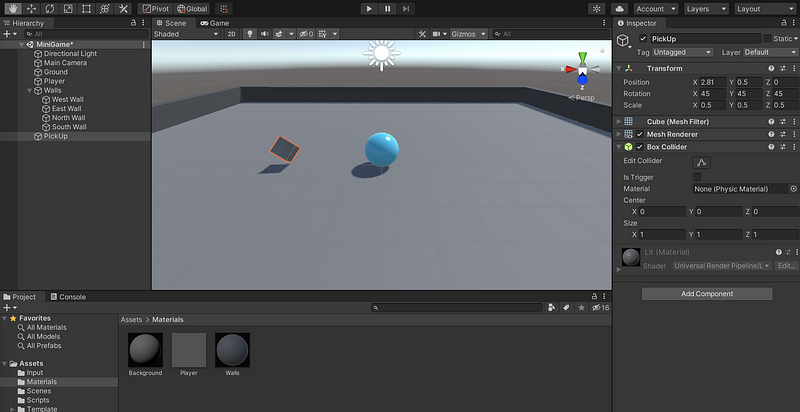
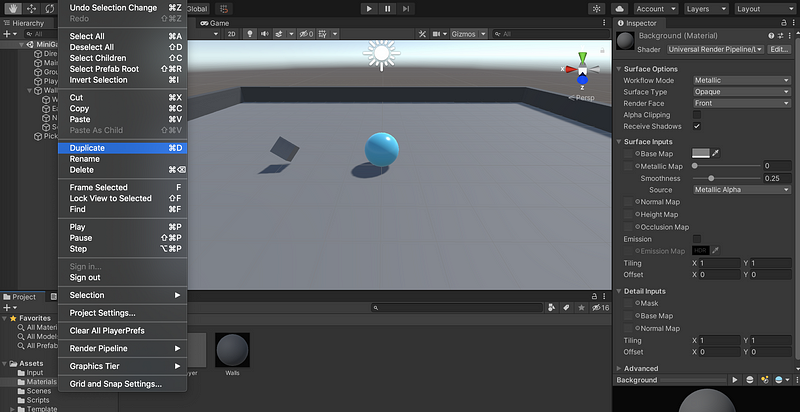
- We should also give this object a new material. Click on the Background material, and then select Edit > Duplicate. Rename it as PickUp.
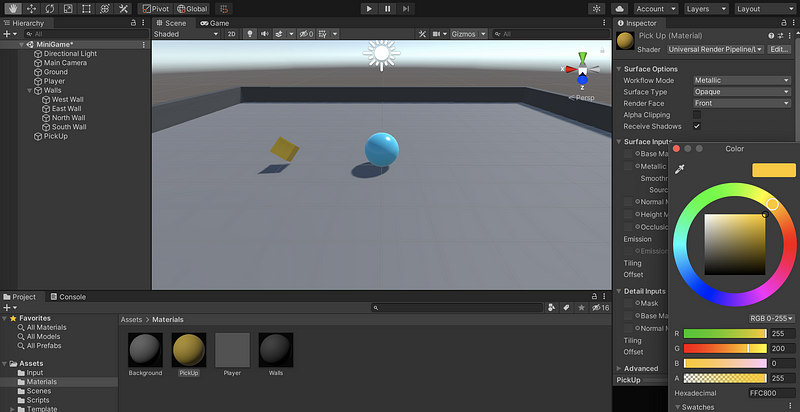
- Edit the color of this PickUp material to
RGB = (255, 200, 0)and then apply it to the PickUp object.
(22) Rotate the PickUp Game Object
- Create a new script called
Rotatorfor the PickUp object. Select Open.
- In the script, we can use
transform.Rotatemethod in the functionUpdatefor rotating the PickUp object.
transform.Rotate(new Vector3(15, 30, 45));
Because this action needs to be smooth and frame-rate independent. We can achieve these goals by multiplying the Vector3 value by Time.deltaTime . So the program is,
using System.Collections;
using System.Collections.Generic;
using UnityEngine;
public class Rotator : MonoBehaviour
{
    // Update is called once per frame
    void Update()
    {
        transform.Rotate(new Vector3(15, 30, 45) * Time.deltaTime);
    }
}
Let’s save it and return to Unity.
- Test the game and we can find out the PickUp object is rotating.
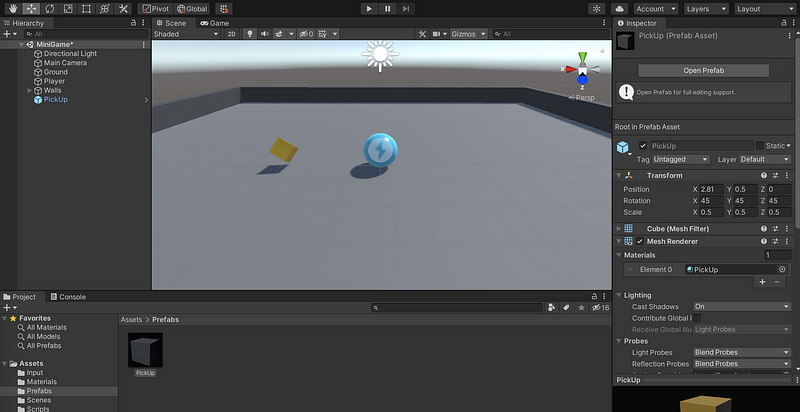
(23) Make Pickup a Prefab
- A prefab is an asset that contains a template, or a blueprint of a game object, or a game object’s family. Once an object turns into a prefab, we can use it in any scene of the current project.
- Go to the Assets root directory. Right-click and create a new folder. Set its name as
Prefabs.
- To make the PickUp object a prefab, we can simply drag it from the Hierarchy and put it into the Prefabs folder. Now we’ve turned the PickUp object into a prefab.
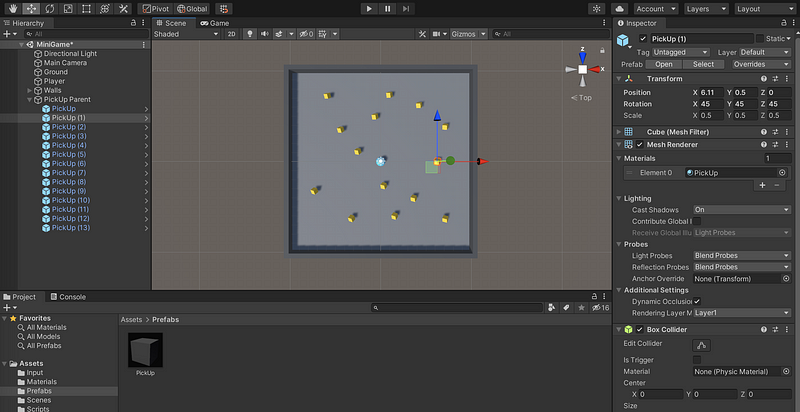
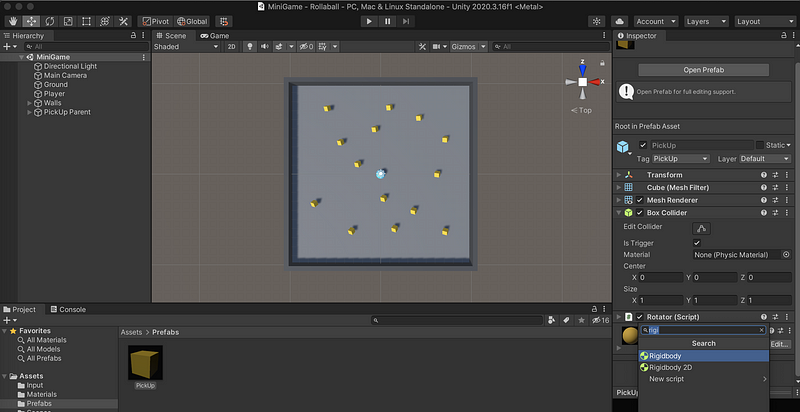
(24) Add More Collectibles
- Create an empty game object called
PickUp Parent, then reset its transform. Drag and release the current PickUp object to make the current PickUp object its child.

- Let’s go to the top view. Use
ctrl + Dto duplicate the PickUp objects and put them anywhere you like.
- Run to test the game now. You may notice that we can still not pick them up.
(25) Disable PickUp Objects with OnTriggerEnter Function
- When we talk about pick up a PickUp object, it doesn't really mean that they are picked up. When the Player object collides with the PickUp objects, the game will detect the collisions between the Player game object and the PickUps. This information will be used to trigger a new behavior of disabling the PickUp objects.
- To test collisions, we commonly use
OnTriggerEnterfunction.Collideris a data type that stores the information of a collision.
OnTriggerEnter(Collider other)
- Select
PlayerControllerscript and Open it. Add theOnTriggerEnterfunction. In order to disable an object that has been collided, we have to call theCollider.gameObject.SetActivemethod. When the parameter isfalse, the object collided by the Player will be disabled.
other.gameObject.SetActive(false);
- The Player can also collide on the Ground object and the Walls object, but we don’t want it to disable them. To avoid disappearing walls or ground, we have to use th built-in Unity Tag System, which allows us to identify a game object by comparing its tag value to a string.
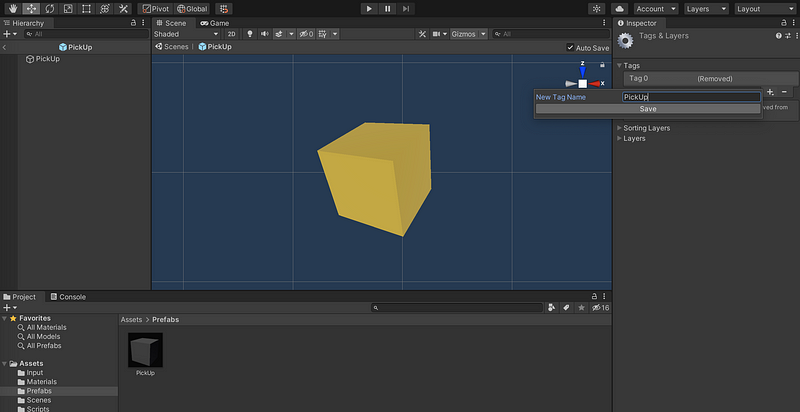
- Open the Prefabs folder and click on the PickUp prefab. Select Tag > Add Tag …
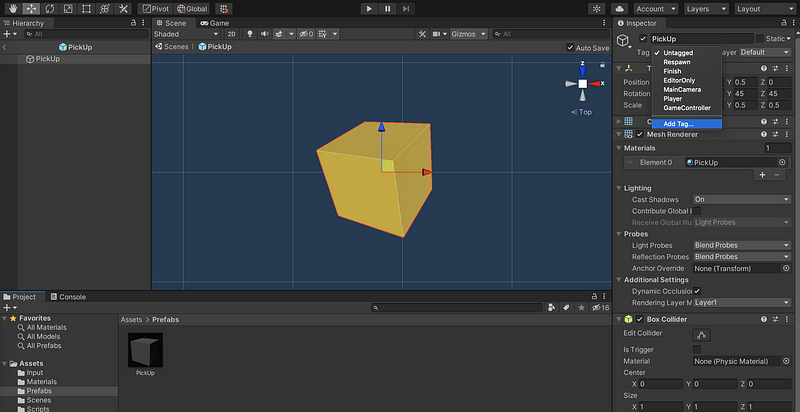
- Click on + to add a new line of the tags. The tag should be named
PickUp, and be careful because the tag names are case sensitive.
- After that, remember to select this tag in the list. Because of the power of the prefab, all the PickUp game objects now tags PickUp.

- Return to the script. Now we will call
Collider.gameObject.CompareTagmethod for checking whether the Player collides with a PickUp or a static object (like walls and the ground). Save it after modifying.
private void OnTriggerEnter(Collider other)
{
    if (other.gameObject.CompareTag("PickUp"))
    {
        other.gameObject.SetActive(false);
    }
}
- There’s one more thing to do. To activate PickUps as triggers, we should open the Prefabs folder. Select the PickUp prefab and check the box is Tragger in Box Collider in Inspector.
- Run the Game. Now the Player is able to collect the PickUps.
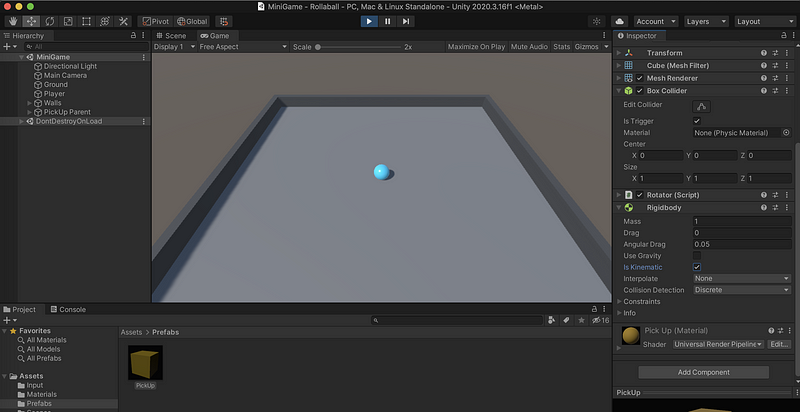
(26) Add Rigidbody to PickUps
- Any game object with a collider and Rigidbody is considered dynamic, and Unity will not do calculations about these for each frame. This improves the game performance.
- Click on PickUp prefab, then select Add Component. Search for Rigidbody and add this component.
- Test the game and we can discover that all the PickUp objects fall through the floor. This is because all the PickUps are triggers, which means that they will not collide with the ground. And because of the Rigidbody component, they can be impacted by gravity.
- To deal with this, we have to uncheck Use Gravity and check Is Kinematic (means that they will not be influenced by any physics force)
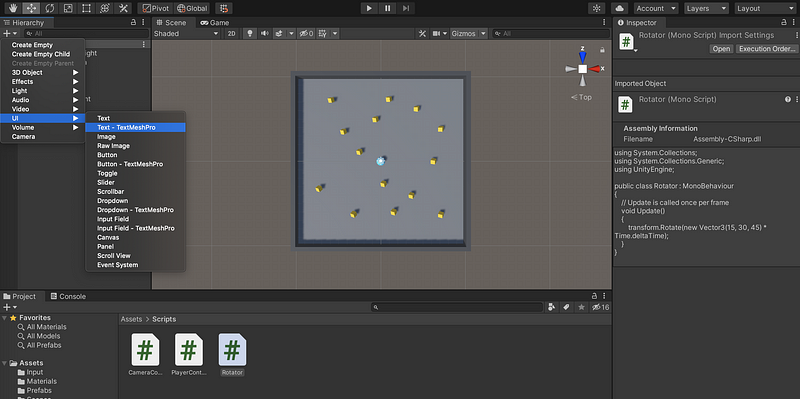
(27) Display a Simple UI
- To make a UI, we have to use TextMesh Pro and User Interface system in Unity
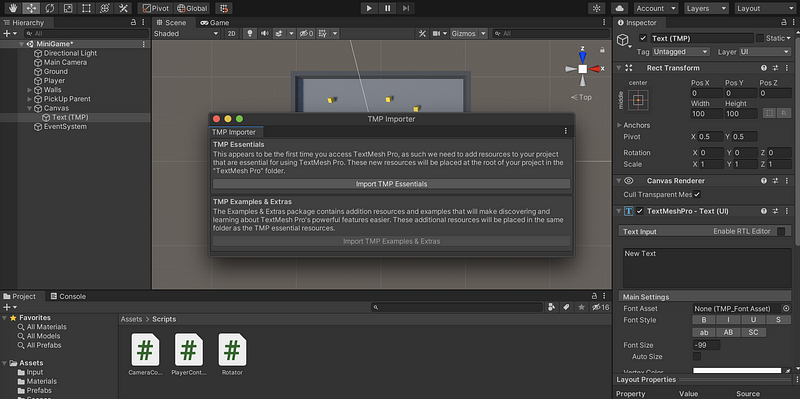
- Select Hierarchy > + >UI >Text-TextMesh Pro
- Click on Import TMP Essentials to continue
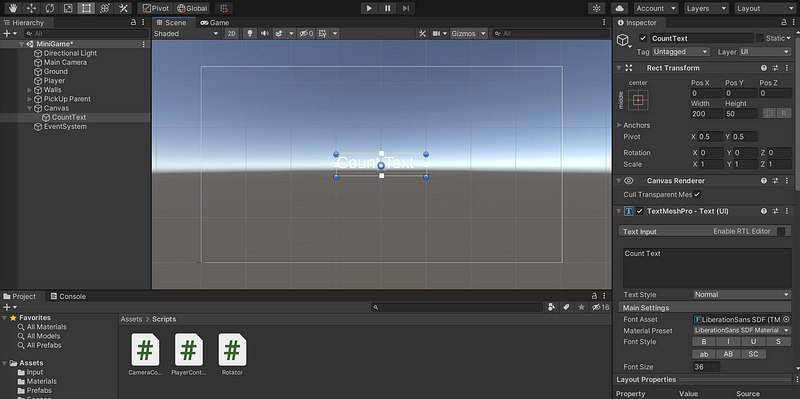
- From the Hierarchy, select Text (TMP). Then press F to focus.
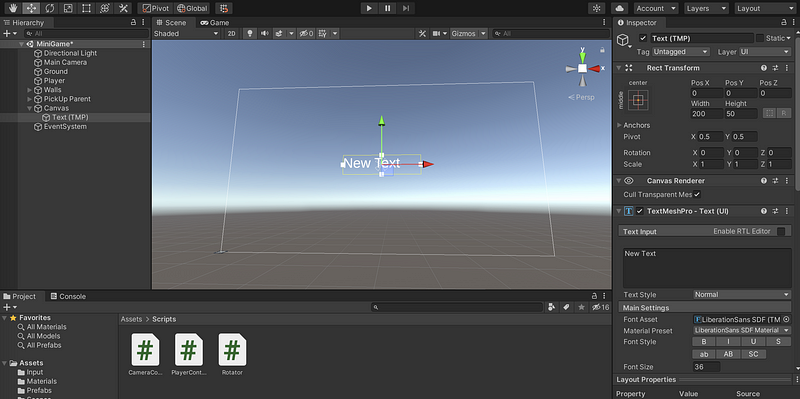
- Click on the 2D button in the Scene to see a 2D view of this object
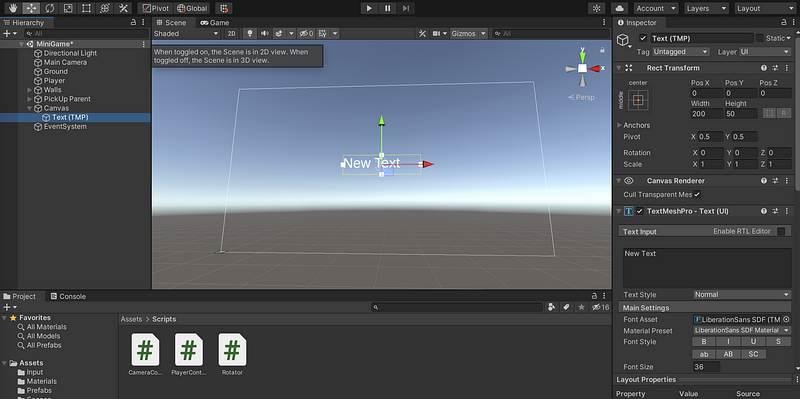
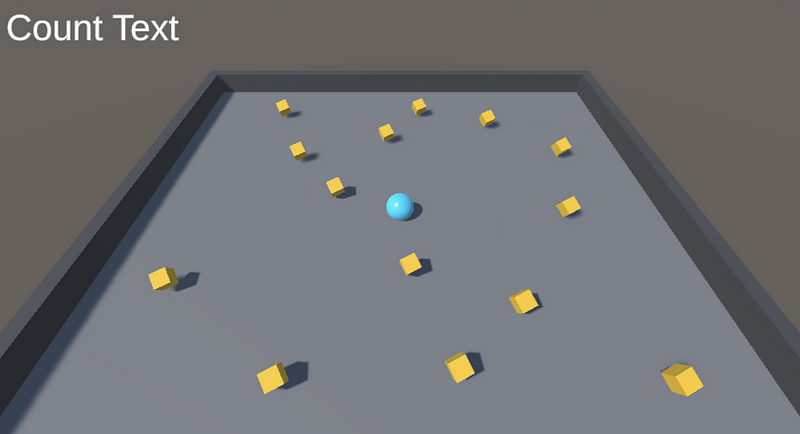
- Rename the Text (TMP) object to CountText and edit the Text input as
Count Text
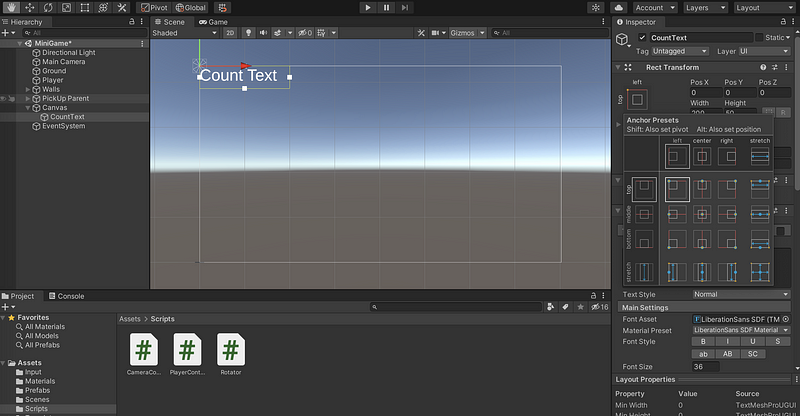
- The easiest way to set an anchor to the CountText object is to click on the square sign in Rect Transform, and then press
shift + alt/optionto adjust the anchor. Select the anchor in the top-left corner.
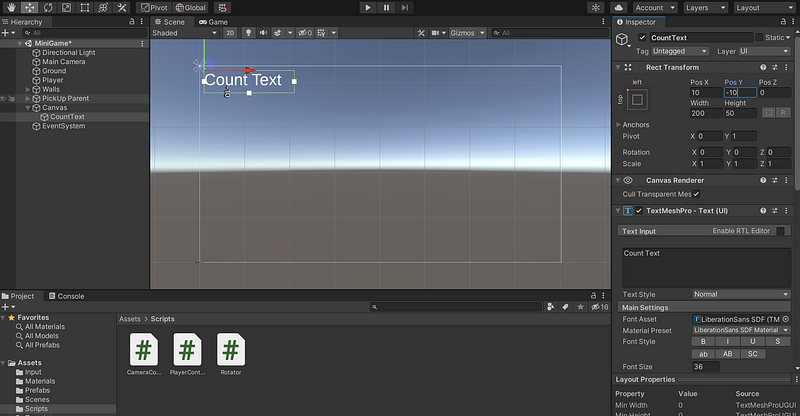
- Now it is a little bit tight and we would like to add some space. Modify
Pos X = 10andPos Y = -10in Rect Transform.
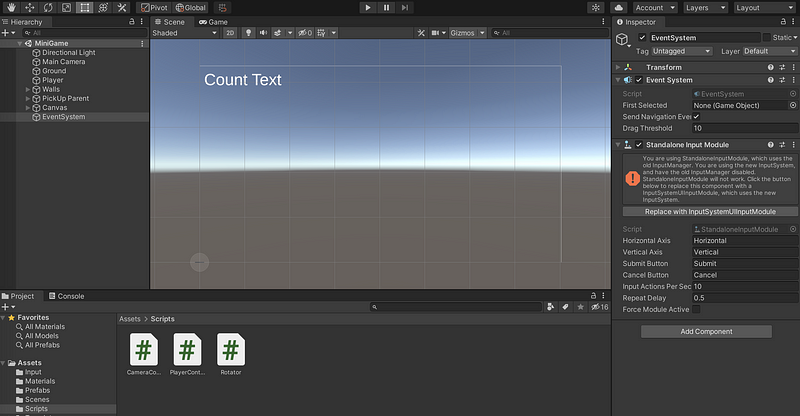
- You may notice the
InvalidOperationException: You are trying to read Input using the UnityEngine.Input class, but you have switched active Input handling to Input System package in Player Settings.exception and this happens because the standard input module is not utilized to the EventSystem object. We can fix it by selecting Hierarchy > Event System > Inspector > Replace with InputSystemUIInputModule.
- Run the game and we can see the UI now.
(28) Display the Count Value
- Open the script
PlayerControllerand we will add counting information now. We should have aprivate intvariable calledcount, and whenever the Player collides with the PickUps, we will add 1 to this variable. This variable should be started as 0. So the program is,
using System.Collections;
using System.Collections.Generic;
using UnityEngine;
using UnityEngine.InputSystem;
public class PlayerController : MonoBehaviour
{
    public int speed = 0;
    private Rigidbody rb;
    private int count;
    private float movementX;
    private float movementY;
    // Start is called before the first frame update
    void Start()
    {
        rb = GetComponent<Rigidbody>();
        count = 0;
    }
    void OnMove(InputValue movementValues)
    {
        Vector2 movementVector = movementValues.Get<Vector2>();
        movementX = movementVector.x;
        movementY = movementVector.y;
    }
    private void FixedUpdate()
    {
        Vector3 movement = new Vector3(movementX, 0.0f, movementY);
        rb.AddForce(movement * speed);
    }
    private void OnTriggerEnter(Collider other)
    {
        if (other.gameObject.CompareTag("PickUp"))
        {
            other.gameObject.SetActive(false);
            count++;
        }
    }
}
- Now, let’s implement the counting UI. What we are going to use here is the namespace
TMPro(handling the TextMeshPro). Then we have to create a public TMP data type calledcountText. The data type of it should beTextMeshProUGUI. Then let’s write a function calledSetCountText()for setting what we will display on that TMP object. In this case, we are going to setcountText.textby adding the stringCount:and the counting number by,
countText.text = "Count: " + count.ToString();
Remember we should update this TMP object at the beginning of the game and in every frame. So this function SetCountText() should be added in both the Start() function and the OnTriggerEnter() function.
using System.Collections;
using System.Collections.Generic;
using UnityEngine;
using UnityEngine.InputSystem;
using TMPro;
public class PlayerController : MonoBehaviour
{
    public int speed = 0;
    public TextMeshProUGUI countText;
    private Rigidbody rb;
    private int count;
    private float movementX;
    private float movementY;
    // Start is called before the first frame update
    void Start()
    {
        rb = GetComponent<Rigidbody>();
        count = 0;
        SetCountText();
    }
    void OnMove(InputValue movementValues)
    {
        Vector2 movementVector = movementValues.Get<Vector2>();
        movementX = movementVector.x;
        movementY = movementVector.y;
    }
    void SetCountText()
    {
        countText.text = "Count: " + count.ToString();
    }
    private void FixedUpdate()
    {
        Vector3 movement = new Vector3(movementX, 0.0f, movementY);
        rb.AddForce(movement * speed);
    }
    private void OnTriggerEnter(Collider other)
    {
        if (other.gameObject.CompareTag("PickUp"))
        {
            other.gameObject.SetActive(false);
            count++;
            SetCountText();
        }
    }
}
- Finally, we should make the CountText object a reference to the public variable
countTextby selectingCountTextin the Count Text in the Player Controller (Script).

- Finally, let’s run the game and test it. Okay, Now the UI works.
(29) Create a Game Ending Message
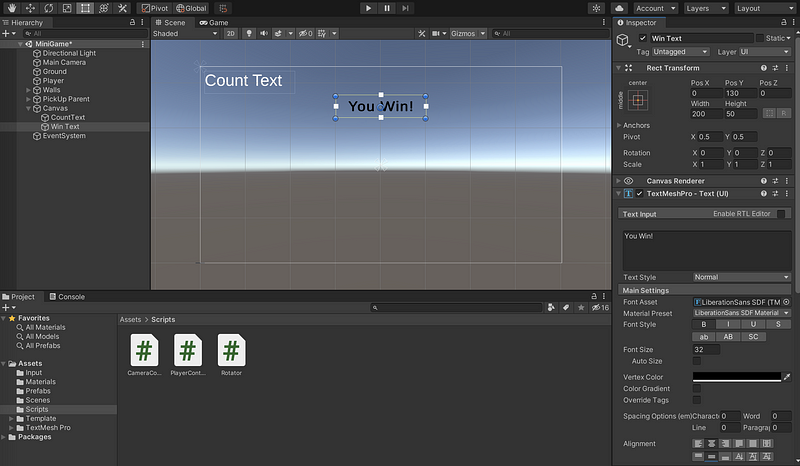
- Create another TextMesh Pro object called Win Text. The text should be
You Win!. Make the font black and bold with size 32, and set it to central and middle alignment. The Rect Transform of this text should bePos X = 0,Pos Y = 130,Pos Z = 0.
- We should also modify the
PlayerControllerscript for it. In order to refer to the WinText, we have to declare a Game Object bypublic GameObject winTextObject;. In the beginning, it should be inactivated bywinTextObject.SetActive(false);. However, when we collect all the PickUps (aka.count >= 14), this object should appear. The program is,
using System.Collections;
using System.Collections.Generic;
using UnityEngine;
using UnityEngine.InputSystem;
using TMPro;
public class PlayerController : MonoBehaviour
{
    public int speed = 0;
    public TextMeshProUGUI countText;
    public GameObject winTextObject;
    private Rigidbody rb;
    private int count;
    private float movementX;
    private float movementY;
    // Start is called before the first frame update
    void Start()
    {
        rb = GetComponent<Rigidbody>();
        count = 0;
        SetCountText();
        winTextObject.SetActive(false);
    }
    void OnMove(InputValue movementValues)
    {
        Vector2 movementVector = movementValues.Get<Vector2>();
        movementX = movementVector.x;
        movementY = movementVector.y;
    }
    void SetCountText()
    {
        countText.text = "Count: " + count.ToString();
        if (count >= 14)
        {
            winTextObject.SetActive(true);
        }
    }
    private void FixedUpdate()
    {
        Vector3 movement = new Vector3(movementX, 0.0f, movementY);
        rb.AddForce(movement * speed);
    }
    private void OnTriggerEnter(Collider other)
    {
        if (other.gameObject.CompareTag("PickUp"))
        {
            other.gameObject.SetActive(false);
            count++;
            SetCountText();
        }
    }
}
- In the end, we should make the WinText object a reference to the public variable
winTextObjectby selectingWin Textin the Win Text Object in the Player Controller (Script).
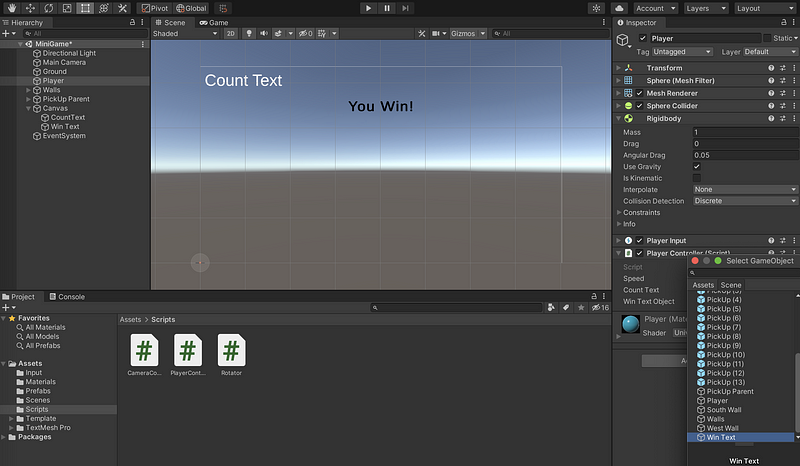
- Run the game and we can find out that this works!
(30) Building the Game
- Save your project again before you continue.
- Select File > Build Settings
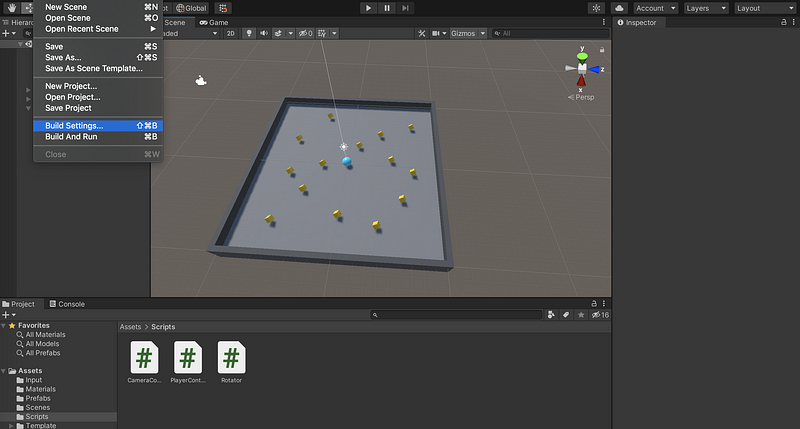
- Select PC, Mac & Linux Standalone and choose the Target Platform your current OS
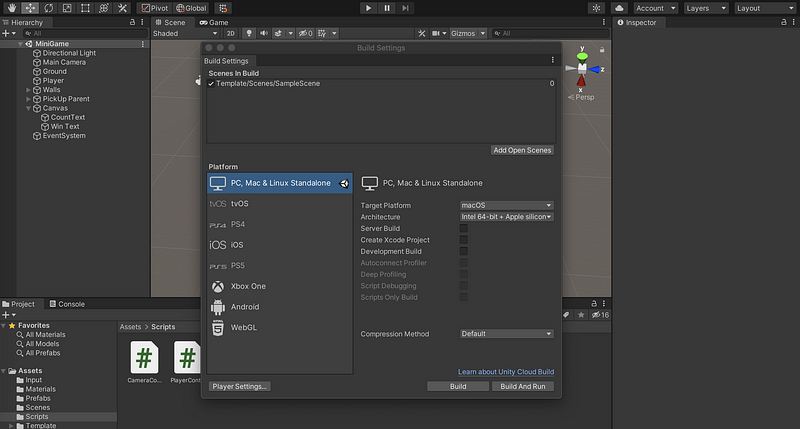
- Click on Add Open Scenes button to add the current MiniGame Scene. Also, exclude SampleScene from your build.

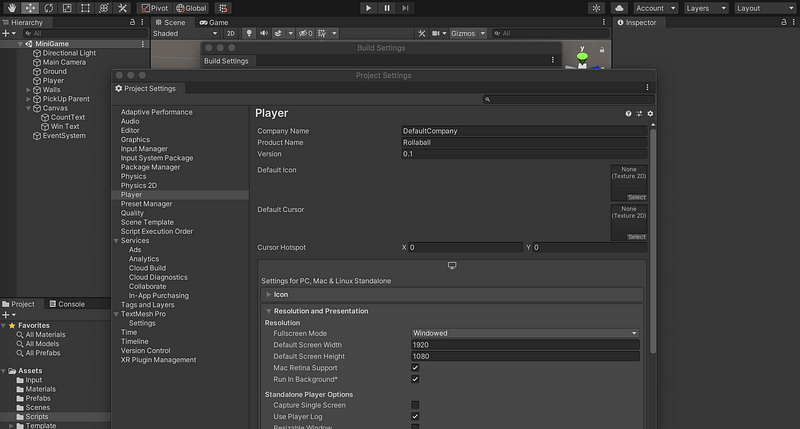
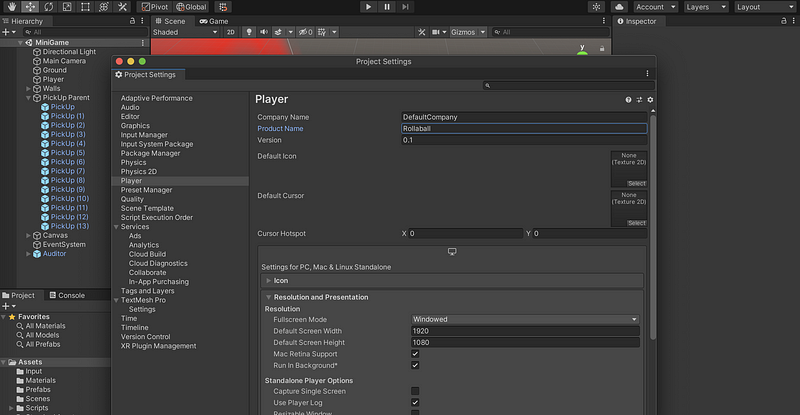
- Find Player Settings > Player > Resolution and Presentation > Fullscreen Mode. Select Windowed for this.
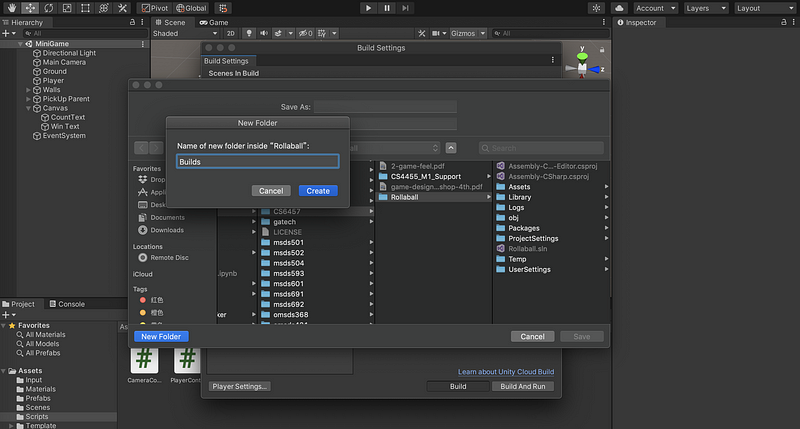
- Close the Project Settings window and select Build. Let’s create a new folder in the project called
Builds.
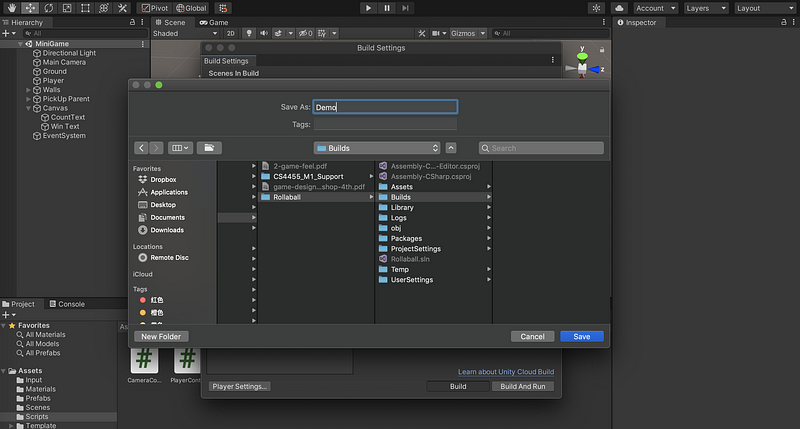
- Name it as
Demo(only for Mac) and click Save to build.
- Test & Enjoy!
2. Completing the Milestone
(1) Auditor Package
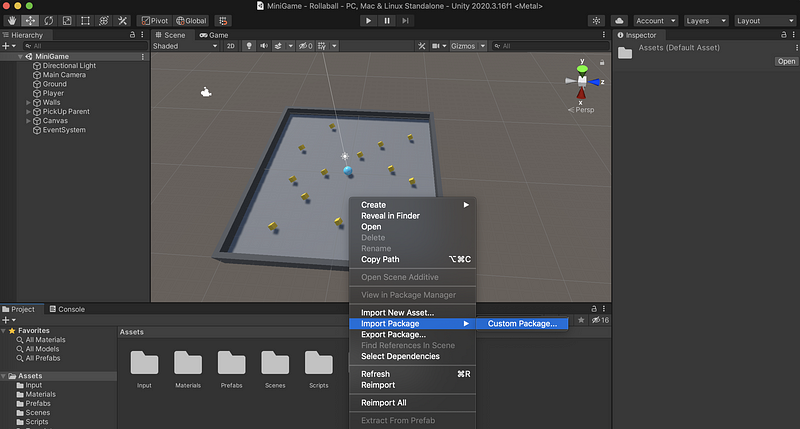
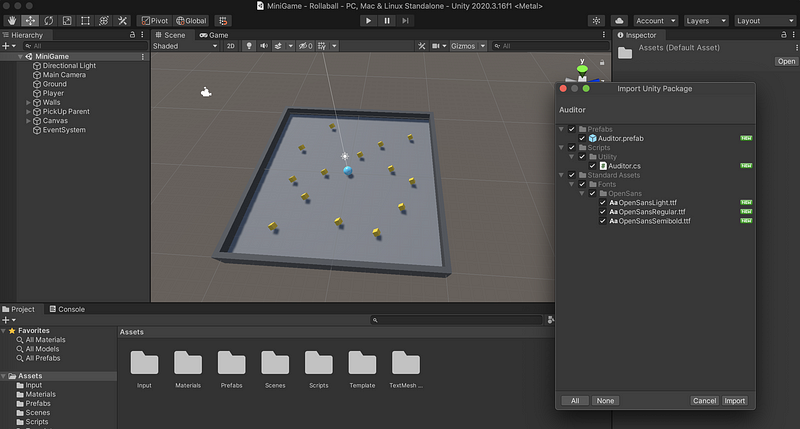
- To complete the M0 milestone, we have to download the Auditor package first. We should import this package via Assets > Import Package > Custom Package.
- Choose the Auditor package and select Import to import all of them.
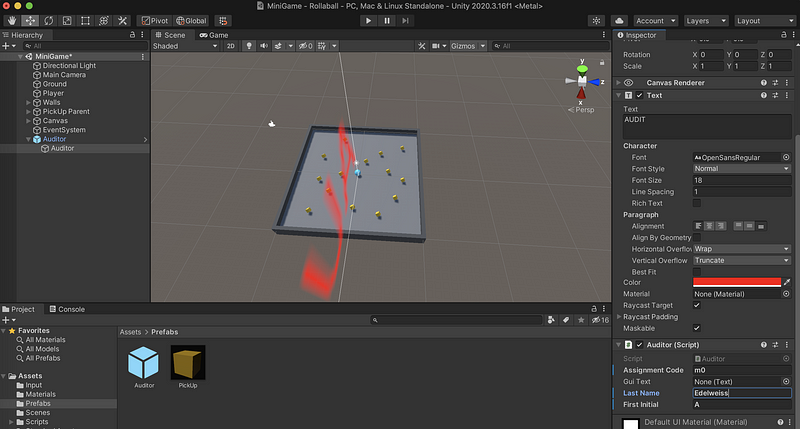
- Drag the Auditor prefab from the Prefabs folder to Hierarchy. In Hierarchy, navigate to Auditor\Auditor. Now in the Inspector, go to the Auditor component and set Assignment Code =
m0. We should also assign the proper Last Name and First Initial.
- You can see the Auditor information only after you build the game.
(2) Change the Product Name
- Go to Edit > Project Settings > Player > Product Name to change the product name of your game.
(3) Tidy Up the Directory
- Root Dir:
<Last Name> _ <First Initial> _ m0(e.g.Edelweiss_A_m0) - Build Dir:
<Last Name> _ <First Initial> _ m/Build - MacOS APPs Dir:
<Last Name> _ <First Initial> _ m/Build/OSX - Windows EXEs Dir:
<Last Name> _ <First Initial> _ m/Build/Windows - Because one of the builds (
.appor.exe) has not been tested, we should add a fileUNTESTEDto the folder, if we don’t test it.
$ touch UNTESTED(4) Putting Your Name on the HUD
- Select File > GameObject>UI>Text. Rename it as
Name. - Set min/max anchors of text's Rect Transform to 0,1
- Change the font type, size, color as you like
- Drag the Text box to the top
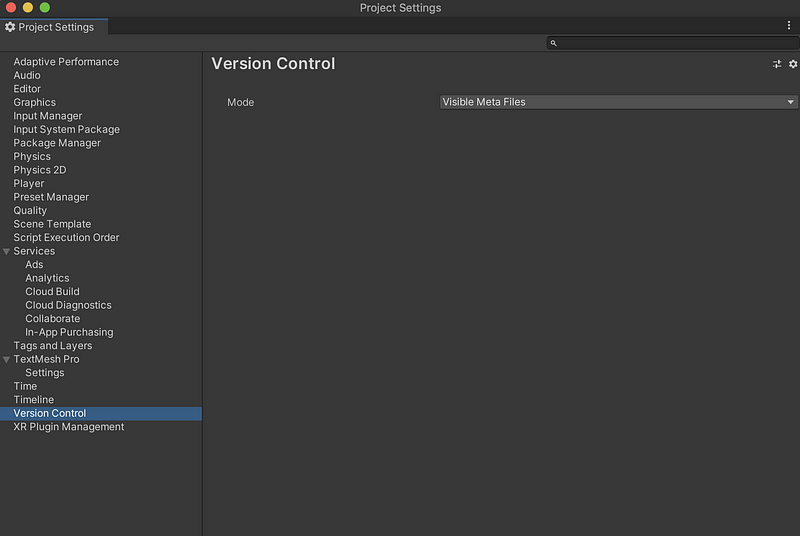
(5) Show Hidden Meta Data Files
- Go to Edit > Project Settings > Version Control > Mode > Visible Meta Files
(6) Add More Features
You can freely add any more features. Here are some ideas,
- Add new Player movements like jumping, bouncing, flying, firing, etc.
- Add new objects like walls, floors, 3D objects, enemies, bombs, trees, etc.
(7) Delete Useless Folders
Before submission, remember to delete the following folders,
- Library
- Logs
- Obj
- Temp