Video Game Design 6 | Unity Physics Case Study
Video Game Design 6 | Unity Physics Case Study
- Unity Physics
(1) Clone the Unity Template
Before we start, let’s first clone the template CS4455_M1_Support from GitHub. You can find it here. Note that we must have the GitHub enterprise account for Gatech before we clone this file.
After having cloned this template, we can open it as a project through Unity Hub. If you aren’t happy with your submitted M1, you can use the original GitHub project.
(2) Basic Rigidbodies with Collision Events
Before implementing this task, we have to look at the crates that are already in the scene. They have a CrateCollisionReporter script that you might find of interest for completing this task. The script is,
void OnCollisionEnter(Collision c)
{
    if (c.impulse.magnitude > 0.25f)
    {
        //we'll just use the first contact point for simplicity
        EventManager.TriggerEvent<BoxCollisionEvent, Vector3, float>(c.contacts[0].point, c.impulse.magnitude);
    }
}
Here, we can find out that we can create an audio event by function OnCollisionEnter . c.impulse.magnitude means that in order to have this event, we must have an impulse with a value larger than 0.25. EventManager.TriggerEvent is called inside the OnCollisionEnter function to trigger an event, and the event BoxCollisionEvent has already been provided in BoxCollisionEvent.cs. This event will be consumed by the AudioEventManager in the AudioEventManager.cs script. You may need to read these scripts carefully before the implementation of the blue balls. Note that the blue material has already been provided.
(3) Physics Layers Example
To select the layer of a rigidbody, we have to select the object and go to the Inspect > Layer. Then click on it to choose a layer. If there is need of a new layer, you can select Add Layer... to create a new one.

The reason why we have to add layers to an object is that we can then choose the collision relationships between different layers. For example, some objects in the same layer can not collide with each other but they can still be collided by the objects from another layer. To edit this relationship, we have to select Edit > Project Settings > Physics > Layer Collision Matrix,

You can check or uncheck the boxes to allow or disable the collisions between objects between different layers.
In this Physics view, we can also change something else. For example,
- gravity acceleration
- bounce threshold
- sleep threshold
(4) Compound Collider for Complex Geometry
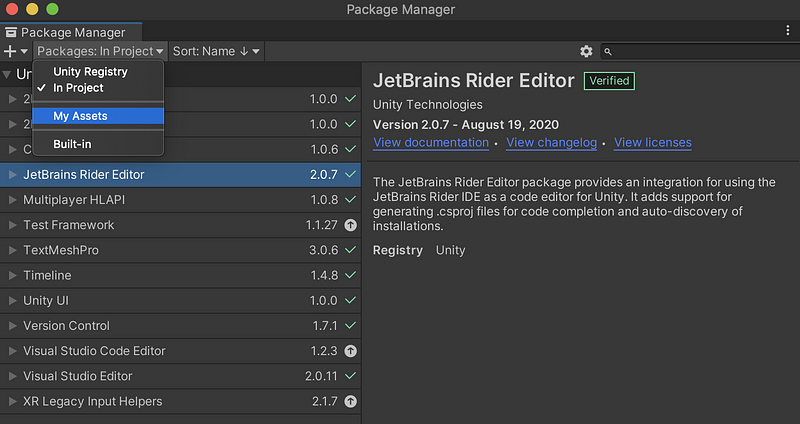
Open Unity’s Asset Store by going to Window > Asset Store > Search online. Then search for Free Japanese Mask (looks like a stone mask of a fox). Select Add to My Assets > Accept. Then go back to the Unity editor, open Package Manager, then choose My Assets.
Then click on Download, and then select Import to import it. Place it in your scene somewhere and scale size uniformly by 10.0. Next, add a rigidbody controller to the Kitsune GameObject. If we play the game now, you will find that the mask directly passes through the ground. This is because it has no colliders and we have to create one for it by the compound collider approach. To make a GameObject invisible, we have to uncheck Inspector > Mesh Renderer. We have to add these colliders as the child objects of the mask to create a compound collider.
(5) Chain with Joint Constraints
To create a fixed joint, we have to select the object, and then choose Inspector > Add Component > Fixed Joint. Then it will be basically pinned in place. To make an ordinary joint, we have to select Inspector > Add Component > Configurable Joint.
For each of the configurable joints, we have to modify in Inspector > Configurable Joint,
X Motion Locked
Y Motion Locked
Z Motion Locked
Angular X Motion Free
Angular Y Motion Free
Angular Z Motion Free
And also, we have to select the Connect body for each of them. The Connect Body should be the object that connects the current object at the top.
(6) Mecanim-Animated Kinematic Elevator
Add an empty GameObject and name it ElevatorRoot. Create a blue child cube GameObject called Elevator with zeroed out transform position and rotation. If you don’t like the placement of the elevator you can move the “ElevatorRoot” without redoing the animation. You get similar benefits if you want to make a prefab of the elevator and clone it multiple times.
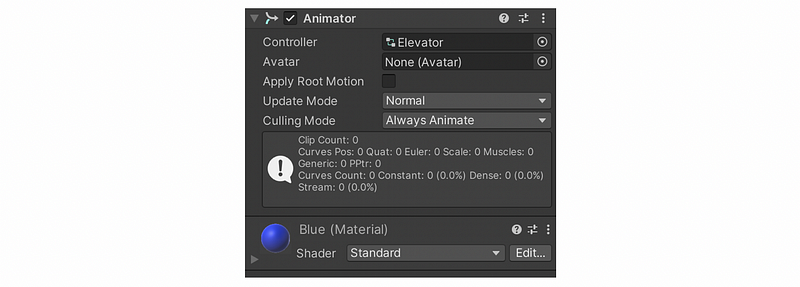
Then scale it to look more like an elevator platform. Add to the Elevator a rigidbody component configured to be kinematic (by checking is Kinematic). With the Elevator object selected in the Hierarchy, open the Animation Window. Click the “Create” button within the Animation Window. Save the animation as Elevator under Assets/Animations. Confirm that the Elevator GameObject now has an Animator component with Inspector > Animarot > Controller of the same name assigned.
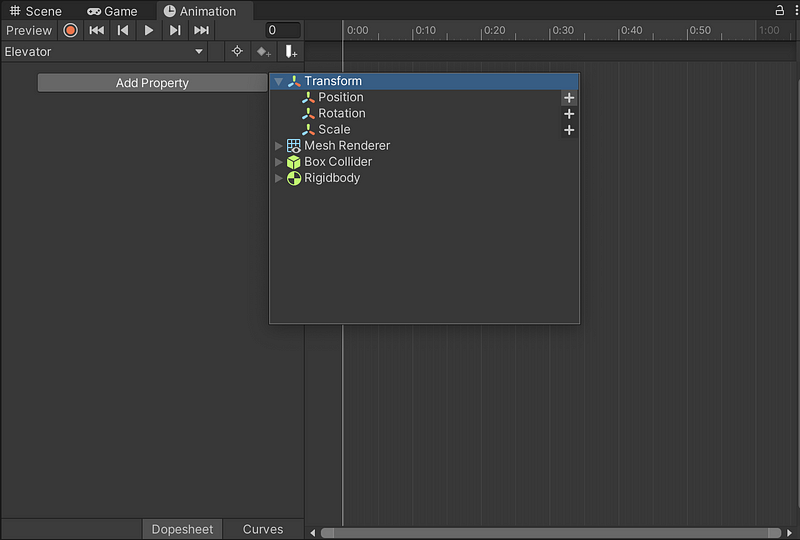
On the Animation Window, add a property of Transform->Position (click the plus to add it).
Add a keyframe midway through your animation so that the Elevator rises and then goes back to the original position. Confirm the animation is set to loop (Inspector view of the Elevator animation selected in the Project View Assets). Test it out.
You may notice that the speed is quite fast and we need to adjust the speed multiplier in the Animator window view (by Window > Animation > Animator) to slow things down. This can be done by clicking on the Elevator in the Animator view and then reduce the value of Inspector > Speed.
We also need to add a red rigidbody sphere on top of the elevator that gets pushed up and then falls repeatedly as the elevator goes up and down.
(7) Customized Center of Mass
Create a green Weeble Wobble or Punching Bozo. These are rounded bottom-heavy toys that cannot be knocked over. Make it out of a capsule collider and a custom center of mass via,
Project: Assets/Scripts/Utility/RigidbodyCenterOfMass
This can be done by selecting Inspector > Add Component > Rigidbody Center Of Mass. MonoBehaviorwith accompanying RigidbodyCenterofMassHandler editor extension. Change the center of mass lower than its original place, and then this will be working. Be sure and read the script source to understand how it works and place it at an angle so it is rocking back and forth at the start of the game.
(8) Default/Slippy Friction
Create a purple rigidbody box and place it on the ramp named BetterRamp. Confirm that it does not slide down the ramp.
Then let’s create a green rigidbody box next to the purple one. Add a new PhysicsMaterial in Asset > physics_materials by right-clicking in the asset, and then choose Create > Physic Material. Modify it to have 0.1 dynamic and static friction, and Friction Combine set to minimum.

Add this physic material to the green rigidbody box by Inspector > Box Collider > Material. Finally, test out the result.
(9) Bouncy Rigidbody
Create an orange rigidbody sphere. Assign a new PhysicsMaterial that has a 0.9 bounciness and Bounce Combine set to maximum. Place it a bit above the ground. You should see the ball bouncing when the game plays.
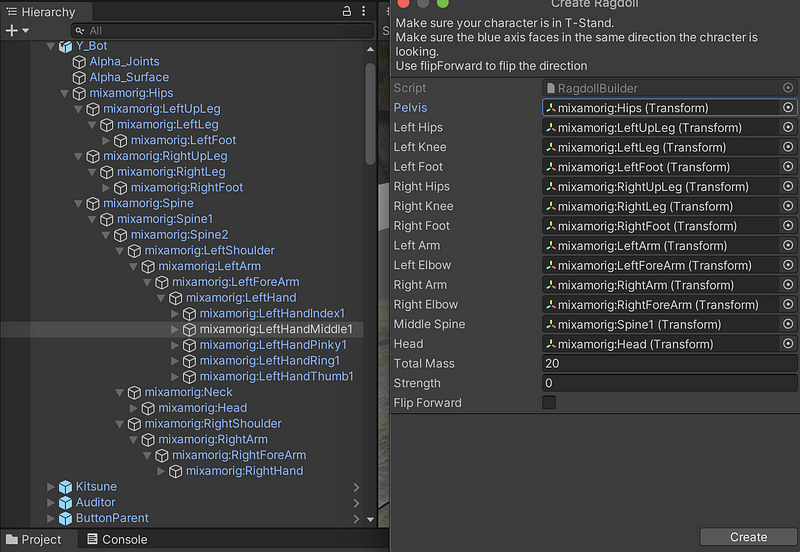
(10) Ragdoll
Place the existing ‘Y_Bot’ asset in the scene right above the nearest hurdle from,
Project: Assets/ModelsAndAnimations/YBot with Animations/Y_Bot/Y_Bot
Run the Ragdoll Wizard via,
Edit Menu:GameObject->3D Object->Ragdoll...
Assign the bones as detailed in the image below. Make sure Y_Bot is aligned such that he flops over the hurdle as he falls when the game starts.
(11) Scripting Forces
Make a black click beetle or jumping bean out of a capsule. You will need to write a MonoBehavior script that intermittently applies a force to the rigidbody in FixedUpdate().
An impulse or instant velocity change for the force type will give a good jump effect. Liberal use of the Random functions will make the behavior more realistic (e.g. bounded but random time between jumps, jump angle and force magnitude, etc.). Also, jumps should only occur when the GameObject is on the ground.
2. Submission
(1) Update the HUD
Update the HUD to show your name. Edit the Name game object under the “FramerateCounter — NAME TEXT IS HERE”.
(2) Modification Check List
- [5 pt] three (3) blue
rigidbodyspheres with collision sounds - [5 pt] three (3) red
rigidbodyspheres that don’t collide with one another - [10 pt] Asset Store model “Free Japanese Mask” with custom compound collider
- [10 pt] yellow jointed chain made of at least five (5)
rigidbodyGameObjects - [10 pt] blue kinematic
rigidbodyelevator using Mecanim animation with redrigidbodysphere going for a ride - [10 pt] green Weeble Wobble/Punching Bozo that tilts but can’t be knocked over
- [5 pt] a purple cube with
rigidbodybox that does not slide down the ramp - [5 pt] green cube with
rigidbodybox that does slide down the ramp - [5 pt] orange
rigidbodysphere that bounces - [15 pt]
Y_Botragdoll that collapses over the hurdle - [20 pt] black click beetle or jumping bean that jumps intermittently
(3) Game Building
- File > Save to save the file
- Select File > Build Settings
- Choose MacOS, Intel 64-bit + Apple Silicon
- Create a new folder named
Last_FirstInit_m2(replace with your name Info). This is the root folder. - Create a path
<root>/Build/OSX. Name the buildLast_FirstInit_m2and save it here. - Select File > Build Settings again
- Choose Windows, x86_64
- Build it in the path
<root>/Buildand name itWindows.
(4) Create UNTESTED file
Because one of the builds (.app or .exe) has not been tested, we should add a file UNTESTED to the folder, if we don’t test it.
$ touch UNTESTED
(5) Clean Up the Root
We have to clean the root before we submit.
$ rm -rf .git
$ rm -rf Library
$ rm -rf temp
$ rm -rf Obj
$ rm -rf Logs
$ rm *.sln
$ rm *.csproj