Video Game Design 6 | Game Menus and Collectables
Video Game Design 6 | Game Menus and Collectables
- Game Menu and Collectables
(1) Set up Game Menu System
- Duplicate the current Demo scene and rename it
GameMenuScene
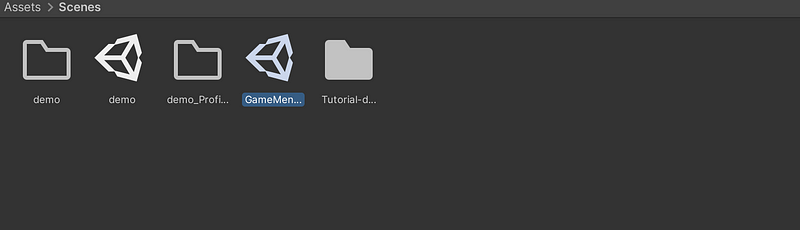
- Select and move the Main Camera for a look-down view of some interesting parts of your scene. Then disable the Third Person Camera (script) of the Main Camera object in its inspector.

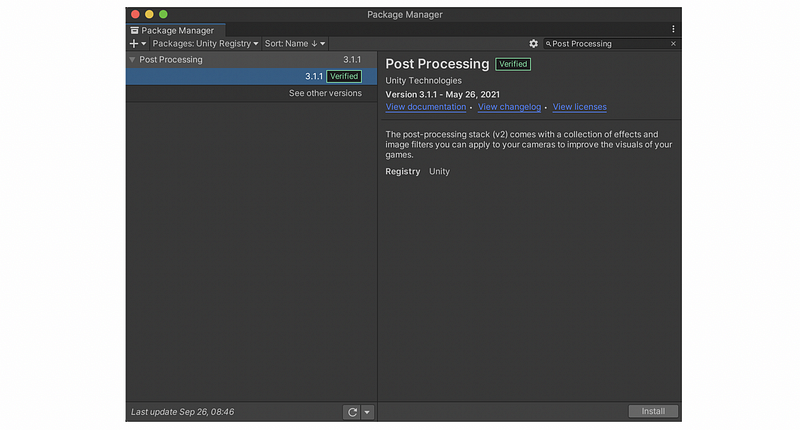
(2) Post Processing
- Then, you will need to go to Window > Package Manager. Choose
Packages: Unity Registry, and then search forPost Processing. Then click on the Install button to install the Post Processing package. You can also view its document at this link.
- The quickest approach is to add a Post Process Layer and Post Process Volume to your Camera by selecting the Main Camera object, and then choose Add Component. Search and choose to add
Post Process LayerandPost Process Volume.
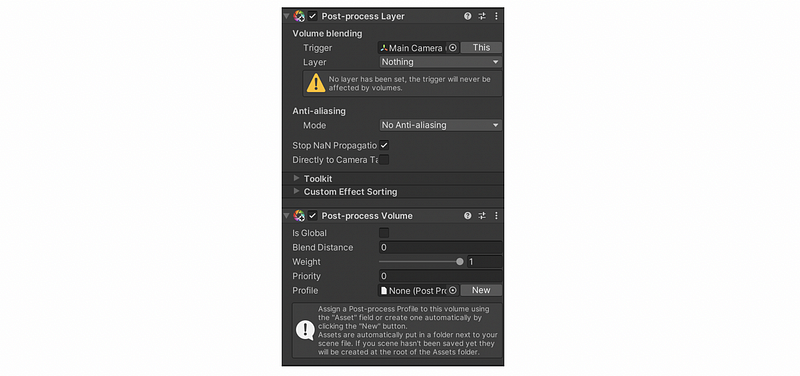
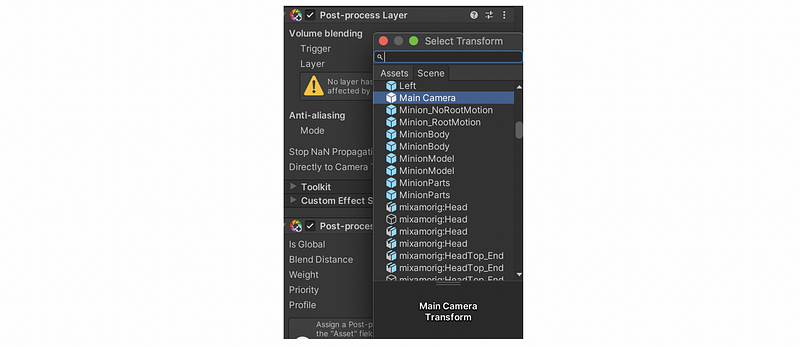
- Set the Inspector > Post Process Layer > Volume Blending: Trigger to the Camera’s transform (Main Camera Transform).
- Add a new layer
PostProcessingor another user-defined layer of your choosing because we are going to use it later.

- Change the layer of your Main Camera to a user-defined layer
PostProcessing

- Set the Post Process Layer > Volume Blending: Layer to the same layer (e.g.
PostProcessing).

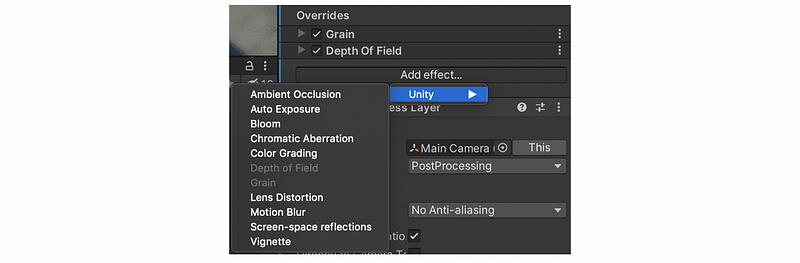
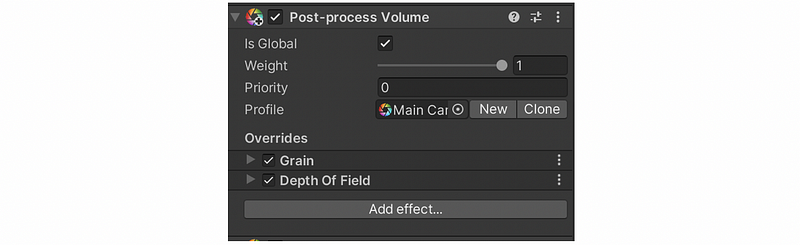
- In the Post Process Volume component, create a profile by selecting
Newand make sure it is assigned to the same component.

- Lastly, in the new profile enable your desired effects. Depth of Field can be used for a blurry effect. Grain might also work (and is good for confirming that post-processing is working), possibly stacked with other effects.
- You will probably need to enable
Is Globalin the Post Processing Volume to get the effect to work.
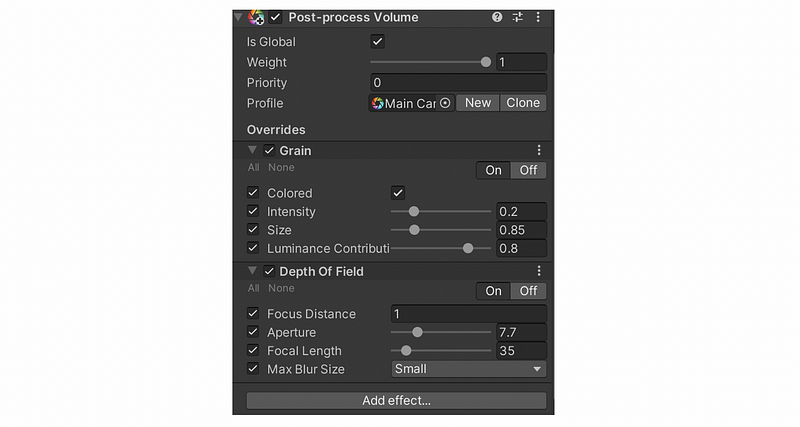
- If you look into the settings of Grain and Depth of Field, there is also something to notice. First, the switch of On/Off for the profile is opposite to its meaning and setting them to
Offactually turn the effects on. Second, you can click onAllorNoneto open or close all the settings for that effect. And third, you can also change the default values of the effect to create the performance you want. It is easier to view the changes under theGametag rather than theScenetag.
- On OSX, if you get errors from shaders then you might enable Metal Support for rendering. Go to Edit > Project Settings > Player: Other Settings > Metal Editor Support and enable.
(3) GUI Creation
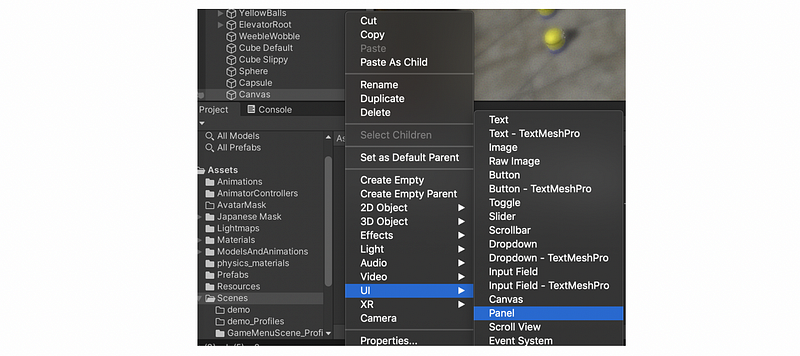
- Add a GameObject > UI > Canvas to your scene (confirm
Render ModeisScreen Space — Overlay)

- Next, add a Hierarchy > GameObject > UI > Panel to your Canvas.
- In the Scene window, switch to
2Dmode so you can see it in the correct perspective.
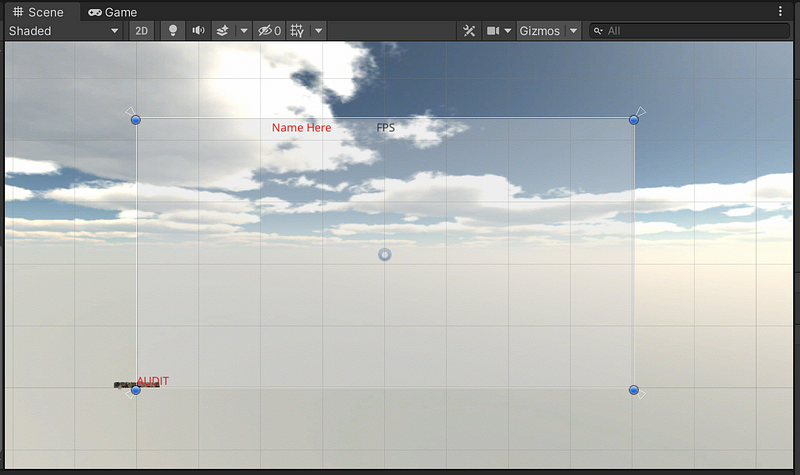
- Note that if your Panel’s
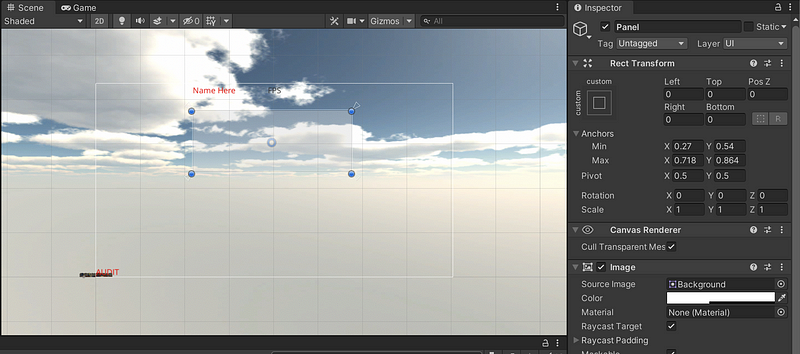
Rect Transform Anchorsare at the maximum extents of the Canvas (default) then your Panel sizing will scale with Canvas resolution and aspect. If you drag the circular blue control points you will manipulate pixel offsets (Left, Right, Top, Bottom) from the Rect Transform Anchors. This will create a sort of hybrid situation where the panel will partially scale with Canvas resolution but there are absolute pixel count offsets from the Anchors. Often, this is not what you want. Typically, a designer wants to scale with resolution or have the same pixel size always. If you want to scale with the resolution, the Rect Transform’s Left, Right, Top, Bottom should stay at 0 offset. - If you want to scale with the resolution, set the
Rect Transform’sMinandMaxAnchorsto the proportional offset within the Canvas. If you want your Panel to always be the same size, shrink your Anchors down to the same X, Y position (say the center of the canvas or a corner) then your panel will maintain the configured pixel size and position offset from the Anchors. You can use the following values to justify your panel.
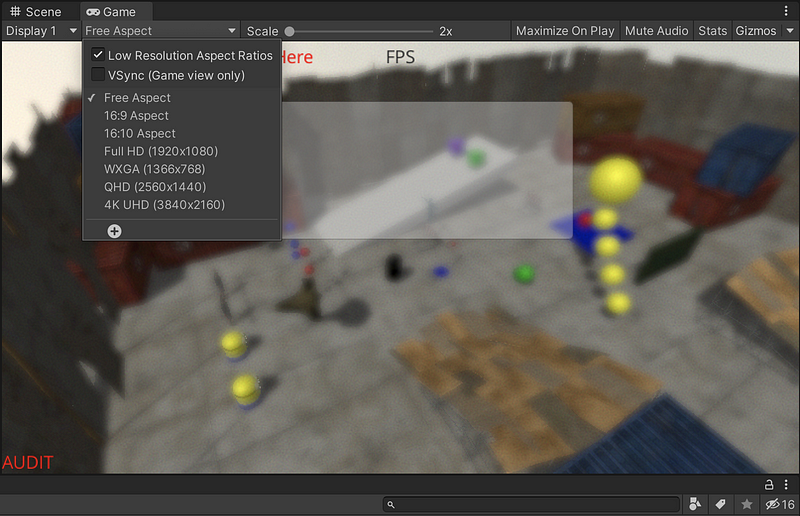
- To aid with GUI design, try switching the Game view from
Free Aspectto a common full-screen aspect ratio. This will help you visualize positioning.
- Now add a GameObject > UI > Button to your Panel. Note Unity’s default Rect Transform for the button versus the Panel. Change the default text to
Start Game.
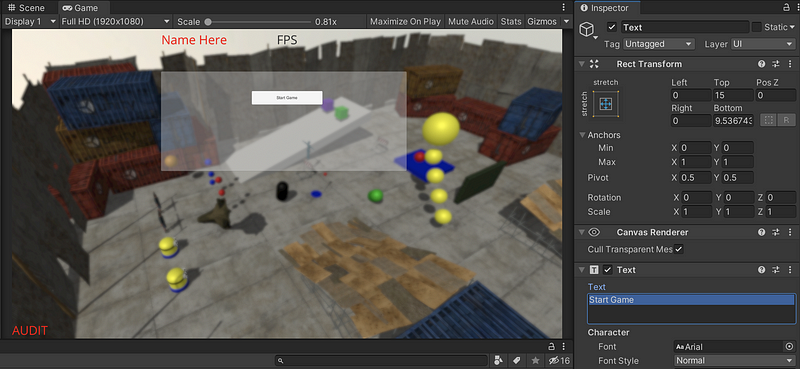
- Now create a script called
GameStarterand add a public methodStartGame(). This method should simply callSceneManager.LoadScene (“SCENE_NAME”)whereSCENE_NAMEis the name of your original interactive scene. This command simply loads the scene during runtime. Add this script to your Button.
public void StartGame()
{
   SceneManager.LoadScene("SCENE_NAME");
}
- Next up, view the Button in the Inspector. Under the Button script settings, you should see an
OnClick()event. Assign the GameObject callee slot to the same Button that the script belongs to. Now use the dropdown to find GameStarter > StartGame and pick it. Now when you click the Start Game button at runtime the level will load.

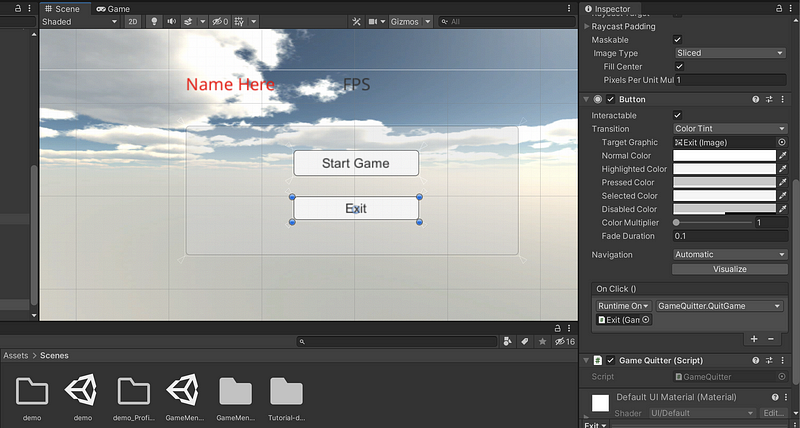
- Make another button called
Exit. Make use of the existing script calledGameQuitter, which is very similar toGameStarterbut the command executed isApplication.Quit()and is contained within theQuitGame()method of theGameQuitterscript. Wire upQuitGame()to theExitbutton. Note that the existing GameQuitter immediately callsQuitGame()if the hotkeyxis pressed.
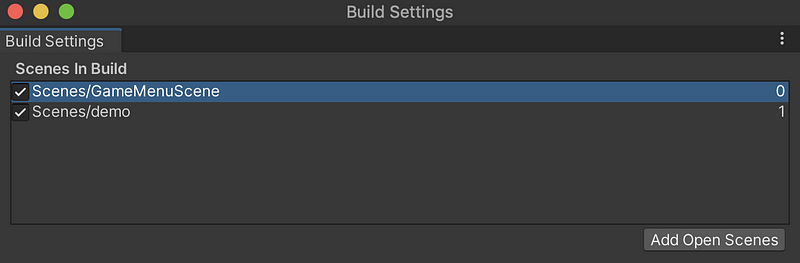
- Go ahead and test or debug your menu buttons. Try testing with a build a well. Note that your build must include both the
GameMenuSceneand your actual gameplay scene to work correctly. Note that theGameMenuScenemust be built in0priority so that we can call this scene at the beginning.
(4) Setting Up the In-Game Menu
- Save your
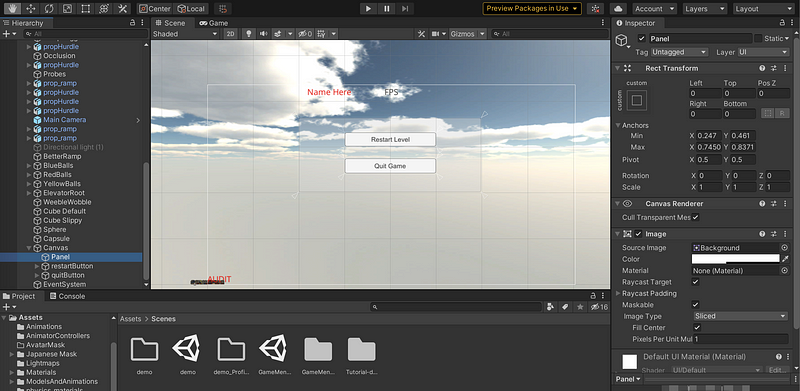
GameMenuSceneand reopen your original scenedemowith the controllable characters. - Leveraging what you learned previously, add a screen space overlay Canvas with a central panel that is smaller than the overall screen resolution. On the panel, create buttons with text
Restart LevelandQuit Game. You can reuse theGameStarterandGameQuitterscripts from above to wire up yourRestart LevelandQuit Gamebuttons.
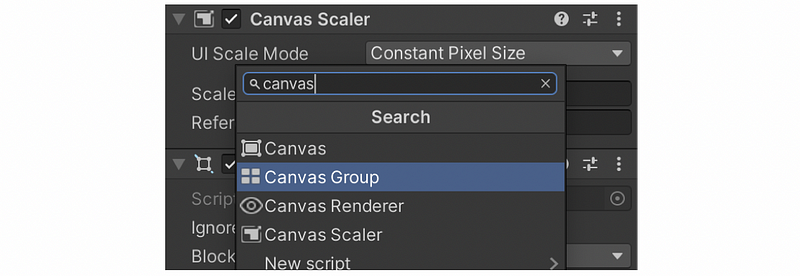
- Next up, let’s add the ability for the menu to be opened/closed when hitting the Escape (ESC) key on the keyboard. First, add a Canvas Group component to your Canvas. The Canvas Group allows you to control all child UI components and their descendants in a coordinated fashion.
- In the Inspector view of the Canvas Group component, set Alpha to 0, Interactable to false, and Block Raycasts to false. This will completely hide and disable your menu.

- Now, you’ll make a script that responds to the Escape key to toggle those settings on/off. Create a new script called
PauseMenuToggle. This script should be attached to the Canvas.

- Now, let’s work on the script. The script will be acting on the Canvas Group so add a component requirement to the class. You can refer to the script in this link if you don’t know where to add it.
[RequireComponent(typeof(CanvasGroup))]
- Use
GetComponent<CanvasGroup>()to grab a reference inAwake()and store in a private member variable namedcanvasGroup. You should print aDebug.LogError()ifGetComponent()doesn’t find the component you are looking for. You can refer to this link for more information. - In
Update()of the PauseMenuToggle script, add the following,
void Update()
{
    if (Input.GetKeyUp(KeyCode.Escape))
    {
        if (canvasGroup.interactable)
        {
            canvasGroup.interactable = false;
            canvasGroup.blocksRaycasts = false;
            canvasGroup.alpha = 0f;
        }
        else
        {
            canvasGroup.interactable = true;
            canvasGroup.blocksRaycasts = true;
            canvasGroup.alpha = 1f;
        }
    }
}
- One problem you may notice is that your game is still running in the background of the menu. That may be ok for a multi-player game, but for a single player, you should pause your game. Go back to
PauseMenuToggleand addTime.timeScale = 0ffor when the in-game menu is visible andTime.timeScale = 1ffor when the menu is off. SettingTime.timeScaleis a simple way to pause your game. It’s not always the complete solution for pausing, but it works for most simple games. - Be aware that
Time.timeScaleis preserved after loading a new level. So, if you paused in one scene then callSceneManager.LoadScene(), you will find the newly loaded scene to still be paused. To avoid this, you should set the timescale back to 1f immediately following the call toLoadScene().
SceneManager.LoadScene("demo");
Time.timeScale = 1f;
(5) Trigger-Based Collectables
- Now, we will make some collectable items and we will create a simple one that
SomeDude_RootMotioncan pick up. - First, make a GameObject that is a sphere. Place it just above the ground and away from anything moving. Give it a pink color. Change the
SphereCollidercomponent to setIsTriggerto true (checked). This change will make the collider not cause collisions withRigidbody, but will generateOnTriggerXXX()callbacks.
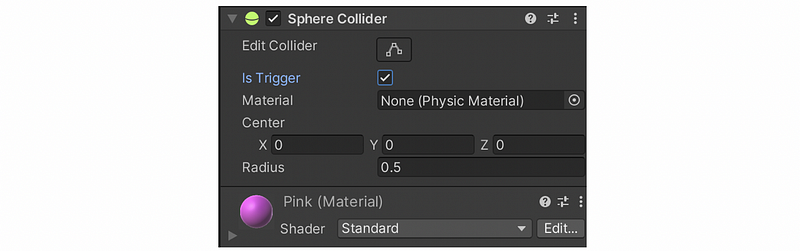
- Note that it is common to make the size of the collider much bigger than the graphical object. For trigger-based collectables, that means the player doesn’t need to get as close to initiate the pickup. Also, trigger colliders don’t need a graphical representation at all. Invisible trigger zones are useful for detecting that a player has fallen to their death, etc. We can make it by setting a larger collider Radius for the sphere.

- You will now implement a script called
CollectableBallthat will implementOnTriggerEnter(). In this script, deleteStart()andUpdate()and add,
void OnTriggerEnter(Collider c)
{
}
- In the body of this method, call,
EventManager.TriggerEvent<BombBounceEvent, Vector3>(c.transform.position);
Destroy(this.gameObject);
This will generate an event that results in a sound played and will also delete the ball GameObject. (Note that the use of BombBounceEvent is just a placeholder. Ideally, you would create a new event for collection and add a new sound to the AudioEventManager)
- Try out the collectable by playing the game. This is close to being a collectable, but we never updated the character to know that the ball was collected. In order to support collection, you will make a script that can be attached to characters that the ball collectable will act upon. So we have to create a new script
BallCollector. Then, add a public member variable,
public bool hasBall = false;
Also, add
public void ReceiveBall()
{
    hasBall =true;
}
Then save and attach the script to SomeDude_RootMotion.
- Next up, modify the
CollectableBallscript to only respond to triggering GameObjects that contain theBallCollectorscript. InOnTriggerEnter(), firstly check ifc.attachedRigidbodyis not null. If that is the case, attempt to grab a reference to aBallCollectorcomponent like so,
BallCollector bc = c.attachedRigidbody.gameObject.GetComponent<BallCollector>();
- Only if
bcis not NULL (this means the current character is a ball collector) andbc.hasBallequalfalse(this means the current character has no ball) we can pick the ball up. Confirming that onlySomeDude_RootMotioncan collect the ball and that thehasBallbool switches totrue. - Now let’s test it out. Notice that any character without a
BallCollectorcomponent should not be able to collect the ball.
(6) Trigger-Based Animated Object
Your last task is to create a trigger-based prefab game object that plays a Mecanim animation if the player gets close enough. You should select a game object concept that you think will be useful in completing your team project. Mecanim should be used for animation support. You should place the animatable geometry under a root empty game object. This will allow you to animate coordinates relative to where the prefab is placed. You can refer to this link for more information. Here are some requirements,
- Object is prefabbed
- Object animates via Mecanim in a compelling way when the player gets close enough
- Object resets when the player is far enough away (if obj is in the triggered state)
2. Submission
(1) Update the HUD
Update the HUD in both scenes to show your name. Edit the Name game object under the “FramerateCounter — NAME TEXT IS HERE”.
(2) Modification Check List
- [25 pt] Working Game Start Menu with the dedicated scene
- [25 pt] Working In-Game Menu in original gameplay scene
- [20 pt] Collectable ball that only
SomeDude_RootMotioncan collect - [30 pt] Trigger-based animated prefab object placed in three (3) locations in the scene
- [Extra 5 pt] Make
SomeDude_RootMotionthrow the collected ball
(3) Game Building
- Edit > Project Settings > Player > Product Name:
Last_FirstInit_m3 - File > Save to save the file
- Select File > Build Settings
- Choose MacOS, Intel 64-bit + Apple Silicon
- Create a new folder named
Last_FirstInit_m3(replace with your name Info). This is the root folder. - Create a path
<root>/Build/OSX. Name the buildLast_FirstInit_m3and save it here. - Select File > Build Settings again
- Choose Windows, x86_64
- Build it in the path
<root>/Buildand name itWindows.
(4) Buttons Not Work After Built
This is a problem with the Auditor canvas. Try disabling it once you have your packaging sorted out. Or set the Canvas sorting layer for both canvas components.
(5) Create UNTESTED file
Because one of the builds (.app or .exe) has not been tested, we should add a file UNTESTED to the folder, if we don’t test it.
$ touch UNTESTED
(6) Clean Up the Root
We have to clean the root before we submit.
$ rm -rf .git
$ rm -rf Library
$ rm -rf temp
$ rm -rf Obj
$ rm -rf Logs
$ rm *.sln
$ rm *.csproj